Key Takeaways
- Level the bed: Make sure the gap between the nozzle and the bed is even and consistent. Use a piece of paper to check the drag and adjust the screws.
- Adjust the temperature: Set the nozzle and bed temperature within the recommended range for your filament. Too low or too high temperature can cause poor adhesion or warping.
- Clean the bed: Remove any dust, debris, or residue from previous prints. Use isopropyl alcohol or acetone to degrease the bed surface. Avoid soap or window cleaner.
- Use adhesion helpers: Try printing with a skirt, brim, or raft to increase the stability and surface area of your print. Or use a different bed surface or coating, such as glue stick, hairspray, or tape.
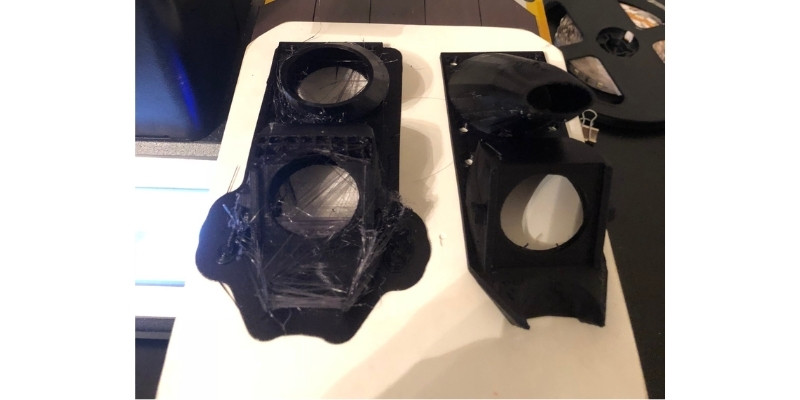
Your 3D print not sticking to the heated bed is one of the most common issues with many 3D printers.
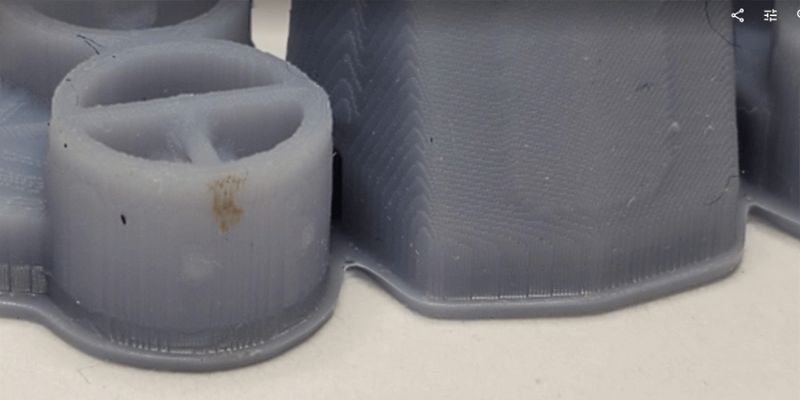
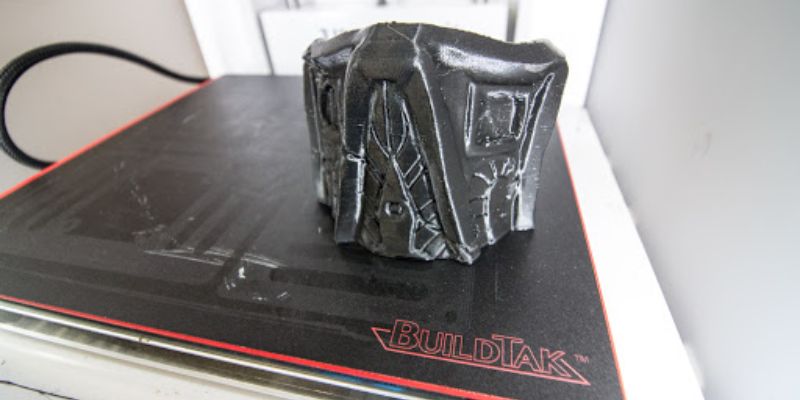
Most failures of filament not sticking to the bed stem from a poor first layer – which is almost always caused by either print bed issues or incorrect print settings.
In this guide, I’ll help you easily diagnose your specific issue, and share the steps to get your first layer sticking perfectly again.
So let’s jump into the most common reasons why your 3D print isn’t sticking to the print bed.
Reasons 3D Prints Fail to Stick to Build Plate
- Print Bed Isn’t Level
- Warped Print Bed
- Unclean Surface
- First Layer is Printing Too Fast
- Wrong Extrusion Settings
- Wrong Nozzle Temperature
- Wrong Heated Bed Temperature
- Faulty Fan Settings
And if all else fails…
- Key Takeaways
- Reasons 3D Prints Fail to Stick to Build Plate
- 1. Platform Isn't Level
- 2. Print Bed Is Warped
- 3. Clean Your Print Bed
- 4. First Layer is Being 3D Printed Too Fast
- 5. Check Extrusion Settings to Ensure the Proper Amount of Plastic is Extruded
- 6. Wrong Nozzle Temperature For First Layer Issues
- 7. Wrong Heated Bed Temperature For First Layer
- 8. Part Cooling Fan Settings Causing First Layer Problems
- 9. Use Build Plate Adhesion Helpers
- 10. Alter Your Design With Brims, Rafts and Skirts
- 11. Replace Your Build Plate – Last Resort!
- Why does my 3D print not stick to the bed?
- How do you get PLA to stick to a heated bed?
1. Platform Isn’t Level
Signs that your platform isn’t level:
Either your nozzle is too near or too far (or both) at the same time along the X or Y-axis.
Or in other words: if the left side of your nozzle is too close and the right side is fine or even too high up, your bed is most likely at an angle – and is not level with the nozzle. The same goes for front and back, and this can happen on both axes at the same time.
Explanation:
When your platform isn’t properly leveled, for example, the nozzle to bed distance varies in different locations across the bed, your nozzle might be too close in some areas and too far away in others.
How to fix:
On most printers, the print bed is leveled by adjusting 3 or 4 screws under the print bed. If your printer is equipped with automatic bed leveling, this step might not be necessary – even though it doesn’t hurt to manually level your 3D printer at least once initially.
Leveling is actually not the correct term for what we’re doing, but that’s what everybody is calling it. What we’re doing is to make sure that the gap between the nozzle tip and the bed is the same all across the bed. Hence: the bed and nozzle are “level” with each other.
To level your 3D printer:
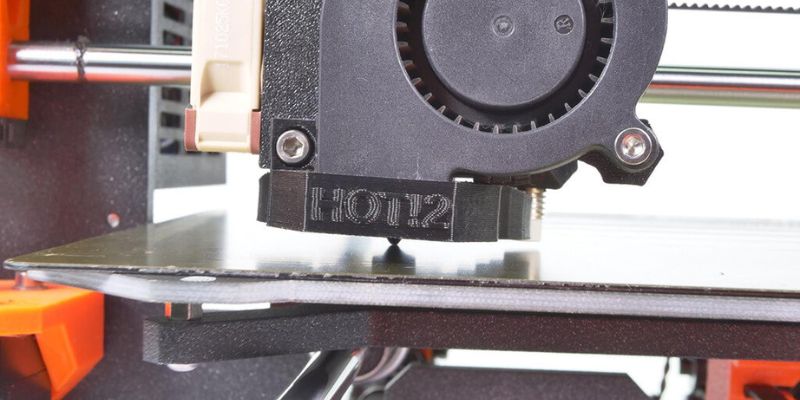
- Heat up your bed and nozzle to a proper printing temperature, retract the filament a bit, and make sure the nozzle is clean (and that no filament is oozing out during the leveling process).
- Move the heated nozzle to the first corner of the bed.
- Slide a piece of paper between the bed and the nozzle. Loosen or tighten the bed level for that corner screw until you notice a bit of drag when sliding the paper under it.
- Continue to the next corner, position your nozzle over it, adjust the screw so you get the same amount of drag.
Do so for at least all four corners, then check the middle of the bed.
This might require multiple passes, as turning one screw usually affects the other screws as well. At the same time, while we’re leveling the bed, we’re also setting the nozzle to bed distance.
By using thicker or thinner paper in this process you also set the nozzle to bed distance at the same time. The receipt paper from your last grocery store purchase for example sets the nozzle to bed distance usually works quite well for PLA, while thicker paper might work better for PETG.
Read more: how to fix PETG not sticking to bed
2. Print Bed Is Warped
Signs your platform is warped:
While printing the first layer, a warped bed will show the effects of your nozzle being too near or too far.
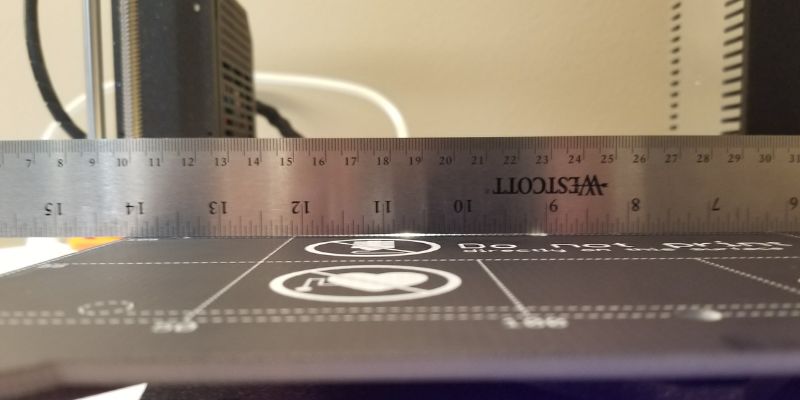
One way to easily tell if your bed is warped is to put a steel ruler or a straight edge on your bed and look at the gap between the edge and the bed. You might be surprised at the results.
Another way to find out: if you leveled the bed for all 4 corners, but the midpoint or some random points on the bed are off, then your bed is warped (or the axis bent).
Explanation:
As with the first point about the build platform not being level, a warped build plate will cause issues with the nozzle to bed distance.
Uneven or warped build platforms are the most common mechanical problem we’ve seen in today’s 3D printers and it can be observed in all price classes and all bed surfaces. Neither a milled aluminum plate, FR-4 board, or even a glass sheet is guaranteed to be 100% even.
How to fix:
Usually, you can work around warped build plates by printing a very thick first layer (but do not exceed the maximum layer height of 75% nozzle size, for example 0.3mm for a 0.4mm nozzle).
If all else fails, try printing with a raft. Also, with a warped build plate, leveling your bed in such a way that your nozzle to bed distance fits in a smaller area will allow you to work reliably with at least part of a warped build plate.
Or in other words, when dealing with a warped bed do not try to level your bed at the 4 outermost corners, but pick a smaller area in the center of the build plate and try to level it as best as possible there. The idea behind this is that most of the prints seldom require the whole bed, so make a smaller area work well.
3. Clean Your Print Bed
Signs the bed needs a clean:
- The bed isn’t spotlessly clean. There might be debris from a previous print, dust, gunk, spots, etc.
- You see lumps, build-up, or an uneven coat of your favorite bed adhesive.
- Look at the bottom of a finished print: do you see some dents in an otherwise smooth bottom surface that shouldn’t be there? If so, chances are high something was or is still sticking to the bed there that caused the dent (or the nozzle was too close in that spot). When printing the first layer over a fingerprint on a glass plate for example, you can usually see the print bubble up in that spot

Explanation:
A dirty print surface negatively impacts your first layer adhesion. Any debris from previous prints needs to be removed before starting a new print. If your nozzle rumbles over leftover remnants of your previous prints it will start bouncing, and it might introduce vibration in your printer depending on how stiff your bed carrier is.
Often overlooked is the detrimental effect of oily or greasy residue on your print surface, like for example a fingerprint.
How to fix:
Degrease your bed surface regularly according to the manufacturer’s instructions. Use either isopropyl alcohol/isopropanol in a high concentration or pure acetone.
Stay away from window cleaners, dishwashing liquids, and soaps, especially those that are supposed to be good for your skin, as most of them will leave a residue behind that negatively affects bed adhesion.
4. First Layer is Being 3D Printed Too Fast
Signs the first layer is printing too fast:
The obvious sign that you are printing too fast is when the extruder can’t keep up with pushing filament through at this speed and you see under extrusion.
This is true for the 1st layer as well, but you’ll have to be way off for it to show. Determining the proper first layer speed is more “subtle”, the result is simply poor bed adhesion and there is no tell-tale sign that says: “adhesion failed because it was printed too fast”. Look at your slicer settings instead.
Explanation:
The speed you’re printing your first layer at directly influences how well your molten filament bonds to the bed surface.
So, print slower to increase first layer bed adhesion, or print faster to decrease adhesion.
How to fix:
Since we’re talking about prints not sticking to the bed, we want to increase adhesion, and therefore print slower.
Usually, a speed of 30mm/s or less is good for the first layer, you can increase the speed later on but experimenting is key.
Every proper slicer out there has the option to specify a different print speed for your first layer.
In Cura, it is called “Initial Layer speed”. In Simplify3D it is called “First Layer Speed”.
We’re pretty sure your slicer has this setting as well, under some variation of those names.
5. Check Extrusion Settings to Ensure the Proper Amount of Plastic is Extruded
Signs the wrong amount of plastic is extruding:
General signs that you’re not extruding the proper amount of plastic are: either under- or over-extrusion, infill leaving gaps, walls turning out too thin, and layers not being thick enough (not squished).
However, for the first layer, there is usually no clear indication, as the result looks the same when your nozzle to bed distance is wrong.
So, your best bet is to eliminate extrusion issues by doing a proper extruder calibration before leveling your bed & setting the nozzle to bed distance.
Explanation:
Print distance (unless compensated by the printer) needs to match your first layer height and the amount of plastic that is actually extruded while printing your first layer.
If your printer is not extruding enough plastic to fill the distance between nozzle and bed (under extrusion), you will end up with adhesion problems. Too much, or over-extrusion and you have excess filament with nowhere to go.
How to fix:
- Calibrate the extruder steps required to extrude the requested amount of filament.
- Check your extrusion multiplier in your slicer software to ensure the proper amount of filament is extruded.
- Check that you selected the proper filament size (1.75mm/2.85mm/3.00mm) in your slicer.
- Ensure filament can be transported properly (i.e. filament unspools freely from the spool, no excess friction in the filament path).
- Ensure your nozzle isn’t blocked or partially blocked. This is a very common cause of under-extrusion or uneven extrusion. See clogged extruder.
6. Wrong Nozzle Temperature For First Layer Issues
Signs the first layer print temperature is incorrect:
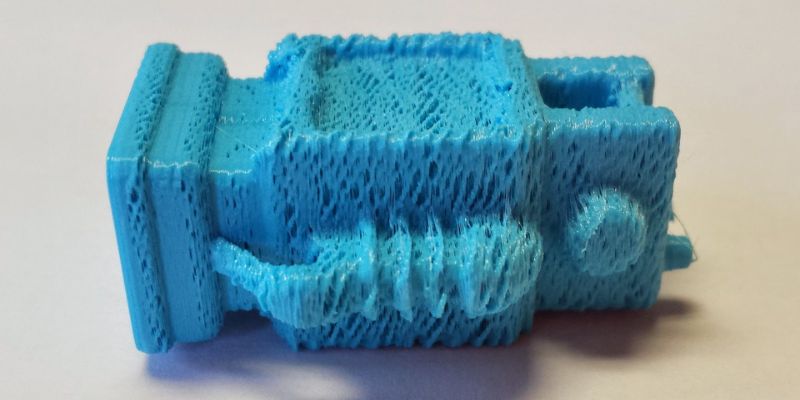
There are lots of different issues that can lead to adhesion problems and the end result always looks the same: prints not sticking/warping.
Unless you’re way off, there is no telltale sign when dealing with adhesion issues that clearly says: your temperature was off. It either sticks, or it doesn’t stick & warps.
Later on in a print, problems like rough corners, curling or sloppy overhangs – or printing a temperature tower – will give better indications if your temperature might be off in general.
Explanation:
Many 3D printing first layer problems are caused by using the wrong first layer printing as it directly affects build plate adhesion.
- Printing colder will decrease adhesion.
- Printing hotter (to a point) will increase adhesion.
Stay within the manufacturer’s suggested range, at least around 10°C below the glass transition temperature.
How to fix:
Almost all slicers out there will allow you to set a different print temperature for your first/initial layer. Use this feature to adjust bed adhesion without it affecting the rest of your print.
Printing colder will decrease adhesion. Printing hotter (to a point) will increase adhesion. But do not exceed the maximum recommended print temperature for the filament you’re using to avoid the filament deteriorating in the hot end, which might lead to clogs. Print as cool as possible while maintaining proper adhesion is best.
7. Wrong Heated Bed Temperature For First Layer
Signs your bed temperature is incorrect:
There are lots of different issues that can lead to adhesion problems and the end result always looks the same: prints not sticking/warping. Compare your slicer settings with the recommendations from the filament manufacturer.
One indication that your bed temperature might be too high is elephant’s foot, or curling close to the bed, where the defect gets less pronounced the further away from the bed you get.
Explanation:
Bed temperature (if your printer is equipped with a heated bed) greatly influences how well your first layer will stick to the bed.
A colder bed usually decreases adhesion, a hotter bed will increase adhesion. But do not set your bed temperature too high.
A common problem is setting the bed temperature way too high for the material you’re printing with. You need to stay around 10°C below the glass transition temperature (Tg) of the filament you’re trying to print.
How to fix:
Look up the glass transition temperature of the material you’re printing. Ensure your bed temperature is at least around 10°C below the glass transition temperature.
If your bed is far below the glass transition temperature and you’re having trouble with your print not sticking, increase your bed temperature in 5°C increments until the issue is resolved (staying below the GT temp).
For some PLA for example, do not exceed 50°C. More is not better. If your bed is too hot, you will increase warping forces and the risk of prints warping or even detaching during the print is increased instead of prevented – and you’ll invite other problems later on in the prints, like Elephant foot or caved-in walls. This is not the case for all PLA however.
8. Part Cooling Fan Settings Causing First Layer Problems
Signs you need to check your part cooling fan settings:
If your part cooling fan is spinning while printing the very first layer, you need to look at your fan settings.
Explanation:
Enabled part cooling fans harden the printed line before proper bonding has occurred. This causes poor adhesion and can cause warping.
You want to allow the currently extruding line of filament to bond with the bed surface. This applies to all our filaments and is especially important to check with PLA.
How to fix:
Disable the part cooling fan for the first layer in your slicer settings.
9. Use Build Plate Adhesion Helpers
Signs you need to use a build plate adhesion helper:
If you have checked all of the above and your print is still not sticking, you may want to consider using a build plate adhesion helper.

Explanation:
Adhesion helpers can be as simple as using a brim or a raft. Or you can experiment with different print bed surfaces or coatings, such as:
Permanent surfaces:
- PEI
- PrintBite/FR-4/Garolite
- BuildTak/FakeTak
- Phenolic sheet/FR-2
- Naked glass
Temporary coatings:
- Glue stick
- ABS Juice (Slurry)
- PVA Wood glue
- Vinyl-based hairspray/3DLac
- Sugar/Saltwater
- Magigoo
- Kapton Tape
- Painters Tape/Blue Tape
How to fix:
When applying helpers to your bed, make sure you apply a thin and even coat. We do not want mountains of glue stick, nor thick patches of hairspray. Nice, thin and even is key. In my opinion, you need to use the best glue sticks for 3D printing out there.
When applying tapes, do not let the edges overlap – apply the tape strips so they sit flush against the previous strip. And make sure you’re not trapping air bubbles when applying your tape or surface.
There’s nothing worse than an uneven surface because of bubbles, and with the cost of some of these surfaces, having to toss a brand-new surface because of bubbles underneath is very frustrating.
Please Note: Not all surfaces and coatings suit all materials so check with the manufacturer before making your choice.
10. Alter Your Design With Brims, Rafts and Skirts
Rafts, brims and skirts are three different methods for negating any first-layer 3D printing problems you have been having. Rafts sit underneath your print, brims extend from the sides of your print, and skirts don’t touch your print, but extend around its perimeter.
Depending on how delicate or how much difficulty you’ve been having with your print not sticking to the bed, you’ll want to opt for one of these to stabilize the print and improve first-layer adhesion.
They do mean that you’ll use slightly more filament, but it’s well worth it to prevent failed prints that don’t adhere properly.
You can add rafts, skirts, and brims in your slicer settings.
11. Replace Your Build Plate – Last Resort!
While you shouldn’t switch out your build plate unless you’ve exhausted every other solution, if your build plate has been damaged, it can prevent you ever having trouble getting the print to stick to your bed when 3D printing.
I made some slicer setting mistakes when 3D printing on a Robo R2 3D printer around 4 years ago, and when removing the print, it took a chunk of the print bed out with it. From then on, adhesion on the uneven and damaged build plate was far more difficult and it was also harder to level properly, and it needed replacing.
It’s also a good opportunity to upgrade. Makers wax lyrical about their Ender 3 glass bed upgrades, but you can also upgrade to a print bed made from polypropylene, or a spring steel flexible bed, such as those that Prusa make. Different beds have different advantages depending on which type of filament you want to print, so delve deeper into this before making a big decision.
Why does my 3D print not stick to the bed?
Your 3D print might not be sticking to the bed because of wrong first-layer 3D printing temperatures, incorrect extrusion settings, your print bed may need cleaning, or your platform may need leveling. If none of these options work, you can 3D print with brims, rafts, or skirts, or replace your build plate.
How do you get PLA to stick to a heated bed?
- Make sure your print bed is leveled: either fix this manually, or if you have auto-leveling you can do this more easily.
- Fix your heated bed and nozzle temperatures: if either are too low, you may struggle to get your prints to stick to the print bed.
- Check if your nozzle is too far away, or too close, to the bed: the wrong z-offset values can cause over or under extrusion, and issues with the PLA not sticking to the print bed.
- Clean your print bed, as build surfaces or remnants from previous prints may be preventing your PLA from sticking to the heated bed.
- Print with a raft, brim or skirt: choose the best-suited option for your print, as these can help overcome poor first-layer adhesion that leads to first layers not sticking problems.
Other related articles:
- Ultimate 3D Print Quality Troubleshooting Guide
- How to Fix Filament Sticking to Nozzle
- Under Extrusion Problems or Clicking Sounds
- 3D Prints Warping or Curling
- 3D Printing Salmon Skin: How to Prevent & Fix it
- How to fix PLA adhesion problems and not sticking to the bed
- PETG adhesion problems and PETG filament not sticking to the bed