

Key Takeaways
- Z-offset: Adjust the gap between the nozzle and the bed to get optimal adhesion.
- Slicer settings: Change the nozzle and bed temperatures, first layer speed, and fan settings to suit PLA.
- Bed adhesion: Use glue stick, hairspray, painter’s tape, or Magigoo to improve the bond between PLA and the bed.
- Build plate: Choose a flat, level, and clean bed surface, such as glass or PEI.
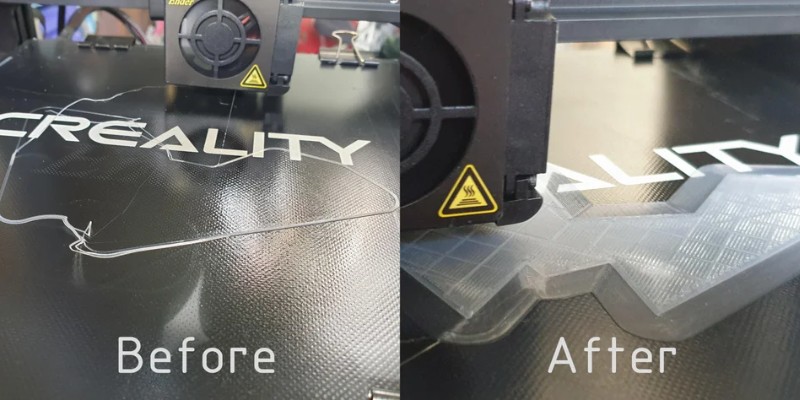
Your 3D printed part is only as good as the first few layers – you can’t make anything if your PLA is not sticking to the bed of your 3D printer.
It’s a frustrating problem, but there’s some good news: there are plenty of solutions you can try. In this guide, we’ll discuss why your PLA is not sticking to the bed, what causes it, how to fix it, and general tips for better adhesion.
Common Reasons Why PLA Doesn’t Stick To The Bed and How To Solve This
General Tips for PLA Bed Adhesion
Why Is PLA Not Sticking to The Bed?
PLA doesn’t stick to the bed because your printer has issues with the z-offset, slicer settings, build plate, or the temperature of the nozzle or bed isn’t perfect. You might also have issues with the flatness of your bed, or a clogged nozzle.
The first few layers of each print will determine how well your part sticks to the bed. You can think of this as the foundation of your print. With improper bed adhesion, the part will eventually fail — it might fall, shift out of position, or leave you with a bird’s nest of PLA in the morning.
This is a very common issue, and you’ll have to go through some trial-and-error to get the best setup for your specific application.
Reasons PLA Doesn’t Stick to The Bed, and How to Fix
Let’s cover what causes PLA to lift from the bed, and discuss specific ways to make PLA stick to the bed better.
Z-Offset Issues
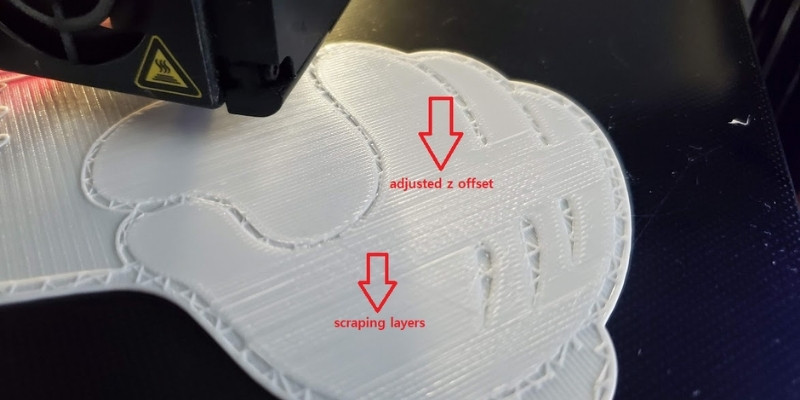
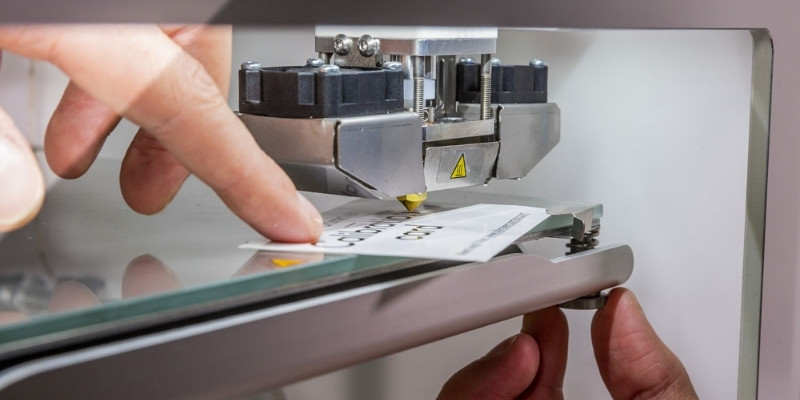
If your z-offset is too far or close, the bead of PLA will not stick to the bed. It’s important to optimize the offset to make sure your print head is the perfect distance away. This can be done by changing the z-offset until you get the best adhesion.
The z-offset refers to the gap between the print nozzle and the build plate. It’s especially important during the first few layers – if the z-offset is too small, your nozzle will be too close — each layer will be squished down and can drag. If it’s too far away, then there isn’t enough force to push the PLA against the bed and get a good bond.
How to fix it: The perfect z-offset depends on your printer and bed material. We suggest inputting both into your slicer software (like Cura) and using the default setting.
Adjust Slicer Settings
Slicer settings will determine temperatures, speeds, fan settings, and more. Changing these settings will increase your adhesion between the PLA and build plate.
You should adjust the bed temperature, nozzle temperature, and first layer speeds to get better PLA adhesion.
Before moving into physical changes, we suggest looking into your software. The slicer settings you use will play a huge role in how well your parts stick.
How to fix it: Change each slicer setting using our tips below.
Nozzle Temperature
For PLA, your nozzle should be between 185°C and 220°C, but 210°C is a good place to start. If you see stringing or oozing, lower your temperature. If your nozzle is clogging and the print is dragging, raise your temperature.
Build Plate Temperature
If you have a heated build plate, the temperature should be 50°C. When the build plate is too hot, the first layer will squish and flatten from the weight of subsequent layers, creating an “elephant’s foot” phenomenon.
If the plate is too cold, you might have issues with PLA not sticking to the bed — however, you can successfully print PLA without a heated bed.
Does a hotter bed help PLA stick? Absolutely, but you don’t want to go too hot and risk the PLA not cooling.
First Layer Speed
Certain printers and slicers allow you to adjust the speed of the first layer. Remember, this is the foundation of your print. With slower first layers, the most important layers have more time to cool and bond before your print continues.
We like to use an initial layer speed of 20 mm/s for PLA, then jump up to 50 mm/s or higher after the first few layers are done.
If you take extra time during the first layers, you’ll have the best chance of adhesion.
Add a Brim
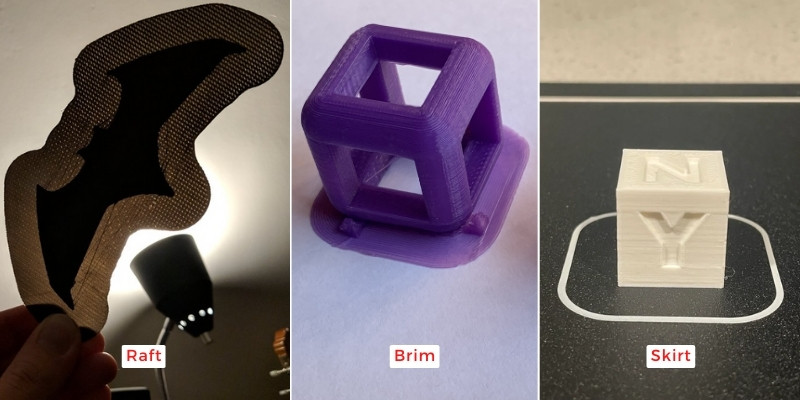
When working in your slicer, you can add an optional brim, raft, or skirt. The skirt is unattached to the print and creates a border around the first layer. The raft is a thin layer with reinforced ribs along it. The brim is a solid piece of PLA, a few layers thick.
The raft is great in theory, but it will often lift up due to poor bed adhesion since it’s so thin. The skirt doesn’t have any effect on bed adhesion since it isn’t connected to the part.
In our experience, the brim works the best when it comes to PLA bed adhesion. It offers a great surface area and creates a strong foundation.
The added bonus is that you can put a putty knife under the brim to remove your finished part without snapping your part.
Fan Settings
Your 3D printer’s fan will determine the temperature inside of your 3D printer. With the fan on full speed, airflow will cool the part and allow it to harden before the next layer is applied. The fan is near your nozzle on the extruder assembly.
PLA needs the fan to run at 100% the whole time, except for the first layers. Why? It gives the initial layers enough heat to fully melt onto the bed and ensure the part is stuck.
Check through your slicer to find a setting that turns the fan to 0% during the initial layers. If your slicer doesn’t have this setting, physically turn off the fan through the screen on your 3D printer for the first three to five layers. Then, keep the fan at 100% for the rest of the print.
Use The Right Bed Adhesion For PLA
You can also apply a product to your build plate to boost its adhesion. Products like glue sticks, hair spray, and painter’s tape work really well with PLA. If you want to splurge for 3D printing specific products, consider Magigoo.
What do we use? In the past, we’ve had a lot of success with a:
- Purple Elmer’s glue stick
- Aqua Net hair spray
- Scotch Blue painter’s tape
- Magigoo PLA Adhesive
How to fix it: Add a product to your build plate to boost adhesion. Consider the following products:
Glue Stick
All four options work exceptionally well for PLA. An Elmer’s purple glue stick is one of the easiest to apply and clean. You want to apply a uniform, light layer across the whole build plate. It should last a few prints before you need to reapply.
Glue sticks are simple to apply, inexpensive, easy to remove, and very easy to keep uniform.

Hairspray
For hairspray, stick with “high-hold” options. They typically have more adhesives in the spray, which is great for PLA bed adhesion. Hold the can about a foot away from the bed and move your hand quickly across the plate to apply a thin layer. When you want to clean your build plate, hairspray is more stubborn — you’ll need to use alcohol or Simple Green to deal with it.
To pick the right hairspray, read our in-depth guide about the best hairspray for 3D printing.
Hairspray is easy to apply, tougher to remove, and harder to add uniformly.

Blue Painter’s Tape
Blue painter’s tape should be applied sticky side-down directly to your glass bed. Make sure the strips don’t overlap, or else your bed will be uneven. Consider using a putty knife to smooth down each strip of tape. The tape can be applied to cover your entire bed, and it can stay on between prints.
Once the tape starts to mar and scratch, you should replace the damaged strips. Each month or so, consider removing all the tape, cleaning the build plate, and reapplying a new layer of tape.
Painter’s tape takes more time to apply and it’s more difficult to maintain, but it offers the best long-term results.

0.94 inch x 60 yard, 3 Rolls
Magigoo
Magigoo is a more expensive adhesive that’s made specifically for PLA printing. However, you can get similar results for cheaper if you use other solutions. It’s worth a shot if the glue stick and painter’s tape didn’t work for you.
It rolls directly onto your build plate, and you can clean it with simple alcohol. You might find that Magigoo gives too much adhesion, and parts can snap as you remove them. If this happens, use a metal putty knife for removal in the future and slowly pry the part from the bed.
Magigoo offers the best adhesion, it’s easy to apply, but it’s more expensive.

Change Your Build Plate
If PLA parts won’t stick to the bed, it might be the build plate’s fault. Glass and flexible metals with PEI are the two best options. PC is a less expensive option of PEI that offers slightly less adhesion.
A glass build plate is flat and smooth, resistant to temperature, and very easy to clean. With a clean plate of glass and correct slicer settings, you should get perfect PLA bed adhesion every print.
The downside is that glass doesn’t have any extra features that boost bed adhesion like patterns or grooves on the plate.
With a flexible metal build plate, the added PEI layer is exceptional at bed adhesion. On a nanoscale, there are ridges and grooves that hold onto your part’s first layers. It’s so good that we often have issues getting parts off a PEI plate. That’s where the flexible nature of the metal comes in — you can bend the metal plate to force your print off.
Regardless of the build plate your printer came with, you can purchase a new build plate and lay it on top. Typically, changing the build plate is the last option. Start by tweaking your slicer settings and adding an adhesive before opting for a brand-new plate.
How to fix it: Buy a new plate and either replace your current plate or put the new one directly on top. You’ll need to add clips if you choose a glass plate, or use magnets if you use a spring steel smooth PEI plate.
General PLA Tips for Best Adhesion
When you’re working with PLA, there are a few things to keep in mind. These general tips will help you achieve the best adhesion with each print.
Keep the Bed Level
Leveling your bed needs to be done before every print. If your table is lopsided, your nozzle’s height will vary, and you’ll be left with parts that don’t stick. You can spot an uneven bed by printing one layer of a rectangle. If one corner is thinner than the other corners, your bed is not level.
Use your printer’s auto-level feature or manually adjust all four springs to ensure a piece of paper can slide between the nozzle and bed with a little friction.
Store PLA Properly
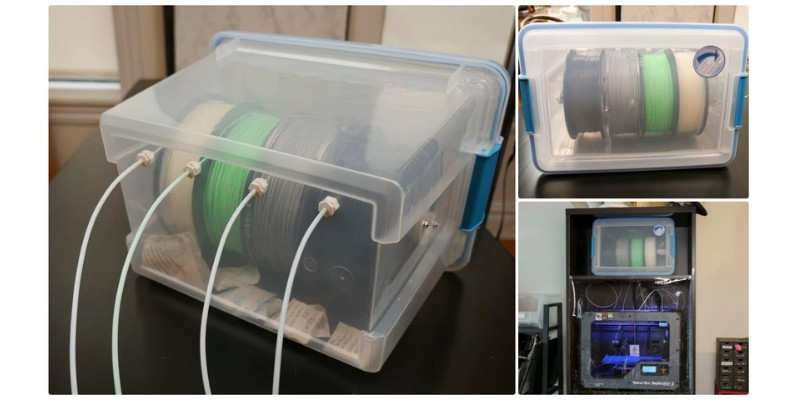
PLA is very sensitive during storage. It absorbs water in the air and attracts dust. In the hotend, water will destroy your prints and dust will lead to inconsistencies across your parts.
You should always store your PLA in a storage box and use a filament dryer before loading your PLA into your printer.
Store it in an airtight box with desiccant pouches to ensure moisture doesn’t ruin your bed adhesion.
Swap PLA Brands
Certain PLA brands work better than others. Even though they look the same, there’s a lot going on within the filament that you won’t notice until you start printing.
Do some trial-and-error with different PLA brands until you find one that offers the best bed adhesion for your setup. Learn more about the best PLA brands.
Keep Your Nozzle Clean and Unclogged
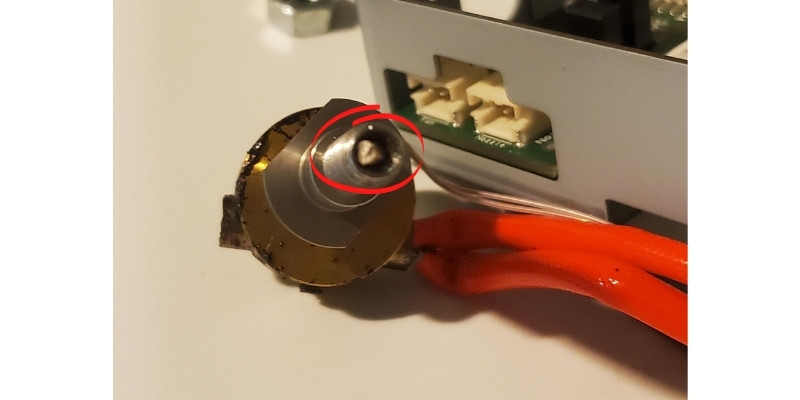
A clogged nozzle will lead to problems like stringing, print failure, missing layers, really thin layers, and filament sticking to the nozzle. If you notice filament buildup on the nozzle, remove it and clean the nozzle.
It’s a good idea to do a weekly check on your nozzle before running a new print.
Clean the Build Plate
The build plate needs to be perfectly clean at all times. Any buildup on the glass or PEI will directly impact how well the part sticks. Use Simple Green and a razor to get rid of adhesives and buildup on your bed.
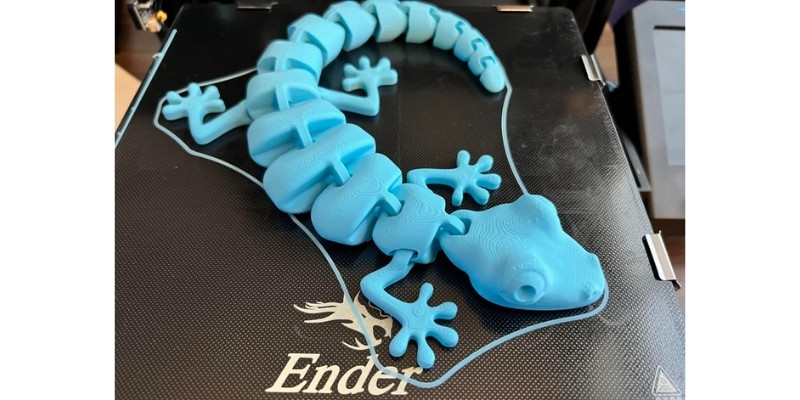
Filament Not Sticking to Bed on Ender 3
With any Ender 3, there’s assembly required. If you can’t get good bed adhesion on your first print after assembly, you should troubleshoot the build. Check your stepper motor installation and ensure the belts are tight. Go through and check the tightness of all the fasteners and ensure the build plate is square and level.
The Ender 3, V2 Neo, Pro, and S1 all have a PC spring steel sheet. Make sure the sheet is clean before every print. Remove the sheet and clean the bed base as well to ensure the sheet is sitting on the base correctly. This sheet works well without added adhesion, so focus on adjusting your slicer settings.
Ender 3 S1 Pro uses a similar PEI spring steel sheet which has the same care instructions as above. The difference is that PEI is better at adhesion, so you should see better results moving forward. Look at the bed temperature to make sure it’s not too high.
With Ender 3 V2’s Carborundum glass, use some Simple Green or alcohol to completely clean the glass. Ensure the clips are holding it firmly in place. Using Windex is a good idea if you can’t access Simple Green.
If you’re using an Ender 3 V2 Neo, Pro, S1, or S1 Pro, use the auto-level feature before every single print. This is a priceless feature that maximizes your chance of bed adhesion.
With any Ender 3 model, there are springs under the build plate with knobs on them. Lower the extruder head and put a piece of paper under the nozzle on top of the bed. Adjust all four springs until the piece of paper can be moved with a little friction. This will set the spring height to be perfect.
Troubleshooting Different Material Adhesion
What if you’re not 3D printing with PLA? Use all of the tips we’ve discussed so far and consider the following specific inputs.
Why Is ABS Not Sticking to Bed?
ABS likes things to be hot. Turn the fan down to 10%, use a hotend temperature of 240°C – 270°C, and adjust the bed to 110°C.
Why Is TPU Not Sticking to Bed?
Without a heated bed, TPU will likely not stick. It prefers a bed temperature of 50°C and it’s very picky about the z-offset. Adjust the z-offset a few times on the same part to see the impact it makes and find the sweet spot. Use a retraction distance of 1.0mm and a retraction speed of 10-20mm/s.
Why Is PVA Not Sticking to Bed?
PVA is more likely to stick to a bed than other materials. Level your bed, check your z-offset, and make sure your hotend is between 210°C and 230°C. It’s easy to overheat the material and get a melted final part.
Why Is HIPS Not Sticking to Bed?
For HIPS, you need a lot of extra help. Put ABS in a cup with acetone and mix it until it turns into a slurry. Apply this slurry to your bed and try printing HIPS again. Since HIPS is non-reactive to acetone, this is a nice way to boost adhesion even better than a glue stick or painter’s tape.
Why Is Nylon Not Sticking to Bed?
Nylon is more stubborn than ABS when it comes to bed adhesion. Use a bed temperature of 110°C, nozzle temperature of 260°C, 10mm/s initial print layer, and add an adhesive to your build plate. If it still doesn’t stick, swap to a spring steel smooth PEI plate. With an unheated bed, it’s very difficult to get good adhesion.
Why Is PC Not Sticking to Bed?
PC likes to warp. To avoid this, use a nozzle temperature of 290°C, a bed temperature of around 150°C, and a nice layer of glue on your bed. It’s a good idea to slow down the print speed as well.
What to Do Next?
If your PLA is not sticking to the bed, consider changing the z-offset, adjusting the slicer settings, using bed adhesion, and swapping out your build plate. In addition, make sure you keep your bed level and store your PLA correctly to get the best adhesion every time.
Related articles:
- Having Issues With PETG Not Sticking to Bed? Read Our Troubleshooting Guide
- 3D Printing Raft, Brim or Skirt – Why and How Discussed
- 3D Print Sticking Too Well To Bed? Here Is How To Fix This Issue
- Full Troubleshooting Guide: 3D Print Not Sticking To Bed
- 3D Printing First Layer Issues And How To Prevent Them


