The best build plates offer improved bed adhesion and easier print removal to increase the stability and surface smoothness of your prints. But they’re not all created equal – each has unique advantages for different filaments. Here’s my recommendations for the best 3D printer build surfaces and plates for every use.
The first part of this article recommends the best build plates for each filament, and the second half recommends the best build plate surface adhesives for perfect adhesion printing every material.
|
Best for PLA & PETG
|
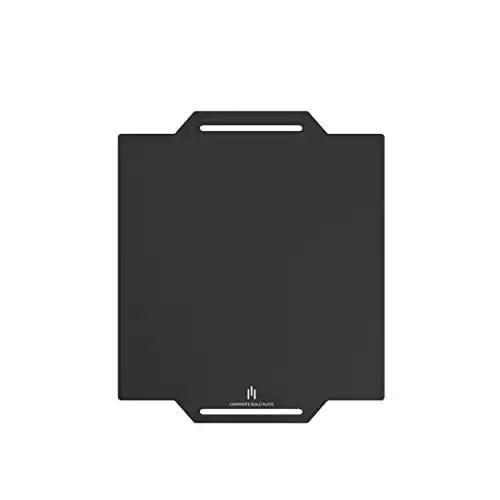
Best for ABS & TPU
|
|
|
|
|
4.8
|
4.5
|
|
$29.99
|
|
|
|
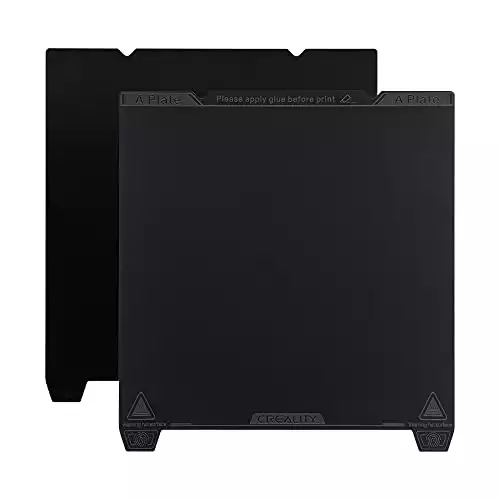
- Dual-sided magnetic 3D printer bed offering smooth and textured surfaces for varying print needs.
- Effortless print removal with flexible and durable PEI sheet, ensuring no damage to your creations.
- Delivers excellent adhesion, easy release, and a flat, hard tempered glass surface for high-quality 3D printing.
- Wide compatibility with various sizes available.
I’d recommend spring steel PEI sheets for most users as they’re cheap, easy to maintain, and really durable over time. They offer excellent performance across common filaments like PLA and PETG, particularly if you get a versatile magnetic sheet.
Glass build plates also hold their own as another cheap, versatile alternative. They heat more evenly than PEI, which makes glass better for ABS and TPU printing), but you can’t pop prints off rigid glass as easily as you can with flex-y PEI.
One of those build plates is likely to be the best surface in 98% of cases, but in this guide, I’ll also cover Polypropylene (the cheapest choice) and Garolite (best for nylon).
In this guide, I’ll share my hands-on experience pairing different build surfaces with the most common filaments (PLA, PETG, ABS, TPU and Nylon), as well as ways to enhance their adhesion with purpose-built and DIY solutions.
| Build Plate Material | Average Price | Best for Filaments | Strengths | Weaknesses | Maintenance |
|---|---|---|---|---|---|
| Spring Steel with PEI | $30 | PLA, PETG | Best adhesion for the most common filaments | Can over-adhere to TPU or ABS (smooth PEI). | Clean with water isopropyl alcohol |
| Glass | $20 | ABS, TPU | Produces the smoothest prints for high-temp filaments | Less durable than PEI, prone to scratches. | Clean with water isopropyl alcohol |
| Polypropylene (PP) | $5 | PP | Cheapest choice. Semi-flexible for easy removal. | Prone to warping and scratches, more frequent replacement. | Requires occasional sanding |
| Garolite | $50 | Nylon | Mitigates warping and lifting issues for Nylon | Possible corner lifting with lower-temp materials (PLA, PETG). | Requires occasional sanding |
1. Spring Steel Sheet with PEI – Best Build Surface Overall
- Filament compatibility: Best for PLA and PETG
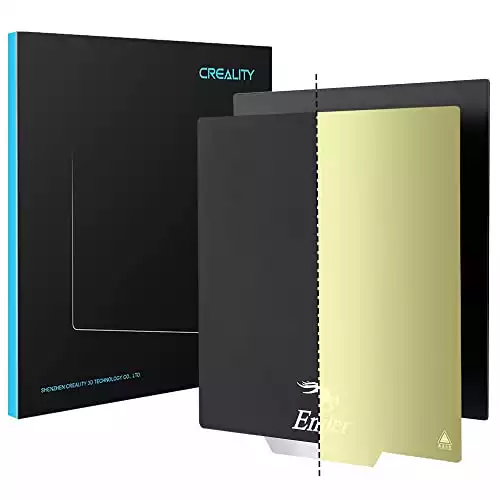
- Recommended Surface: Creality Ender Double Sided Magnetic PEI Sheet
Polyetherimide, abbreviated as PEI, is a type of thermoplastic known for its heat resistance. When applied as a finish to steel sheets, it provides a robust and low-maintenance build surface for 3D printing.
Spring steel PEI build plates provide the best balance for beginners looking for ease-of-use and excellent adhesion with PLA and PETG.
This inexpensive surface is super easy to remove prints from, particularly if you buy a magnetic bottom sheet. Simply remove and gently flex your PEI sheet and your prints will pop right off, leaving a clean, glossy finish on the base of your prints.
It’s also easier to clean compared to other surfaces and is less likely to become damaged than other popular choices like glass.
Dual-sided magnetic 3D printer bed offering smooth and textured surfaces for varying print needs.
Effortless print removal with flexible and durable PEI sheet, ensuring no damage to your creations.
Types and Textures
There are two primary types of spring steel PEI sheets: adhesive and magnetic.
- Adhesive PEI sheets are designed to be stuck on top of your existing build plate semi-permanently, and is slightly cheaper than a magnetic build plate.
- Magnetic beds are easily removable and changeable, offering more filament versatility in by switching sheet textures. When you remove and flex a magnetic sheet, the 3D prints “pop off” easily.
On that note, there are two primary textures of spring steel PEI sheets: smooth and textured.
- Smooth PEI is the most adhesive choice. It’s excellent for PLA and PETG, but can adhere a little too strongly to TPU or ABS.
- Textured (or Frosted/Powder Coated) PEI is easier for print removal because there’s less surface area contact between the base and the bed.
Overall, I recommend choosing a double-sided magnetic PEI sheet so you can print a full range of filaments without difficulty. There isn’t much price difference, and the versatility across materials is worth it.
|
Best for Smooth Base
|
Best for Easy Removal
|
|
$22.99
|
$24.99
|
|
|
- Ideal for flat models, offering great adhesion, easy printing, and a seamless removal process, ensuring high-quality prints every time.
- Perfect for preventing warping and providing excellent adhesion, these sheets allow easy printing and lend an appealing finish to the printed model.
Check the video below to see the differences between smooth and textured for yourself.
Maintenance
PEI beds are known as low-maintenance build plates. A wipe-down with an isopropyl alcohol and water solution every 5-10 prints is plenty to maintain performance.
Avoid more powerful cleaning methods like acetone, as these will end up stripping the PEI from your spring steel sheet.
The video guide below show you how easy PEI beds are to maintain.
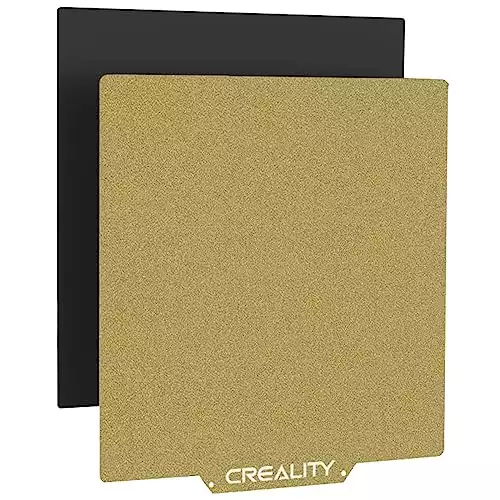
2. Glass Build Plates – A Good Alternative To PEI Sheets
- Filament compatibility: Best for ABS and TPU, works with PLA and PETG
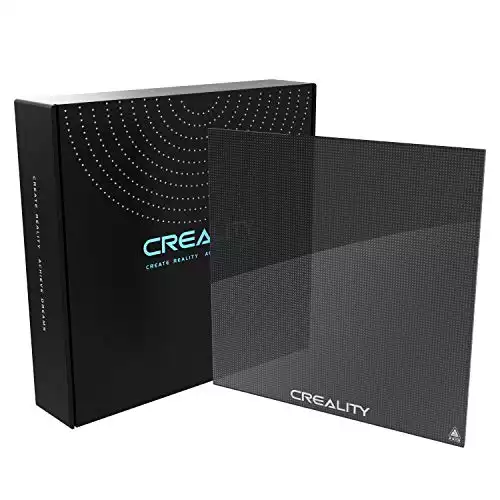
- Recommended Surface: Creality Glass Build Surface
Glass is another favorite build surface in the 3D printing community.
Most glass 3D printing surfaces are tempered glass, a durable and heat-resistant type of glass that resists deformation and heats evenly.
This consistency in temperature and predictable cooling makes glass the best choice for high temperature filament like ABS or TPU, which can otherwise warp and crack from thermal fluctuations.
For these types of materials in particular, a glass build plate provides you with stable adhesion and the best chance for a smooth base on removal.
This coated glass bed provides no-edge curling and no-indentation printing for improved printing quality and results.
Boasting excellent flatness and easy model removal, the glass bed can be easily cleaned and maintained.
That said, a glass build plate is generally less durable than a PEI magnetic sheet, and the rigid surface get scratched or damaged if prints are forcefully removed.
Most glass build plates are easy to install with either adhesive pads or clamps.
Types and Textures
Like PEI beds, glass surfaces are available in both smooth and textured styles.
- Smooth glass sheets provide a cleaner bottom finish on prints.
- Textured glass beds offer easier part removal.
PETG and PLA can also be a little harder to remove on glass than with PEI because you aren’t able to flex the bed to pop your prints off, so I recommend a textured bed for these filaments.
Delivers excellent adhesion, easy release, and a flat, hard tempered glass surface for high-quality 3D printing.
Wide compatibility with various sizes available.
Maintenance
Like spring steel PEI, glass build plates are straightforward to clean with water, isopropyl alcohol, and a cloth.
You can see the cleaning process for yourself in the video guide below.
3. Polypropylene (PP) Build Plates – Cheapest Choice
- Filament compatibility: Best for PP, works with PLA, ABS, PETG, and TPU
- Recommended Surface: YOUSU Polypropylene Printing Surface
Polypropylene, also known as PP, is a translucent plastic that adheres well with most 3D printable materials.
It’s suitable for bed temperatures up to 120°C, and (like spring steel PEI) this semi-flexible build plate allows for some bend to help your prints pop off the build platform.
Even PP sheets are slightly cheaper than glass and PEI, I wouldn’t recommend them overall.
The plastic surface is far more prone to warping and scratches and tend to require replacement more frequently.
Utilizing nano technology, the iStick film provides warp-free, superior performance, especially with PP 3D filament.
Suitable for larger printing surfaces, with easy installation.
Maintenance
In general, cleaning a polypropylene 3D printing build plate is the same as cleaning glass or PEI. You’ll want to use a soft cloth and isopropyl alcohol.
However, you’ll have to replace Polypropylene build sheets more regularly than glass or spring steel PEI. Repeated heating and cooling cycles will cause warping in the plastic which will result in inconsistent print height over time.
Polypropylene can also be scratched or damaged when removing prints, meaning sanding is sometimes required to restore a smooth surface. Otherwise, these imperfections can show up on the bottom of your prints.
For me, this is an unnecessary hassle and worth avoiding altogether by choosing a glass or PEI plate instead.
Check out the video guide below to see how to make the most of this cheap print bed option.
4. Garolite Build Plates – Best for Printing With Nylon
- Filament compatibility: Best for Nylon, works with ABS or TPU
- Recommended Surface: Lightyear Garolite Build Plate
Garolite, also referred to as FR4 or G10, is by far the best option for printing with Nylon, which other popular build plate types like spring steel PEI and glass struggle with.
It’s created by curing fiberglass and epoxy under high pressures, and looks similar to carbon fiber.
Garolite’s rough texture increases the surface area for the filament to grip onto, significantly reducing warping and lifting issues that are common with Nylon.
In my opinion, Garolite is only worth it if you’re consistently working with Nylon filament. You may experience corner lifting when pairing a Garolite surface with lower temperature materials like PLA or PETG, which makes a PEI or glass build plate a better choice for most hobbyists.
The G-10 composite bed ensures effortless adhesion Nylon, eliminating the need for additional adhesives.
Maintenance is straightforward and installation is easy.
Check the video below to see just how well Garolite handles printing Nylon filament.
Maintenance
This durable surface will retain its bed adhesion for a long time if occasionally refreshed by light sanding, but you will have to take precautions and use a mask to not inhale any harmful debris.
Best Build Plate Surface Adhesion Aids
Even if you have a great build plate, you might find you need a little more first layer adhesion from time to time.
In this section, I’ll rank a few excellent adhesive aids – as well as some DIY solutions – that you can use on top of your print bed surface.
1. BuildTak
- Best for: All filament types
- Top Choice: Amazon here
BuildTak is a thin, self-adhering plastic material that provides the best combination of bed adhesion and easy removal for your 3D prints.
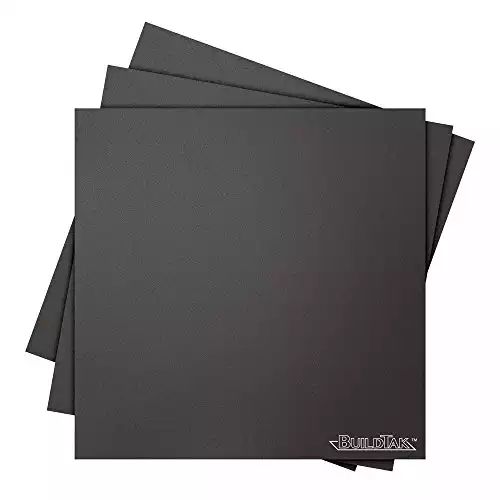
This build sheet enhances filament adhesion for a wide variety of filaments including ABS, PLA, and HIPS.
It offers durable construction for multiple uses, simple single sheet design for quick and bubble-free installation, and is suitable for use with fused-filament 3D printers.
It comes in various sizes and works with pretty much every filament, from common PLA and ABS to filaments like HIPS and PETG.
A single BuildTak surface can last for about 50 to 100 hours of use, making its “cost per print” pretty negligible.
Keep in mind that you may need to increase the temperature by a few degrees to compensate for BuildTak slightly insulating your heated build plate.
This hands-on video from Matterhackers does a great job of explaining why BuildTak is the best adhesive aid for 3D printing.
2. Kapton Tape
- Best for: ABS and PETG
- Top Choice: Amazon here
Kapton tape is a cost-effective adhesive aid that can withstand high temperatures, making it more suitable for high-temp filaments like ABS or PETG than DIY solutions.
It offers the most reliable adhesion outside of BuildTak and is my recommendation for situations when you can’t wait on an order of BuildTak to arrive, but you can make it to the local hardware store.
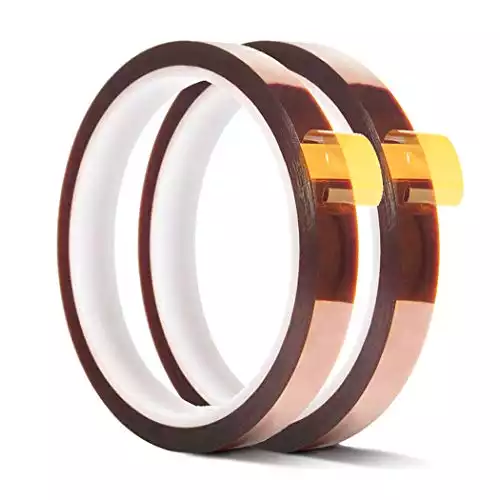
Cost-effective, heat-resistant adhesion ideal for high-temp filaments like ABS and PTG.
A handy substitute when quick alternatives to BuildTak are required.
It is easy to trim down to whatever size bed you have and can last for several prints.
However, the application process requires careful alignment to avoid any seams or air bubbles that could cause an imprint on the base of your printed object.
You can learn how to apply Kapton tape the right way with the video guide below.
3. Blue Painter’s Tape
- Suitable for: PLA and TPU
- Top Choice: Amazon here
Painter’s tape has a wax-based release agent that helps filaments like PLA adhere to the printer bed.
It is thicker than Kapton tape, making it easier to apply, adjust, and remove, which can help you minimize air bubbles and seams from overlapping tape.
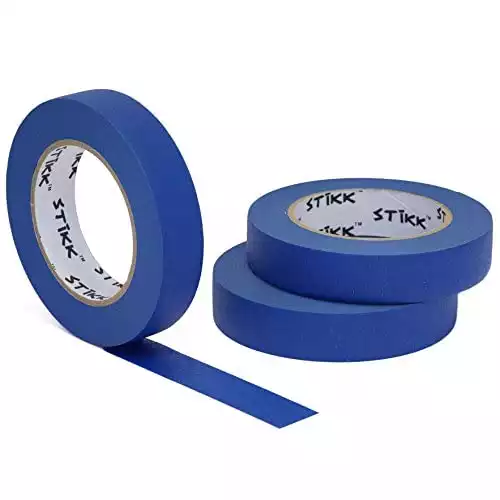
Painter's tape offers improved PLA adhesion and easy application, though it might necessitate post-print smoothing.
Despite its affordability, the tape's adhesion may falter at high temperatures, leading to potential warping.
However, it has a rougher surface which can mean you need to sand the bottom of your prints for a 100% smooth finish.
Though cheaper and more accessible than Kapton tape, blue painter’s tape is less likely to stay adhered to the print bed at high temperatures, potentially leading to warping.
Check the video below to see how easy it is to use painter’s tape, and the kind of results you can expect.
4. Pritt Stick
- Suitable for: PLA and TPU
- Top Choice: Amazon here
The key benefit of glue sticks is that they’re super easy to apply, and perfectly water soluble for simple cleaning between prints.
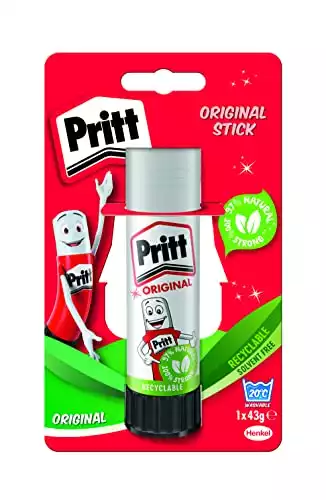
Pritt Stick is notably easy to apply and clean due to its water solubility.
It provides stable adhesion for PLA and TPU, but its efficacy diminishes at higher temperatures for PETG or ABS prints.
It’s strong enough to help PLA and TPU prints adhere stably, and add a layer of protection between your bed and print for stickier filaments like PETG and ABS for easier removal.
The only reason glue sticks don’t place higher on my list is that they can become a little inconsistent at higher temperatures, becoming a little more slidey than sticky when used to print PETG or ABS. Using the best glue sticks for 3D printing can help you with tricky filaments.
5. Hairspray
- Suitable for: All filament types
- Top Choice: Amazon here
Hairspray is a surprisingly effective adhesive for 3D printing. It’s similar to Pritt Stick in the sense that it’s a solid back up if convenience and accessibility are high on your list, and you’re prepared to clean your heated bed after each print.
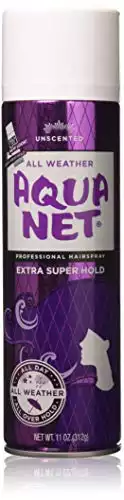
Hairspray offers easy application and worthwhile adhesion.
It is flammable so care must be taken near heated elements.
However, hairspray is flammable, so caution is needed when using it near heated components. It’s also a little messy and unsophisticated compared to the other, purpose-built options on this list.
For best results, follow the video guide below.