
3D printer kits are cheaper, generally have larger build volumes, and are great fun to build yourself. Here’s my round-up of the top DIY 3D printers in every price range:
Overall, my top recommendation at for a budget 3D printer kit is the Creality Ender 3 V2. It’s consistent, reliable, and still a great printer for the money. For a newer version that’s slightly more expensive, I also recommend the Ender 3 V2 Neo which I recently tested.
Also consider the Anycubic Kobra, as it’s one of the easiest kits to build, and prints with great reliability. I have personally tested it and think it’s super easy for beginners to use, and matches the Ender 3 V2 and Ender 3 S1 range in specs.
|
Super Budget 3D Printer
|
Great Home 3D Printer Kit
|
Premium 3D Printer Kit
|
|
|
|
|
|
4.2
|
4.7
|
4.5
|
|
220 x 220 x 250 mm
|
220 x 220 x 250 mm
|
250 x 210 x 210 mm
|
|
around 1 hour
|
around 45 minutes
|
Assembled (ready to print), 3D Printer Kit (6-8 hours)
|
|
280°C
|
260°C
|
330°C
|
|
100°C
|
110°C
|
120°C
|
|
PLA, ABS, TPU, wood
|
PLA, ABS, PETG, TPU
|
PLA, PETG, ASA, ABS, PC, CPE, PVA/BVOH, PVB, HIPS, PP (Polypropylene), Flex, nGen, Nylon, Carbon filled, Woodfill and other filled materials.
|
|
$189
|
$299
|
$999
|
These 3D printer kits can take just a few minutes to assemble, or take hours or even days. They can also vary greatly in price, print accuracy, maximum build and print speed.
| Name | Build Volume (mm) | Assembly Time |
|---|---|---|
| Creality Ender 3 | 220 x 220 x 250 | 1 hour |
| Prusa Mini+ | 180 x 180 x 180 | 6-8 hours |
| Creality Ender 3 V2 | 220 x 220 x 250 | 1-2 hours |
| Anycubic Kobra | 220 x 220 x 250 | 45 minutes |
| Creality Ender 5 S1 | 220 x 220 x 280 | 1 hour |
| Flsun Super Racer | 260 x 260 x 330 | 20-40 minutes |
| Prusa i3 MK3S | 250 x 210 x 210 | 6-8 hours |
| Peopoly Moai 130 | 130 x 130 x 180 | 4-6 hours |
| Voron 2.4 LDO Kit | 350 x 350 x 350 | 20-40 hours |
3DSourced is reader-supported. When you buy through links on our site, we may earn an affiliate commission. Learn more
The Best DIY 3D Printer Kits in 2024 – Full Reviews
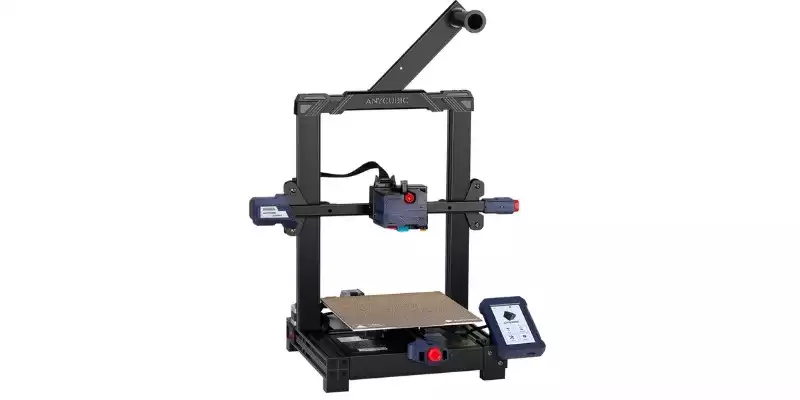
1. Anycubic Kobra – Easiest Kit To Build
- Price — Check latest price at Anycubic here / Amazon here
- Assembly Time: around 45 minutes
- Build Volume: 220 x 220 x 250 mm
- Max Extruder Temp: 260°C
- Compatible Filaments: PLA, ABS, PETG, TPU
Pros
Low cost
Extremely fast assembly
Performed very well during my hands-on testing
Cons
Specs are fine, but nothing special
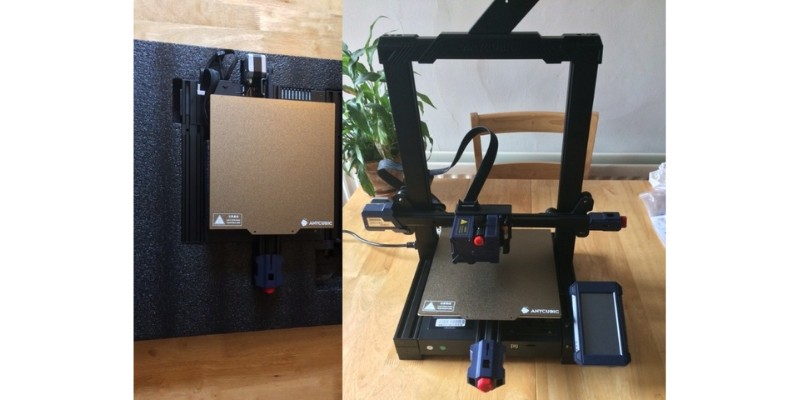
The Anycubic Kobra is a reliable DIY printer by a reliable brand, at an incredibly low price. Despite the low price, it comes with auto-leveling, a touchscreen, and a filament sensor.
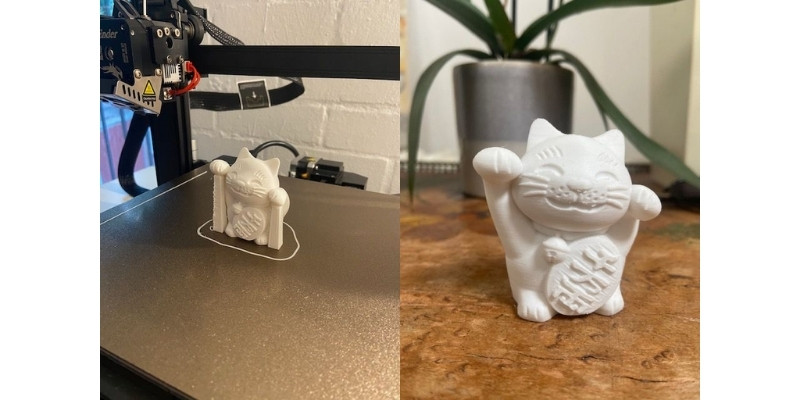
I’ve tested the Kobra for 3DSourced, and it performed well overall, especially for the price. I highly recommend it as a great desktop DIY kit.
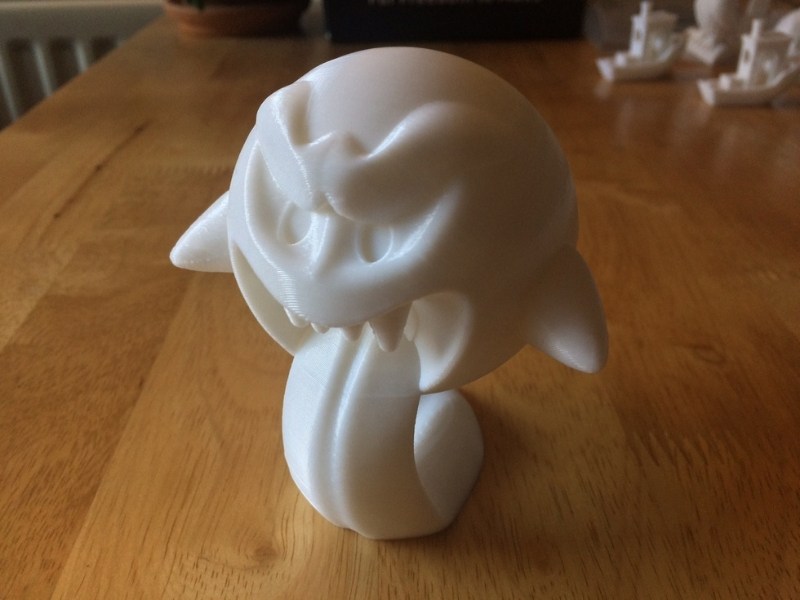
For example, here’s some test prints I managed with the Anycubic Kobra:
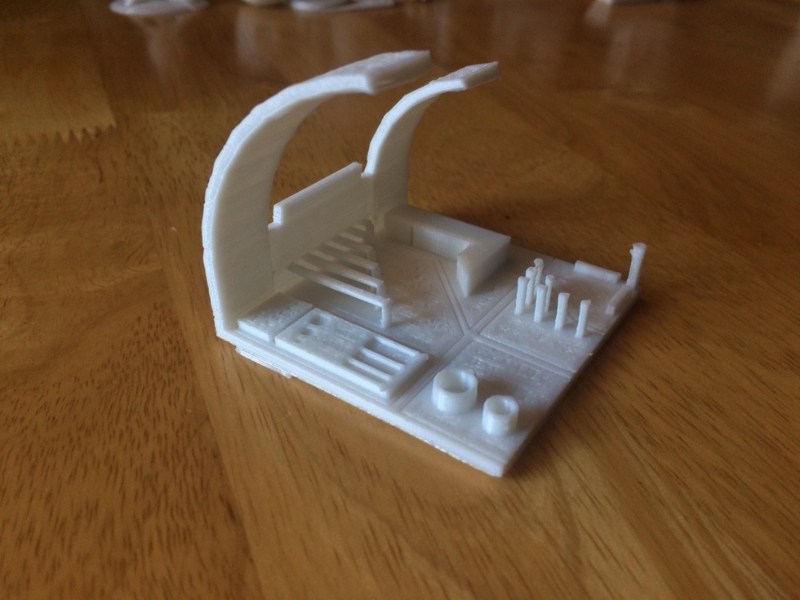
Build volume on the Kobra is a relatively standard 220 x 220 x 250 mm for a printer of that price range. It’s impressively lightweight – just 7 kg – which makes it a convenient portable option if you’re a casual hobbyist who doesn’t have a dedicated craft space.
The Kobra is also equipped with a spring steel PEI-coated bed. It’s flexible and magnetic, allowing you to take the plate and bend it to pop prints off. No risk of damage to the print!
I would suggest the Anycubic Kobra to beginners who don’t have the time or aren’t interested in long assembly times and sharp learning curves. You can assemble the entire printer in just 15 – 60 minutes, depending on your level of skill.
Really, the Kobra is Anycubic’s version of the popular Ender 3 S1. It has similar assembly times and essentially the same build size (though the Ender 3 S1 has 20 mm more in the Z axis, it’s basically the same).
Unless you’re attached to the Creality brand, I personally feel that the Kobra is a better option. It’s cheaper, and there are minor improvements. For example, the Kobra has an inductive probe instead of a touch probe, which is the faster option of the two.
This ultra budget-friendly printer assembles in a lightning-fast 15-60 mins.
The lightweight 7kg body and 220 x 220 x 250mm build volume make printing and portability a breeze.
Reliable auto-leveling and filament runout detection provide peace of mind.
Perfect for beginners seeking hassle-free printing, the Kobra delivers impressive performance with no fuss!
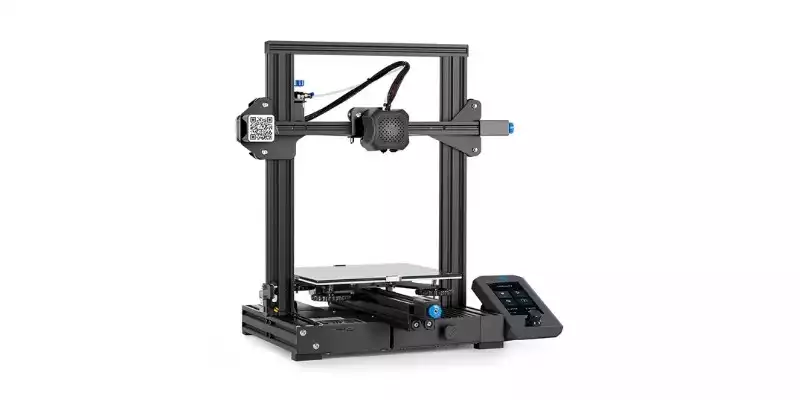
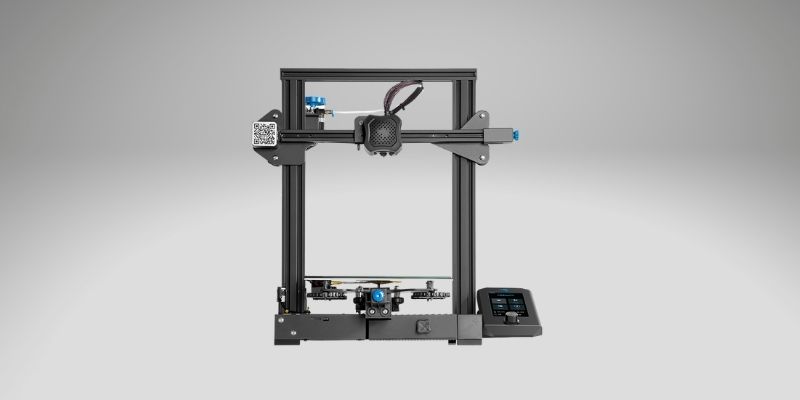
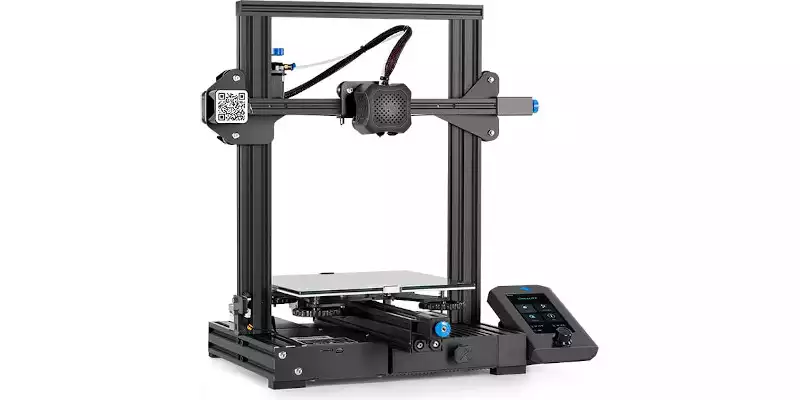
2. Creality Ender 3 V2 / V2 Neo – Best Under $300
- Price: Check price at Creality Store here / Amazon here
- Build volume: 220 x 220 x 250 mm
- Assembly time: 1-2 hours to fully assemble
- Max extruder temp: 260 °C
- Filament compatibility: PLA, TPU, PETG, ABS
Pros
One of the best low-cost 3D printer kits.
Very upgradeable.
Cons
More advanced 3D printers are available with newer features.
Building on the success of the Ender 3 and improving on its flaws, the Ender 3 V2 is a much improved kit.
The upgraded motherboard makes the printer quieter than ever, and the extra power makes for a more stable and precise printing experience.
The upgraded extruder is also a great touch. It’s easier to load and feed filament into via the rotary knob, which is ideal for PLA and flexible filaments. The large 4.3-inch screen makes the interface more intuitive, and the Ender 3 V2 is really easy to use overall.
Another extra is the carborundum glass platform, which can heat up faster than ever and improves adhesion so you can be sure of a great first layer. If you have the extra $100 to spare, I recommend going for the Ender 3 V2 over the original.
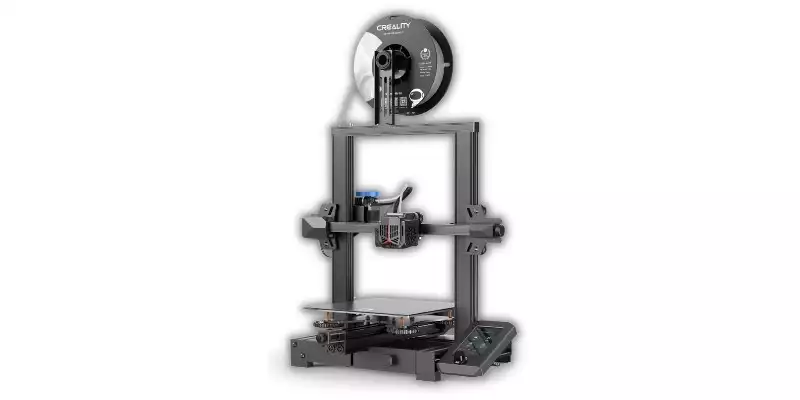
However, having since owned and tested the new Ender 3 V2 Neo, I recommend buying this instead of the standard V2 if you have the budget.
I put it through its paces for my test, and I was impressed with the V2 Neo overall.

The Ender 3 V2 Neo has auto-leveling – a big improvement! – as well as an all-metal extruder. The DIY kit itself has also been simplified to be quicker to create, so it’s more beginner friendly.
If you have the budget, I recommend the Ender 3 V2 Neo over the standard V2.
Upgraded version of the original Ender 3 with a number of key improvements.
This easy to assemble DIY kit creates a 220 x 220 x 250mm build volume for printing epic creations. Experience ultra-quiet operation and stable, precise printing with the upgraded motherboard and extruder.
And, get great first layers with the heated carborundum glass print surface.
An easy-to-use enclosed 3D printer with auto-leveling and removable steel print surface.
With pristine 0.1 mm resolution, you won't find a more precise 3D printer for this price anywhere.
Easy setup, operation and print removal make this an ideal pick for beginners.
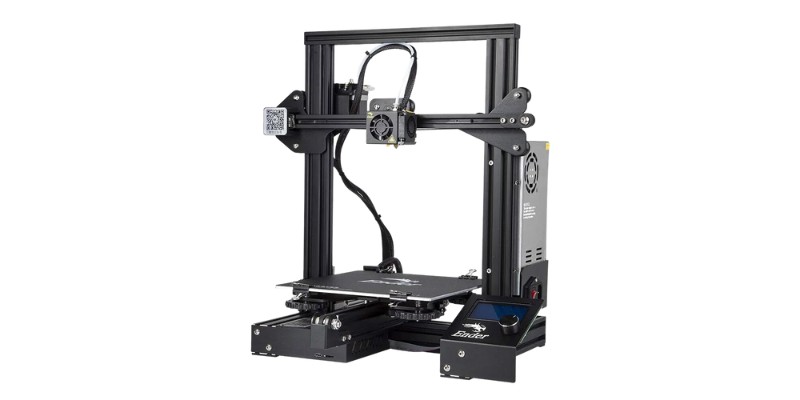
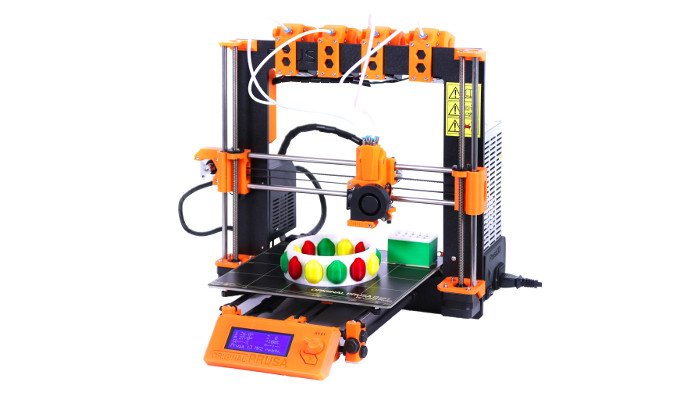
3. Creality Ender 3 – Cheapest DIY Kit
- Price: Check price at Creality Store here / Available on Amazon here
- Build volume: 220 x 220 x 250 mm
- Assembly time: around 1 hour
- Filament compatibility: PLA, ABS, TPU, wood
Pros
Great performance for the price.
Produces high-quality prints.
Works well with lots of different filaments.
Cons
Takes time to assemble, as it comes as a kit.
Now outdated, and I recommend the V2 Neo now instead.
No auto-leveling.
The original Ender 3 is still one of the world’s most popular 3D printer kits, years after it was originally released. The low price, great build area, and reliability have cemented the Ender 3 as one of the best 3D printer kits around.
Whereas issues caused by low-quality parts plague most DIY printers in this price range, the Ender 3 is dependable and consistent, partly due to its upgraded extruder to prevent clogging or poor extrusion.
However, many of the features that were rare and innovative at the time, are standard or considered basic now. Print resume functions are expected, and the Ender 3 does not have auto-leveling which is frustrating.
As an older kit, the original Ender 3 also takes longer to assemble than the newer kits.
So now, I recommend the Ender 3 V2 Neo instead, and you can read my full review of the Ender 3 V2 Neo here, or read on to the V2 section in this article for more details.
If you’re on a tight budget, then absolutely the Ender 3 is still the best printer under $200. But, if you have the spare cash, then upgrade. You’ll be glad you did, for the quality-of-life improvements like auto-leveling, and the far better metal extruder.
The best budget 3D printer kit around - and the best-selling, too.
If you have the budget, pick up the V2 or V2 Neo version, or even the Ender 3 S1 if you prefer a direct drive extruder.
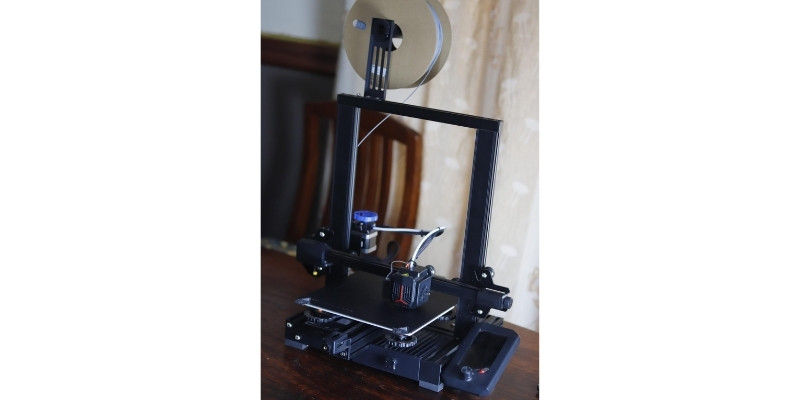
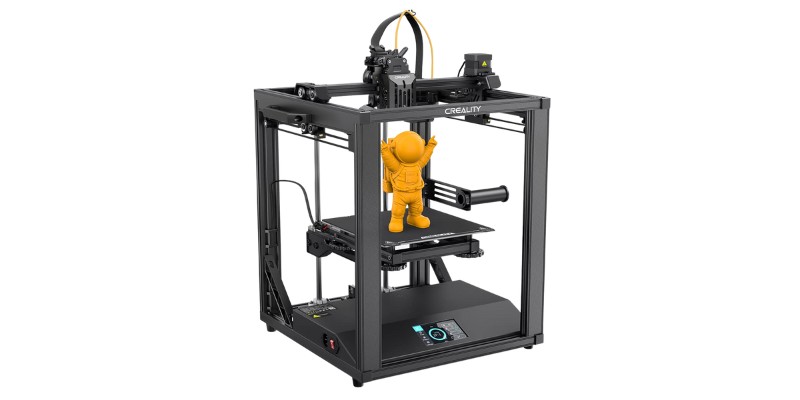
4. Creality Ender 5 S1
- Price — Check latest price at Creality here
- Assembly Time: 1 hour
- Build Volume: 220 x 220 x 280 mm
- Max Extruder Temp: 300°C
- Compatible Filaments: PLA, PETG, ABS, TPU, PC, ASA, HIPS
Pros
Impressive extruder durability
Open source
Huge DIY community
Cons
Build volume is only large in the z-axis (try Ender 5 Plus for a bigger build volume)
The Creality Ender 5 S1 is one of the more recent printers in a long line of DIY Creality kits. It’s a long way from the original Ender 3, now boasting easy leveling, great filament compatibility, and a more stable design.
Assembling the Ender 5 S1 only takes slightly longer than the Anycubic Kobra at 1 – 2 hours, depending on experience. The build plate is also similar– a PC spring steel sheet with a magnetic base. It has high sticking power but allows for popping off models by bending.
You can expect the same quality-of-life features that are on any cheaper printer, like auto-leveling through CR-touch, a touch screen, and a filament runout sensor. But the Ender 5 S1 boasts high print speeds of 250 mm/s, too.
It has a stronger extruder than previous Ender models and other cheap DIY kit options. Allowing for a max temp of 300°C, you will be able to use a wide variety of filaments.
A key benefit to purchasing the Ender 5 S1 is that Creality’s entire Ender series is somewhat open source. All Ender printers are built off a similar layout as the Ender 3, which is completely available on GitHub.
Plus, Creality has a huge community that loves DIY. Any project or upgrade you want to do with your Ender 5 S1 has probably been done before, and it’s likely you can find numerous tutorials or forum threads online to help you out.
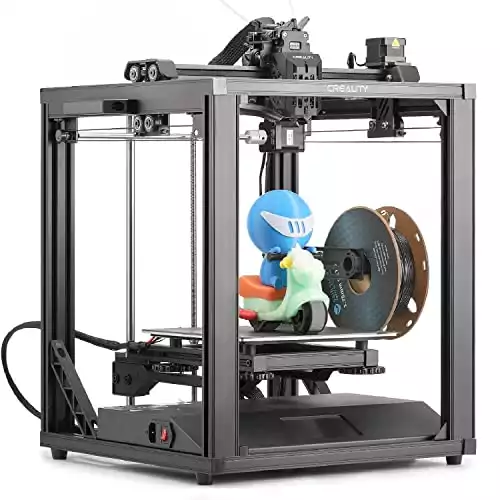
This user-friendly DIY kit assembles in just 1-2 hours. Print big projects up to 280mm tall with its spacious 220 x 220 x 280mm build volume.
Print fast at speeds up to 250mm/s and use exotic filaments like ABS and PC thanks to its durable 300°C extruder.
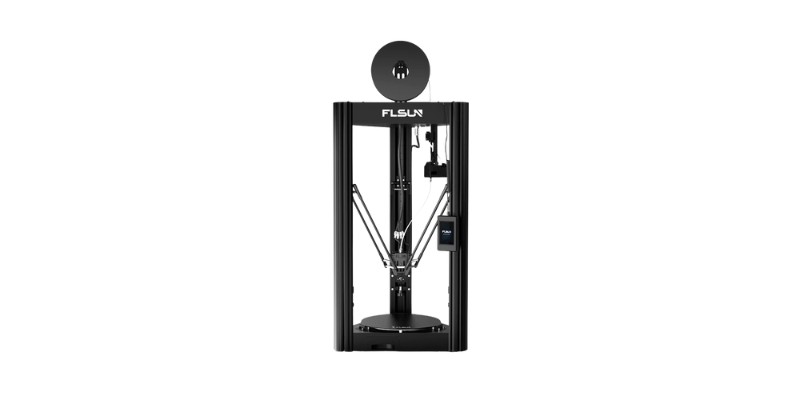
5. Flsun Super Racer – Best Delta Kit
- Price: Check latest price at Amazon here / Flsun here
- Assembly Time: 20-40 minutes
- Build Volume: 260 x 260 x 330 mm
- Max Extruder Temp: 260°C
- Compatible Filaments: PLA, ABS, PETG
Pros
Incredible speeds as a Delta printer
Reasonable, mid-range price
Fast assembly time within an hour
Cons
Little opportunity to customize
The Flsun Super Racer is the newer replacement for Flsun QQ-S Pro. It’s a niche option, instead using a delta triangle configuration instead of standard Cartesian setups.
Delta 3D printers are known for being much faster than standard Cartesian printers. As a result, print speeds reach as high as 200 mm/s, with the default printing speed left at 150 mm/s. Even the default speed is faster than the default of comparable printers like the Ender 5 S1, at 120 mm/s.
Despite the high speeds, the Flsun Super Racer can still produce the high-quality prints we’ve come to expect after the QQ-S Pro.
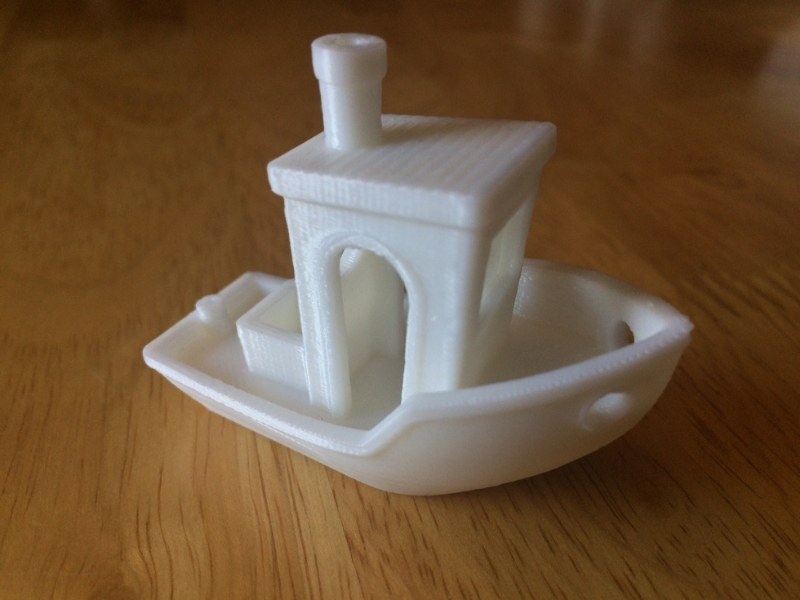
Here’s some of the high-quality prints I managed on my Flsun QQ-S Pro, and the Super Racer achieves even better consistency as well as speed improvements.
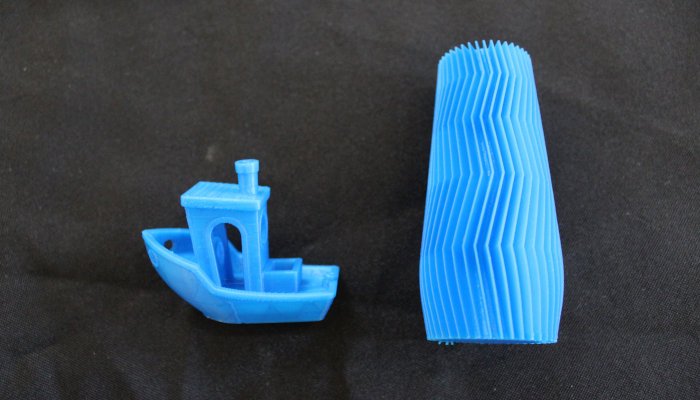
Assembly time is similar to the Flsun QQ-S Pro, taking around 15 to 45 minutes.
The Super Racer comes with a ton of spare parts, so you don’t need to worry about losing or breaking pieces. It even has a digital version of the user guide, and videos to help you on your way.
One interesting quirk about building the SR is the leveling sensor. You need to attach it in order to level the bed properly, but then you are instructed to detach it before printing. The process is repeated for every re-level – which isn’t often on a delta printer.
The main upgrade that the Super Racer brings to the table is a better motherboard. It uses a 32-bit high-speed motherboard with 4 TMC 2209 for quieter and more accurate printing. All things considered, the Flsun SR is a great DIY 3D printer for those who want high speeds and tall prints.
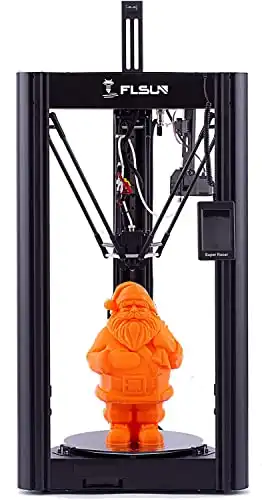
This lightning fast delta 3D printer assembles in just 20-40 minutes.
Max print speeds hit an incredible 200 mm/s for insanely fast prints.
Achieve new heights with the generous 260 x 260 x 330 mm build volume.
Precise 32-bit motherboard and auto-leveling deliver professional quality prints every time.
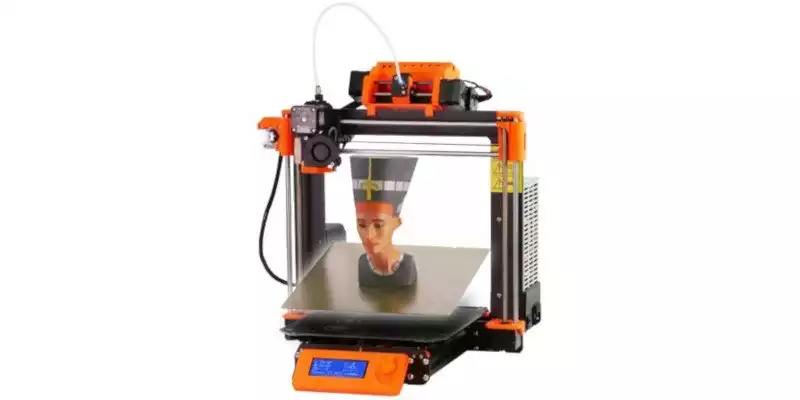
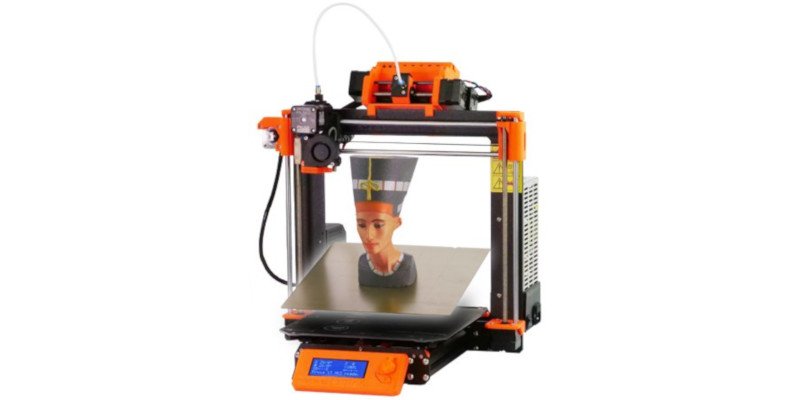
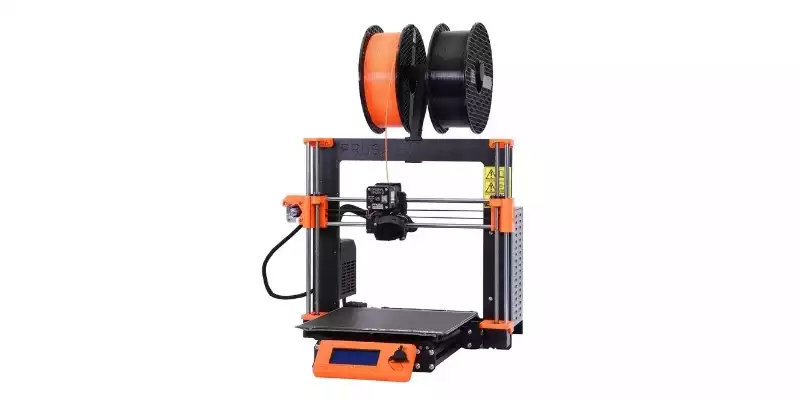
6. Prusa i3 MK3S+ – Most Reliable Kit
- Price: Varies — Available on the Prusa store here or Amazon here / Fully assembled — Available on the Prusa store here or Amazon here
- Build volume: 250 x 210 x 210 mm
- Assembly time: Assembled (ready to print), 3D Printer Kit (6-8 hours)
- Max extruder temp: 330°C
- Filament compatibility: PLA, PETG, ASA, ABS, PC, CPE, PVA/BVOH, PVB, HIPS, PP (Polypropylene), Flex, nGen, Nylon, Carbon filled, Woodfill and other filled materials.
Pros
Reliable and durable.
Comes with auto-leveling, saving you lots of time.
Can be upgraded with an MMU kit to print 5 colors of filament at once.
Cons
Takes a long time to build.
The Prusa i3 MK3S+ is known as the undeniable king of DIY 3D printer kits.
These RepRap kits are fantastic, with an impressive print volume of 250 x 210 x 210 mm, and able to print at speeds up to 200mm/s.
The Prusa is extremely accurate, precise, and a reliable workhorse 3D printer. For a long time it has been the gold standard in FDM 3D printer kits.
Accessible via USB stick or by SD card, the Prusa i3 MK3S+ kits are designed to be simple to use as well as effective.
With layer resolutions up to 50 microns, the Prusa i3 homemade 3D printer is so effective that it outperforms far more expensive 3D printers.
It can print tougher filaments than more expensive printers too, with a Bondtech extruder that can reach temperatures of up to 300°C, making printing Polycarbonate, ABS, Nylon, and other difficult filaments no problem.
Additionally, you can print up to 5 colors simultaneously with your Prusa if you purchase their multi-material upgrade kit, costing $300. This makes colorful model printing a breeze, and opens up for far more extravagant printing projects.
- With a Multi Material Upgrade kit, it can also print multiple colors. We explain more in our color 3D printer buyer’s guide.
- You can buy the Multi Material Upgrade Kit 2.0 here.
You can choose to either assemble the kit yourself or buy the printer pre-assembled, though this costs a few hundred dollars more.
Overall, the Prusa remains the undisputed king of DIY 3D printer kits.
Meet the gold standard in DIY printing - the Prusa i3 MK3S+!
Print like a pro with exotic filaments like PC and nylon thanks to the 300°C hotend.
Reliable, precise, and loaded with innovations like auto bed leveling, the Prusa i3 MK3S+ delivers exceptional performance right out of the box!
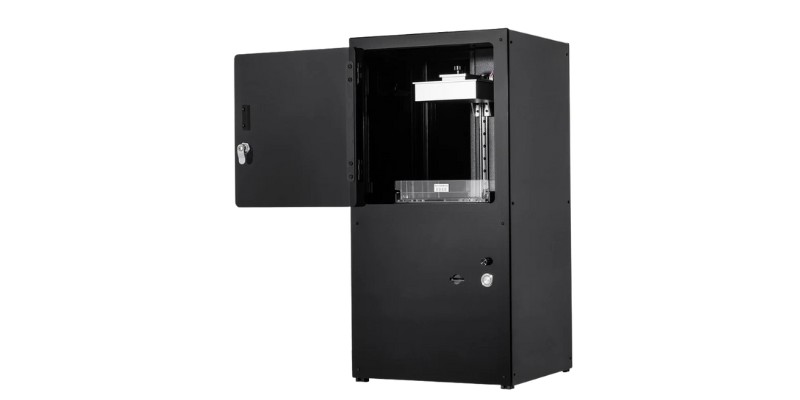
7. Peopoly Moai 130 – Top Resin 3D Printer Kit
- Price: Check latest price at Peopoly here
- Assembly Time: 4 – 6 hours
- Build Volume: 130 x 130 x 180 mm
- Resolution: Z-layer: 5 micron (resin dependent), XY: 70 microns
Pros
High-resolution printing
Great build volume for a resin printer
Customizable and offers add-ons
Cons
Still lacking in quality of life features
Capable, but pricey
The Peopoly Moai 130 kit is an incredible feat of engineering. It’s huge, offers incredible precision, and best of all, it lets you build your own 3D resin printer at home from scratch.
Featuring a 70-micron laser spot size and a 130 x 130 x 180 mm build volume, you can create everything from resin molds for 3D printed jewelry, dental models, engineering pieces, or miniatures.
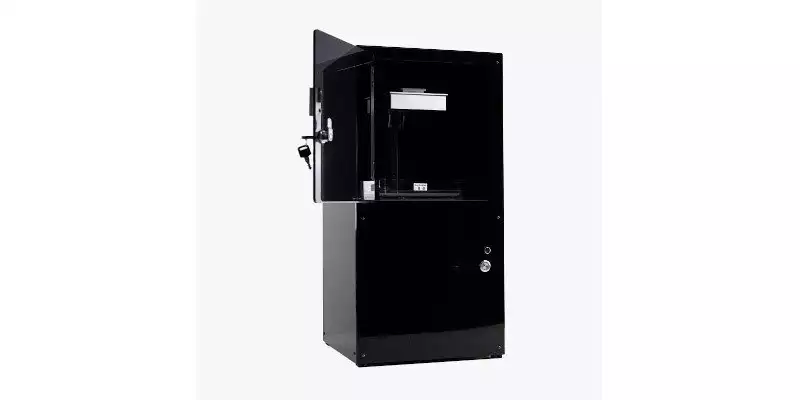
The Moai 130 costs slightly more than the now-unavailable original Moai. In return, you get a variety of quality-of-life upgrades that were previously missing. The inclusion of an FEP film vat and an easier-to-level build plate makes the Moai 130 more approachable as a printer kit.
It is only to be expected that the Moai will take some time to assemble, as resin 3D printers are more complex than their FDM 3D printer counterparts. Most makers will be able to build their own Moai 130 within 4 – 6 hours.
As a DIY kit, Peopoly understands that people don’t want to buy branded resins only. You can use the Moai 130 with any third-party resins you want. Another great DIY opportunity is in the form of add-ons. Certain add-ons are supported by Peopoly itself, such as a heater module.
The Moai 130 is something in between an extreme do-everything-yourself experience and a pre-assembled wonder. So long as you’re willing to put in the effort, it’s a reasonable resin option for both beginner and experienced makers.
This expansive DIY kit offers a generous 130 x 130 x 180 mm build area for sizable resin prints.
Expect perfect 70 micron XY resolution and astonishing 5 micron Z resolution for professional quality results.
Build it yourself in 4-6 hours and unleash your creativity.
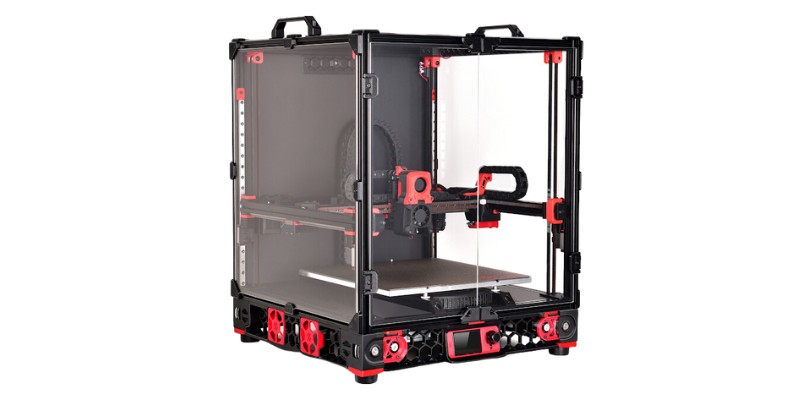
8. Voron 2.4 LDO Kit – Professional DIY Kit
- Price: Check latest price at Matterhackers here
- Assembly Time: 20 – 40 hours
- Build Volume: 350 x 350 x 350 mm
- Max Extruder Temp: 300°C (customizable)
- Compatible Filaments: PLA/Tough PLA/PLA+, PETG/CPE, ABS/ASA, TPU/TPE, Nylon/NylonX/NylonG, PVA, Polycarbonate
Pros
Huge build volume
True DIY experience
Highly customizable
Great specs and features even without add-ons
Cons
Expensive
Time intensive and not beginner-friendly
The Voron 2.4 LDO Kit is in sharp contrast to beginner printers like the Anycubic Kobra. It’s hands down the most customizable, and that’s because it’s a true DIY printer. You get the pieces, and you build it entirely yourself. No pre-assembly included.
In the past, the Voron project just gave you a sourcing guide and instructions for you to buy all of the pieces individually. This LDO kit makes the process significantly easier, since they’ve sourced all the pieces already.
It’s pricey because it comes with pretty much everything you could want in a printer. There’s the touch screen, auto-leveling, and filament runout sensor. But the Voron 2.4 also has an enormous build volume of 350 x 350 x 350 mm.
The Voron 2.4 LDO Kit comes with clear acrylic panels for you to mount onto the frame. You will need to print or purchase the panel clips in order to properly enclose the printer, but it’s an option for anyone with the kit.
You can opt-in to purchase better parts, like stronger nozzles or better hotends. Since you’ve built the whole thing by hand, without any proprietary parts, you can really adjust anything you want except build volume.
If the trial-and-error, DIY process is the fun part for you, the Voron 2.4 Kit is perfect. It will take you anywhere from 20 – 40 hours to assemble (and then some if you have add-ons), but the result is incredible.
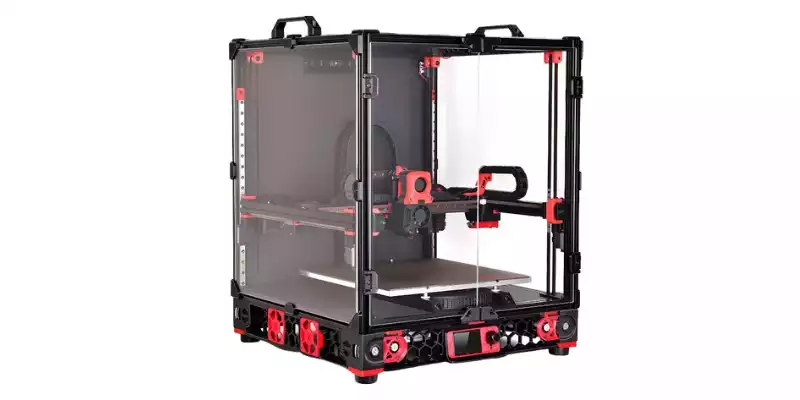
This epic DIY kit offers a massive 350 x 350 x 350mm build volume to print colossal projects. Tinker to your heart's content assembling the kit in 20-40 hours.
Print like a pro with exotic filaments like ABS, ASA, nylon, and PC!
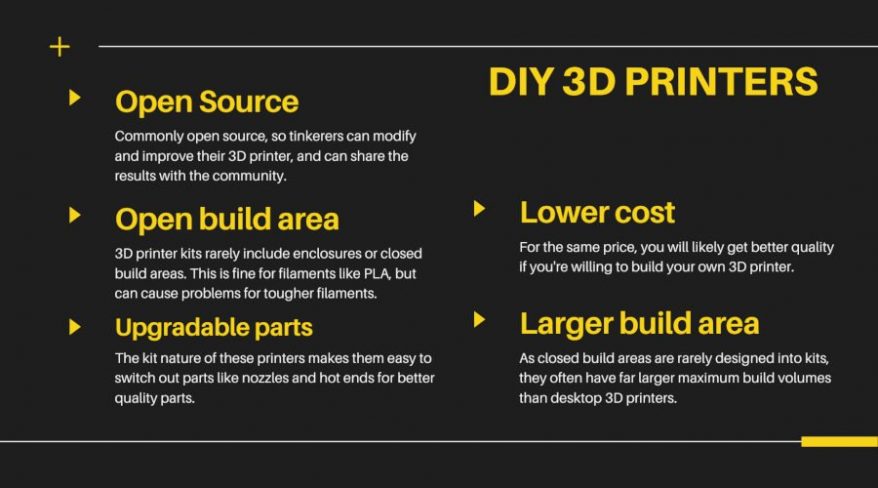
Advantages of DIY 3D printers
- Open source: Most homemade 3D printers are also open source 3D printers, meaning they can be tinkered with, upgraded, and modded freely, with the printer files usually hosted on a repository like GitHub. Many Creality and Prusa printers are open source.
- Easily upgradable: Makers frequently switch out parts, such as nozzles, hot ends, and extruders for better quality parts or for certain projects.
- Lower price: For the quality and size, they’re cheaper 3D printers than pre-assembled versions.
- Larger build volume: The open build area means you can have a larger 3D printer build area for the same size.
Build your own 3D printer: what makes a good DIY 3D printer?
We used several criteria to determine which 3D printer kit made it into our ranking:
- Affordable: We only included FDM 3D printer kits under $1,500. The printers are listed in price order, cheapest first.
- Print quality
- Easy to build: Not everyone is a technology wizard. Therefore, any kit that can be assembled quickly, easily, and is simple to operate, is at an advantage.
FAQs
Is a DIY 3D printer worth it?
Yes, building your own 3D printer from scratch can be really fulfilling, and you’ll learn about engineering and DIY from the project. Nothing is more satisfying and fun than using the 3D printer you built yourself. It’s also cheaper to build a 3D printer than buy it pre-assembled.
Is it cheaper to build your own 3D printer?
Yes, it’s generally cheaper to build your own 3D printer versus buying it ready-made. You’ll need to source the parts yourself from specific shops, though there are 3D printer kits with these parts that are much quicker to build.
How much is a DIY 3D printer?
The cheapest DIY 3D printers start at around $150, and can cost upwards of $5,000 for professional kits. Most home kits will cost between the $250 and $1000 mark, with popular 3D printer kits such as the Ender 3 V2, Prusa i3 range, and Anycubic kits falling within this price range.
What are the main types of 3D printer kits and how do they differ?
The most common types of 3D printer kits are FDM (fused deposition modeling) which use filaments to build models layer-by-layer. There are also SLA 3D printer kits that cure resin such as the Peopoly Moai range, and there is also an SLS 3D printer kit for sintering plastic powders, released by Sintratec.
How difficult is it to assemble a 3D printer kit?
The difficulty of assembling a 3D printer kit varies greatly depending on your model. Entry-level kits like the Anycubic Kobra take under an hour to build, while more advanced kits like the Prusa i3 MK3S+ have estimated build times of 6-8 hours for beginners. The most intricate kits may take 15-40 hours, such as the Voron 2.4, and require mechanical assembly skills.
What tools do I need to assemble a 3D printer kit?
Don’t worry about the tools required for most printer kits. Every kit I’ve built has come with the basic tools required to build the printer. These include a basic wrench, allen key, screwdriver, and any required screws.
How customizable are DIY printer kits?
The customizability depends on the kit. For example, Prusa kits are open-source and built off the RepRap philosophy, and are extremely customizable. Other printers such as the Ender 3 are also very upgradeable, and we have written an entire article on the 20+ upgrades for the Ender 3. These upgrades include hot ends, build plates, nozzles, and control boards.
What kind of technical support is available for printer kits?
Most 3D printer kits have online documentation and troubleshooting guides for assembling and using them. Most brands, such as Anycubic, offer email support, and brands like Prusa also offer 24/7 live chat support. The best support is often in user forums and communities, as community members share solutions to common issues.
What common troubleshooting problems arise with DIY 3D printer kits, and how can I fix them?
Some of the most common problems with DIY 3D printer kits involve bed adhesion, nozzle clogs, warping, and bed leveling. Here’s our guide for how to fix each problem:
Struggling with first layer adhesion
Nozzle clogging issues
Warping issues
What software is compatible with most DIY kits?
Almost every DIY 3D printer kit is compatible with common open-source slicing software like Cura, and Slic3r, as well as paid software like Simplify3D. Any 3D printer using Marlin firmware should be compatible with software that outputs g-code.
Cura has the advantage of predefined profiles for many printers to get good initial settings, whereas Slic3r gives more detailed control.

What’s Changed
In our August 2023 update of this article, we changed the following:
- The Flsun QQ-S was switched out in favor of the newer Flsun Super Racer. It is better in every dimension, and is now the 3DSourced choice for delta printer kit.
- Added the newest versions of the Ender 3 range, including the V2 Neo, which we have tested and reviewed on our site.
- Updated the Peopoly Moai section now that the newer Moai 130 version is sold.
- Replaced the Ender 5 Pro with the newer Ender 5 S1.
- The Voron 2.4 LDO kit was added, as it is a high-quality, premium kit.
Jan 2024 updates:
- Updated pricing information for 2024.


