Key Takeaways
- Why dry filament: Filament absorbs moisture from the air, which can cause printing problems and degrade the quality and strength of the prints.
- How to dry filament: Use an oven, a specialized filament dryer, a food dehydrator, or a DIY dry box to heat the filament and remove the moisture.
- How to test filament: Check the diameter of the filament for swelling, or extrude some filament and listen for hissing or popping sounds.
- How to store filament: Use airtight containers or bags with desiccants, preferably made of Mylar or similar material, to keep the filament dry and protected from UV light.
Are you getting a slightly rough surface or noticeable stringing, under-extrusion, and oozing on your prints, or even crackling or popping during printing?
If so, it’s likely your filament is a little damp.
The problem is all 3D printer filaments are hygroscopic. This means in the air, they’ll absorb moisture over time and retain it.

Knowing how to properly dry filaments not only protects your prints from imperfections but drastically improves the overall quality of your prints by maintaining their mechanical properties and reducing waste.
In this guide, I’ll explain how to dry out filament using several methods, including a conventional oven, specialized filament dryers, food dehydrators, and even a DIY dry box, and how to use proper 3D filament storage to prevent the problem altogether.
I’ll also share my process to test if formerly wet filament is safe to use again – so you can revive your filament with confidence.
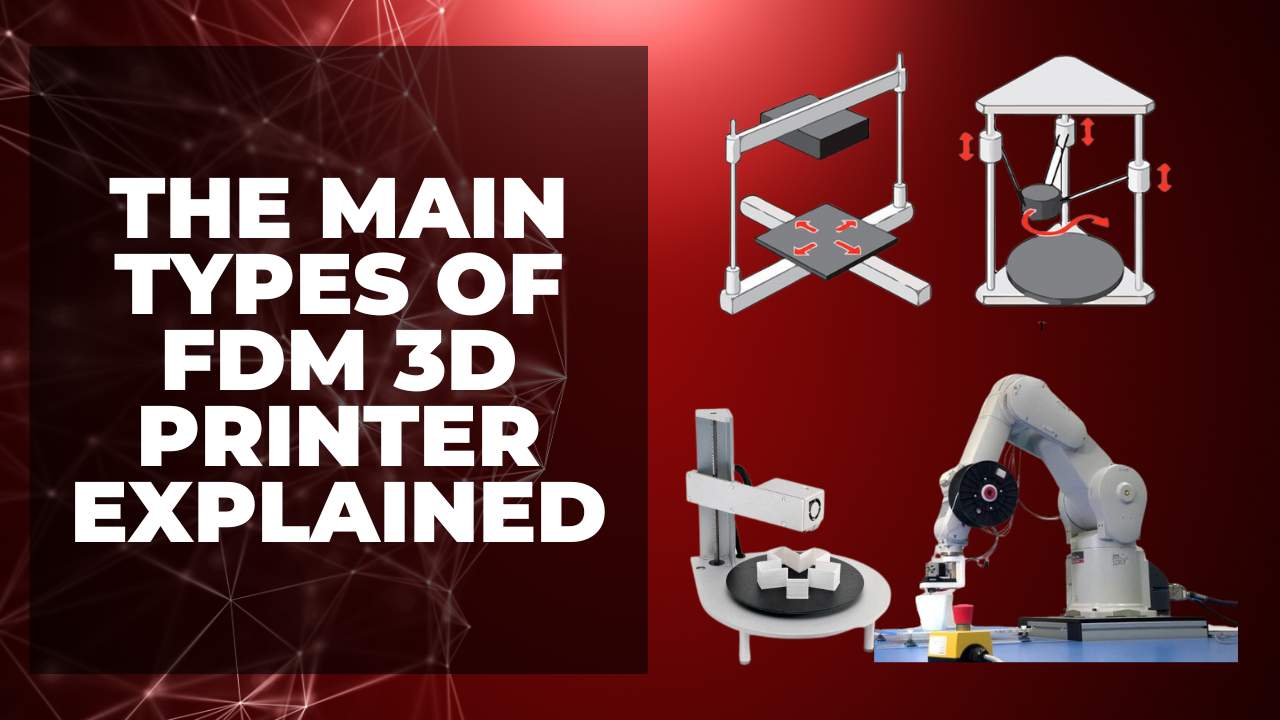
My Top Filament Drying Methods
- Specialized Filament Dryers – Best for Precision and Multi-Spool Drying
- How to Dry Filament in Oven – Most Accessible Method
- Food Dehydrators – Budget Method for Low-Temp Filament
- DIY Dry Box – Custom Solutions for Hobbyists
| Filament | Drying Temperature | Drying Time | Drying Method |
|---|---|---|---|
| PLA | 45°C | 4-6 hours | Oven Specialized filament dryer Food dehydrator DIY dry box |
| ABS | 75-80°C | 5-6 hours | Oven Specialized filament dryer |
| PETG | 65°C | 4-6 hours | Oven Specialized filament dryer Food dehydrator DIY dry box |
| Nylon | 75-80°C | 5-6 hours | Oven Specialized filament dryer |
| TPU | 50-60°C | 4-6 hours | Oven Specialized filament dryer Food dehydrator DIY dry box |
| Polycarbonate (PC) | 120°C | 5-7 hours | Oven Specialized filament dryer |
| ASA | 80-85°C | 5-6 hours | Oven Specialized filament dryer |
Best Methods for Drying Filament
Knowing how to properly dry filaments not only protects your prints from imperfections but drastically improves the overall quality of your prints by maintaining its mechanical properties and reduces waste.
Specialized Filament Dryers:
Specialized filament dryers are arguably the best method for drying filament. Unlike DIY solutions, these devices are designed from the ground up to extract moisture from materials, priming them for beautiful, blemish-free prints. Many come with direct control over the temperature and drying time to suit different filament types, from highly hygroscopic materials like PETG to less moisture-absorbing PLA.
How to Use a Filament Dryer
The first step is to insert the spool of filament into the dryer per the manufacturer’s instructions. Some come with several spool berths, allowing you to dry several at a time. Some models also allow you to print directly from the dryer through a small feed hole, but you’ll want to avoid printing before you’ve dried the filament first.
Second, dial in your desired temperature and drying time. Each model has documentation that provides recommended settings for each filament type. For example, 55°C for three hours for PLA or 65°C for 3 hours for PETG.
Allow the dryer to complete the drying cycle before removing the spool or using it to print a part or model. Once you’ve dried the filament, we recommend storing it in the dryer itself between printing sessions.
Dryers include a vacuum-sealed chamber to prevent more moisture from getting in, meaning they also double as an effective filament storage solution, extending the lifespan of your materials.
Alternatively, you can source a dedicated filament storage box to prevent moisture from seeping into the material and having to dry it again before use.
My Favorite Filament Dryer Boxes
Though there are quite a few specialized filament dryers available, I recommend the SUNLU Filament Dryer Box for those on a budget or the Matterhackers PrintDry Pro for those with more cash to spare and a need to dry multiple spools at the same time.
The SUNLU Filament Dryer Box is compact, easy to use, and has a budget price tag at under $50. It features temperature and drying time controls so you can dial in the right settings for the type of filament you’re using without fear of overcooking the filament or not drying it long enough.
There’s also a temperature gauge on the front to monitor the drying process. It houses one 1 kg spool, so is best for those working with one filament type at a time, but does feature a purpose feeder hole to run filament straight into your printer.
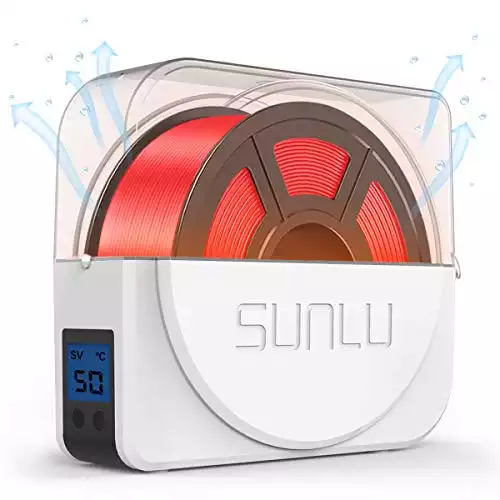
- Compact and user-friendly design.
- Precise and consistent filament drying.
- Front-facing temperature gauge with capacity for one 1 kg spool.
If you’re looking for something a bit more professional and have the budget, the Matterhackers PrintDry Pro is a great pick. This filament dryer has space for up to four spools up to 5 kg each. It comes with adjustable temperature controls so don’t worry if you’re swapping between PLA, ABS, or PETG regularly.
Better yet, the Matterhackers PrintDry Box has a suite of presets for all the most popular filaments so no need to dial in settings yourself. The chief benefit of these is that the dryer will use the best ones to remove moisture safely without damaging the material. Once the filament is dry, it can be left in the dryer, which also acts as a storage box with a feeder system that directs the filament straight to your printer.
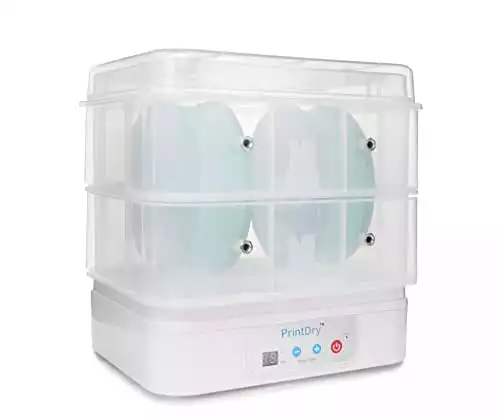
- Space for up to four 5 kg spools.
- Optimal drying without manual setting adjustments.
- Doubles as a storage box with direct filament feeding to 3D printer.
How to Dry Filament in Oven
The easiest way to dry out filament without buying a filament dryer box is by using your oven.
The first thing to do is check out the glass transition temperature for the filament that you are going to dry. You want to make sure that you keep your oven temperature below the transition temperature. In general, about 60-70°C is just about right for most materials, except maybe a bit hot for lower-temperature materials like PLA. Always keep in mind how hot your oven runs and only use electric ovens.
Here’s a quick breakdown of the temperature you should be aiming for to avoid damaging the filament but also allow it to heat up enough to remove all moisture:
- PLA: 45°C
- ABS: 75-80°C
- PETG: 65°C
- Nylon: 75-80°C
- TPU: 50-60°C
- Polycarbonate: 120°C
You also want to be aware, even if the Glass Transition temp is very high, for a material like Nylon or Polycarbonate – the spool your filament is wound on is likely made from an ABS which will soften at lower temperatures than the filament.
Once the oven is up to temperature, place the spooled material inside and leave it there for four to six hours. If you have a convection oven, this drying time may be shortened since the circulated air removes more moisture from the material more quickly.
You can also ‘recharge’ the desiccant this way too, placing it in the oven over a low heat.
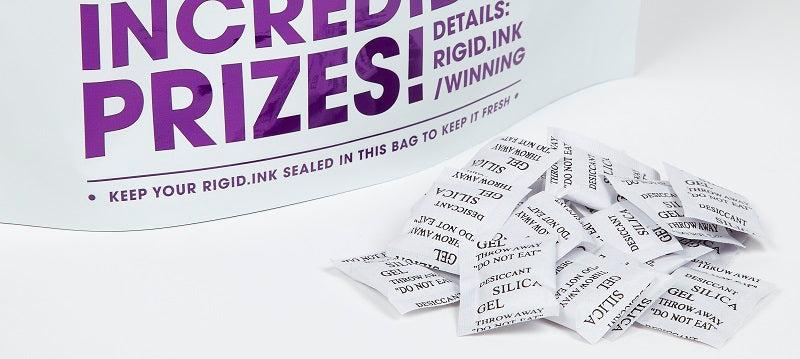
Once the time is up, remove the material from the oven, allow it to cool and place it into a water-impermeable container or bag along with desiccants. Make sure that the container or bag is completely sealed.
When you use any material that you have oven-dried to print, be aware that it will be slightly more brittle than normal. If you handle the material with care this should pose no problem, especially when you consider the superior results that you can achieve when using a properly dry print material.
Food Dehydrators for Drying Filaments
Though we recommend buying a purpose-built filament dryer to remove moisture from filament, using a run-of-the-mill food dehydrator is an option for those on a budget or those without an oven.
While not all dehydrators are large enough to house a spool, many are, thanks to the fact that they are typically round.
Place the spool inside, then set the dehydrator temperature to near, but never above, the glass transition temperature of the filaments we discussed in the oven section.
Many food dehydrators won’t reach as high as the 80-120°C needed for filaments like PC and ABS, so in this case, simply crank up the temperature as high as possible and leave the filament in for 2-3 hours longer. If you’re feeling particularly resourceful, you can also modify the food dehydrator to act as a storage box with feed holes to run filament to your printer.
As for drying times, this is where food dehydrators really tail off compared to filament dryers with optimized drying settings and cycles. Typically, most filaments will dry somewhere between 4-6 hours in a food dehydrator but this isn’t an exact science.
Fortunately, as we’re working with low temperatures, the risk of overcooking filament is low, but it can be hard to gauge if a filament is truly dry other than running a test print. This can be time-consuming.
And, finally a word of caution, we don’t recommend using a food dehydrator to cook food at all once you’ve used it to dry filament. As the filament is heated it will release fumes and particles that leave a potentially harmful residue on the surface of the dehydrator that can seep into food, even after a thorough clean.
DIY Dry Box
Another popular DIY option for drying wet filament is to build your own DIY dry box or DIY dryer.
While the main goal with a DIY dry box is to prevent the filament from getting wet in the first place through proper storage, they often have either a passive or active drying element. Active typically involves a heating component such as a mat or fan, while passive drying relies on silica gel or desiccant pouches.
There are three main methods to build a DIY dry box: an air-tight plastic container, a 3D printed filament dry box, and a heated filament dry box. Check out the methods here for my top DIY filament dry box projects.
Air-tight Plastic Container
You will need: a storage container with a lead, a metal rod, PTFE tubing, several 3D printed parts, hardware, and reusable silica or desiccant packs.
In under 30 minutes and for under $20, you can piece together a filament dry box that can house several filament spools to keep them away from dirt and moisture, while the gel packs work to remove any that’s seeped into the filament.
When constructed, place the filament inside the dry box and leave it for several days to allow the gel to remove moisture. You may need to periodically dry out the gel packs throughout this process.
3D Printed Filament Dry Box
You will need: about 750 g of filament to 3D print the container, reusable silica gel packs, PTFE tubing, bearings, nuts, screws, magnet, and, optionally, a hygrometer and battery.
Though there are plenty of designs out there, we recommend Mihai Design’s dry box project as it not only looks the part but has a slew of advanced features such as a feeder hole, hygrometer function, and a rewind knob. It relies on passive drying, so can take time to fully dry out filament.
Once it’s built, put the filament spool inside and let the silica absorb moisture over several days, drying out packs as needed.
Heated filament dry box (for faster drying)
You will need: a heating mat along with desiccant, a plastic container, 3D printed parts, threaded rod, nuts and screws, and temperature and humidity sensors.
Assembling the dry box is straightforward, taking no more than 30 minutes, with the only real potential hiccup being punching through a feeder hole to route filament directly to your printer.
Place the filament inside, turn on the heating mat, and leave it to dry for a day or two. You may need to dry or replace the desiccant during the drying process for quicker results.
How You Can Tell That Your Printing Material Has Absorbed Water
There are two easy methods that you can use before you print in order to determine whether your material has absorbed water. First, you can measure the diameter of the material itself.
When a polymer absorbs water it begins to increase in size. The more water it absorbs the bigger the size increase will be. If the diameter of your filament has increased by 10% or more, it is likely that absorbed water is the cause.
The other way to determine if your filament has absorbed water is to extrude a small amount of filament prior to printing. We’ve probably all had the experience of sitting next to a fire and listening to it pop and crackle. This occurs because there’s water in the wood that is turning to steam as a result of the heat.
When you extrude thermoplastic that has absorbed water, the same phenomenon occurs. The heat of the print end causes the water in the plastic to expand. As the plastic extrudes, you will hear hissing or popping that is a result of the steam escaping. You may also see bubbling.
Under-extrusion, stringing, and oozing are also common symptoms of wet filament. Because these are often caused by issues other than excessive moisture (typically poor retraction settings and worn components), crackling and popping is the best way to diagnose that your filament has absorbed too much water.
How To Store PLA Filament to Keep It Dry
Even a small amount of absorbed water will negatively affect the end result of your print jobs. The best way to avoid this problem is to prevent your print materials from coming into contact with water vapor in the first place.
The easiest way to do this is by storing your filament in an air-tight container that contains desiccants. A filament dry box works well, but these can be bulky.
When it comes to airtight, however, all containers are not created equally. When most people think of airtight, they think of plastic containers and bags. These are fine short-term solutions for the most part.
It’s better to store your materials in a plastic bag than to leave it unprotected in a drawer or box.
However, over time, plastic containers and bags are slightly water permeable. This means that the longer your printing materials sit in the plastic bag, the more water they are slowly absorbing. If you’re using clear bags or a clear box, UV light can also degrade your filament over time.
You might be thinking how long does 3D printer filament last? And if I shouldn’t be storing PLA filament in clear bags, what should I use?
Well, if you live in a humid climate, this process is accelerated. Eventually, even with the use of desiccants, you wind up with filament that is water-damaged.
A better solution is to use high-quality Mylar bags, or bags made of a similar material, to store your thermoplastics. Mylar, as you know, has a metal layer that is embedded between two layers of plastic.
This metal layer keeps any water vapor that permeates the plastic layer away from your printing materials. The result is dry materials that are ready to give you great results every time you print.

Why Water Damages Thermoplastics
All plastics are polymers or copolymers. Simply put, a polymer is a material that is made up of multiple long molecular chains of a single substance. For example, PVC or polyvinyl chloride consists of a bunch of vinyl chloride molecules.
A copolymer, on the other hand, is a material that is made up of several substances, each of which exists in long molecular chains. ABS is a copolymer and consists of strands of acrylonitrile, butadiene, and styrene molecules all bound together.
Polymers and copolymers are complex substances. They are designed to act in certain ways under specific conditions. For the most part, they fulfill this task admirably.
However, that task-specific complexity comes with a price. What can be built up, can also be broken down and nothing breaks certain polymers or copolymers down quicker than water.
If you looked at a polymer or copolymer under a strong microscope, you’d see that the long molecular strands that make them up are woven and braided together, almost like rough cordage or rope. This means that there is plenty of space between and around these strands.
Because of this, most polymers and copolymers are hygroscopic. This means that as air circulates around and through these strands, the spaces between them pick up and hold the molecular water that is naturally present in the air.
Some filament materials, like Nylon can be extremely sensitive to water – if they absorb just a little it can lead to problems when printing.

The more water vapor there is in the air, the more molecular water the copolymer can pick up or absorb.
These water molecules in the spaces between the strands not only increase the size of the material, they also tend to break down and alter the length of some of the molecular chains that comprise the polymer.
This process is caused by hydrolysis. The result is an extruded copolymer plastic that doesn’t perform to design specifications.
Can Filament Be Too Dry?
No, there’s no such thing as filament being too dry. When filament leaves the factory floor, it has nearly 0% water content, specifically because moisture causes so many issues during the printing process, and this is why spools are shipped in vacuum-sealed bags. The drying process is designed to bring filament back to this state.
Once all the moisture is removed, having the filament sit in an oven or specialized dryer won’t damage the filament as long as the temperature isn’t too high.
It is possible to overcook filament by drying at a temperature that exceeds the glass transition temperature. Doing this can cause the plastic to melt, effectively kickstarting the same process that happens inside a 3D printer’s hot end. In severe cases the wound filament can fuse to each other or the spool, making it unusable.