Key Takeaways
- Why sand PLA? Sanding PLA can make your prints smoother, sharper, and more precise. It can also improve the appearance and safety of your prints.
- How to sand PLA? Use a three-stage sanding process with different grits of sandpaper, from coarse to fine. Sand in a circular motion and wet the sandpaper to avoid heat damage.
- What to avoid when sanding PLA? Do not use a powered sander, as it can melt the PLA. Do not skip any stage of the sanding process, as it can affect the final result. Do not use poor quality PLA, as it can be harder to sand.
- How to polish PLA? Use a liquid metal polish and a soft cotton cloth to rub the surface of your print in small circles. Then buff it up with a clean cloth to get a shiny finish.
Sanding PLA is my personal favorite technique for smoothing PLA prints to a professional grade.
But, it has to be done the right way.
By sanding your PLA, you get:
- Less sharp edges: this is essential for anything wearable like cosplay costumes, or 3D printing toys or figurines kids will play with.
- Nicer aesthetic: smooth, layer-less prints look beautiful.
- Precision: for parts that require really tight tolerances, sanding can really help.
With my tested methods, I’ll show you how everything you need to know to polish PLA 3D prints to a shine you won’t believe was ever 3D printed.
Things to Note Before You Get Started
Do not use a powered sander when sanding PLA. The heat generated will deform the outer layers of your print.
It’s also worth noting that not all PLA is created equal. Poorer quality PLA isn’t as easy to sand as the best-quality PLA filaments. So if you are going to sand PLA, you’ll save yourself hassle printing with high-quality filament.
Also, the quality of your filament, and print settings, can make sanding PLA much easier. This is because the smoother the surface finish, the less defects and layer lines you’ll have to sand down. Here are some settings and factors to optimize for:
- Store your filament properly so it doesn’t get ‘wet’
- Use smaller layer heights where possible
- Slower print speed for better surface finish
- Ironing slicer settings for a smoother top layer
- Correct wall thickness
- If you designed the model yourself, optimize chord height
What you’ll need:
To start, you’re going to need a selection of fine grit sandpapers.
I suggest following a 3-stage sanding process, where you use three different grits of sandpaper to gradually achieve a very smooth surface finish for your 3D print. For this process, you’ll need sandpaper in the following grits:
- 80-100
- 150-200
- 300-400
Additionally, you can get sandpaper with even higher grits (e.g. 600, 800, 1000+) to achieve an even smoother surface finish. But, for 3D prints, 400-grit sandpaper will yield a surface finish that’s more than smooth enough for most people.
It’s best if you can use ‘wet & dry’ paper when sanding 3D prints (black grit as opposed to beige effect), especially with PLA. This is because if you’re sanding fast, heat can build up and affect the smooth surface you’re trying to achieve.
I also recommend wetting the glass paper to lubricate and cool the surface when you’re sanding PLA prints.
How to Sand PLA 3D Prints For the Best Results: Step-By-Step Guide
Now, let’s get into how you can sand your PLA 3D prints to give them a super smooth surface finish!
1. Prepare the 3D Print
The first step to sanding your PLA 3D print is to properly prepare the model.
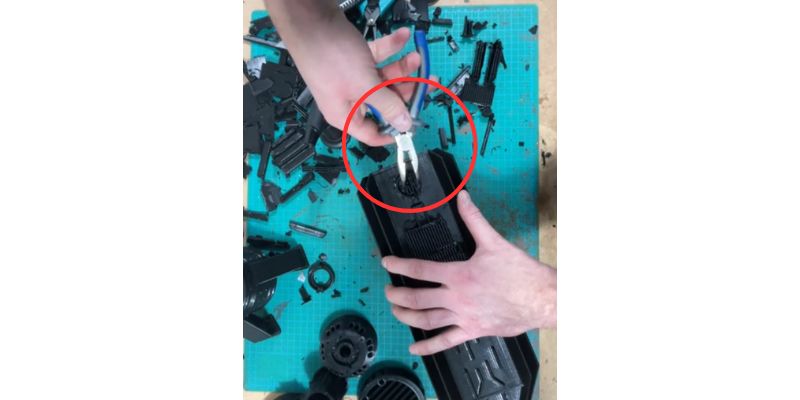
This involves removing any support structures or adhesion assistants, like a brim or raft. I like to use a pair of sharp pliers to remove these detachable structures but you can pop these features off with your hands too.
I also recommend lightly scrubbing the overhang areas of your model with a file if they required support structures. Doing so will better prepare these areas for sanding later.
2. Start with the coarsest sandpaper
Now that you’ve prepared your model for sanding, start with the coarsest sandpaper of around 80-100 grit. Sand the model until the entire surface is just as smooth as the piece of sandpaper.
To sand the model, scrub the sandpaper in a circular motion over the outer surface of your PLA 3D print. Make sure to maintain the same direction of rotation throughout the entire process, as this will yield a more consistent finish.
I recommend you keep a bowl of water right next to you and dip the sandpaper into the water before scrubbing. The water will act as a lubricant for the sandpaper and will help you sand your model faster.
I also suggest sanding your model one area or segment at a time as this will be easier than trying to sand the entire part evenly all at once.
3. Scale up the sandpaper grit
After you’ve completely sanded your PLA 3D print with the 80-100 sandpaper, move on to the next stage and sand your model with the 150-200-grit sandpaper.
Follow the same process described in the previous step, scrubbing the sandpaper in a circular pattern across the entire surface of the model until it matches the smoothness of the paper. You should notice that your model is significantly smoother than it was after the initial round of sanding.
Next, complete the third stage of the process, sanding your model with the 300-400-grit sandpaper.
It’s important to not rush any one of the three stages of this sanding process. That’s because not sanding your model enough in stage one will make sanding more difficult in stage two, and so on.
Also, make sure you also sand the smaller features on your 3D print. While these areas will be more difficult to sand because they are more fragile and intricate, if you don’t sand them, it will be noticeable later. You want the entire model to have the same level of smoothness.
4. Optional: Use higher-grit sandpaper
As I mentioned, you might want to sand your model with even higher-grit sandpaper if you want an even smoother surface finish. Of course, this is completely optional because 300-400-grit sandpaper typically provides a smooth-enough surface finish for painting and polishing.
But, if you want to continue sanding, simply repeat the process described in the previous two steps until you reach the desired level of smoothness. Just make sure you gradually increase the grit instead of making large leaps (e.g. 400 to 2000-grit). With each finer grit, you won’t need to spend as much time sanding that layer.

5. Start polishing the PLA print
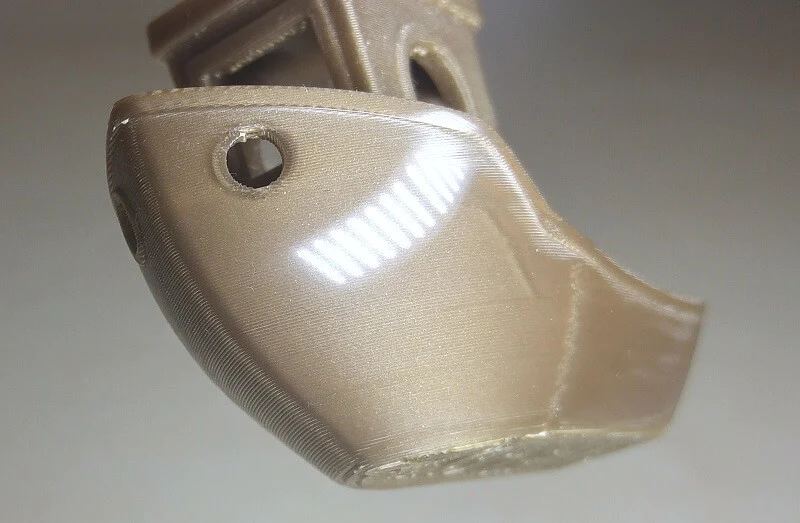
The final, and most fun part, is polishing the PLA print. Layering up those sandpaper increments doesn’t feel like you’ve made much progress, but once you polish up, the final finish looks great.
To smooth the PLA to a mirror finish, you’ll need a good liquid metal polish. Our favorite is the trusty Brasso.
The technique to polish your prints is simple. Get a soft cotton cloth, and apply a small amount of liquid polish. Then apply to your 3D print surface in small circles until all the polish is rubbed into the surface.
Once you’ve finished that, the surface should look reasonably shiny. The final stage is to buff up the surface into that mirrored, polished shine.
To do this, get an unused area of your cloth, without any polish on, and go back over the area you’ve just worked on to buff it up to a shine. And that’s it.
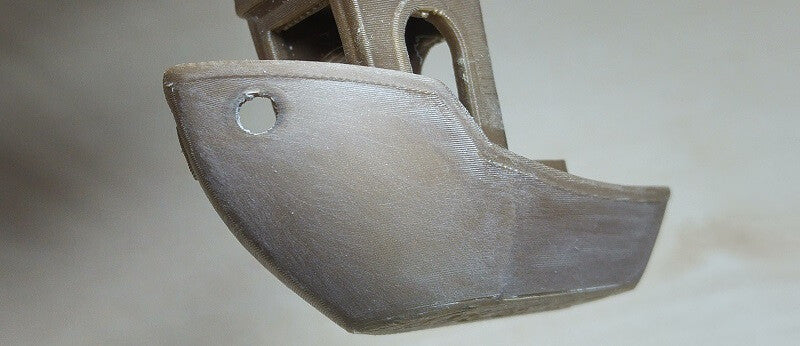
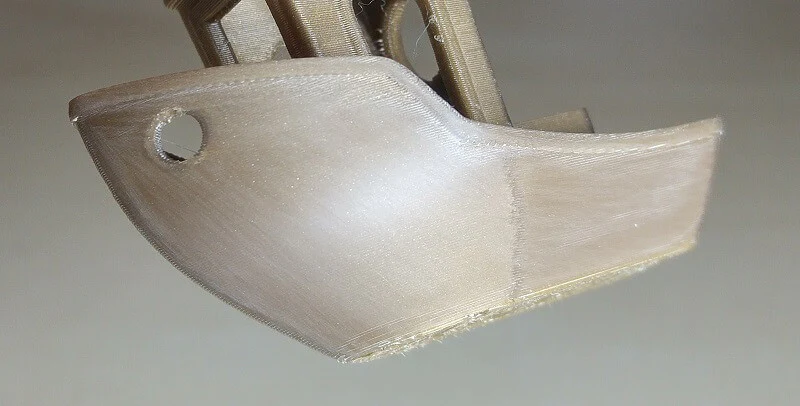
Here’s a before and after reminder on the technique:
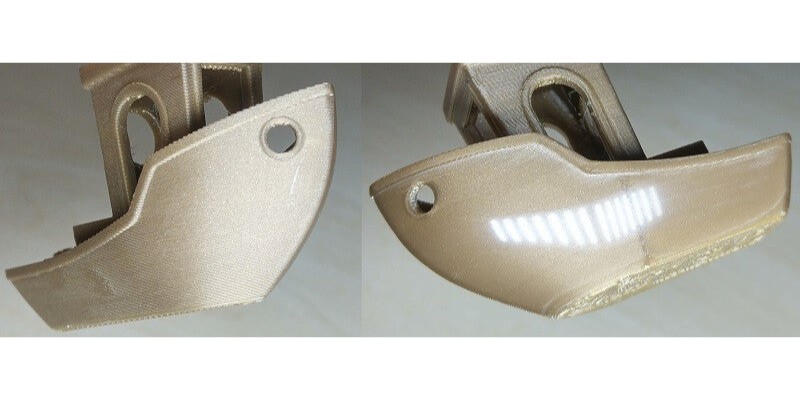
Now you should have a perfectly sanded PLA with a fantastic finish, and if you polished it, it’ll look even better! I hope you found this guide on how to smooth and sand PLA 3D prints useful.
We also have a comprehensive guide to other professional grade 3D printing finishing techniques here, including PLA painting techniques.