Key Takeaways
- Safety Precautions: Wear gloves, goggles, and a mask. Work in a ventilated area. Avoid contact with skin and eyes.
- Washing Process: Remove the print from the build plate. Wash it in a container of Isopropyl alcohol (IPA) or water. Remove supports and rinse again.
- Curing Process: Expose the print to UV light for 10-15 minutes or until dry and hard. Use a wash and cure station, a DIY setup, or sunlight.
- Disposal Process: Cure any leftover resin and tools before throwing them away. Do not pour liquid resin down the drain or into the environment.
Properly cleaning and curing your resin prints transforms a fragile, viscous, potential toxic and slightly hazy blob of semi-cured resin into a structurally sound and highly detailed model. It’s an unavoidable part of printing with a resin SLA printer, and one you’ll want to get right to save time and hassle in the long run.
It’s a messy business and one that can feel daunting for first timers, but with the right tools, a strict adherence to safety and best practices, and a decent understanding of the process, it’s a fairly straightforward process. After a few wash and cures, it will soon feel like second nature.
As the title implies, in this guide we’ll walk you through how to correctly wash and cure your resin 3D prints so that they look their best and are ready to be handled.
- Key Takeaways
- Do I Need to Cure My Resin Prints?
- How to Safely Handle Resin 3D Prints
- Equipment Needed to Clean and Cure Prints
- How to Clean and Cure Prints
- Alternatives to Isopropyl Alcohol for Washing and Curing Prints
- Ultrasonic Cleaners vs Standard Resin Cleaners
- How to Dispose of Leftover Resin Safely
- How Long Should I Wash and Cure My Resin Prints?
- Can You Over Cure Prints?
- Can You Cure Resin Prints Without Washing Them?
Do I Need to Cure My Resin Prints?
Yes, resin prints must be washed and cured for several reasons. First and foremost, non UV-cured resin is toxic to both humans and the environment. When cured, SLA resin becomes safe to handle as you would a typical FDM filament like PLA, allowing you to use minis, for example, for war gaming sessions or functional parts for various projects.

Secondly, curing models brings out all the features and details that are present after printing but not quite as sharp and distinct. Curing resin prints also smoothes up surfaces and gives models that sleek sheen we expect from SLA prints. It’s the final touch up needed to fully complete the polymerization process and the work undertaken by the printer to bring a model to life.
Curing also turns a model from malleable and fragile, to hard and reasonably durable – cementing its material properties and ensuring it won’t cave in or lose its shape when handled. Fresh off the bed, the semi-cured resin is soft and it doesn’t take much to snap off overhangs, scratch surfaces, or otherwise blemish surfaces.
How to Safely Handle Resin 3D Prints
Before we dive into how to wash and cure resin 3D prints, it’s critical to take the right precautions and understand potential hazards. Liquid resin and processing chemicals are toxic and need to be handled properly because contact with skin, eyes, and so on can cause nasty irritations.
To avoid problems, nitrile gloves should be worn at all times as well as safety goggles/glasses. Next, we recommend having a clearly defined and organized workspace that sets up and ready before you start post-processing. For example, having a paper towel-lined tray where you scrape off the bed from the bed and snip off supports, then a tub filled with Isopropyl alcohol for cleaning the model, possibly another larger one to plunge the bed into to remove most of the residual liquid resin, and so on.

Have all the tools available and within reach, and a system in place should spills happen – properly protected work surfaces, easily accessible paper towels, and a sink with soap to clean off any resin should it get on your skin.
Ventilation is also key. Aside from the pungent smell that wafts off liquid resin and semi-cured resin, you’ll also be using chemicals like Isopropyl alcohol that let off toxic fumes. This can be setting up your post-processing station near an open window, wearing a filtered face mask, or installing a venting system that moves fumes outside.
Equipment Needed to Clean and Cure Prints

- Nitrile Gloves – To protect your hands when handling prints during the entire wash and cure process.
- Safety Goggles/Glasses – As you’re dealing with harmful liquids, there’s the possibility of stray droplets splashing up or pieces of hard resin hurtling towards the eyes when sniping off supports, so always err on the side of caution and wear protective eyewear.
- Isopropyl Alcohol – Higher percentages and concentrations are better as weak alcohol won’t work as well to remove excess resin stuck to the print.
- Paper Towels – It’s better to have more than not enough, so we recommend having a couple rolls at your disposal for the wash and cure process.
- Large Tray – Line it with paper towels and use it as a workspace to remove the print from the build plate, to try prints after washing, remove supports, and so on. The tray will keep any spills and drips of liquid resin contained, making clean up easier.
- Plastic Containers – We recommend two. Fill them with Isopropyl Alcohol. One for washing models and the other to wash the build plate (much easier than doing it entirely by hand with paper towel). Ensure the second is rectangular and is large enough to dunk the plate. We also recommend air tight containers so that you can seal them and reuse the alcohol for your next print session. You’ll likely get a few washes out of the alcohol before it’s too contaminated with uncured resin to be useful.
- Scraper – or a sharp knife to remove prints from the build surface without damaging features and details. We suggest avoiding plastic scrapers as these aren’t generally sharp enough to get under the model and remove it cleanly.
Above is what we consider the bare essentials to complete to clean and cure prints. It’s possible to expand the list with silicone mats, flush cutters, brushes, and more.
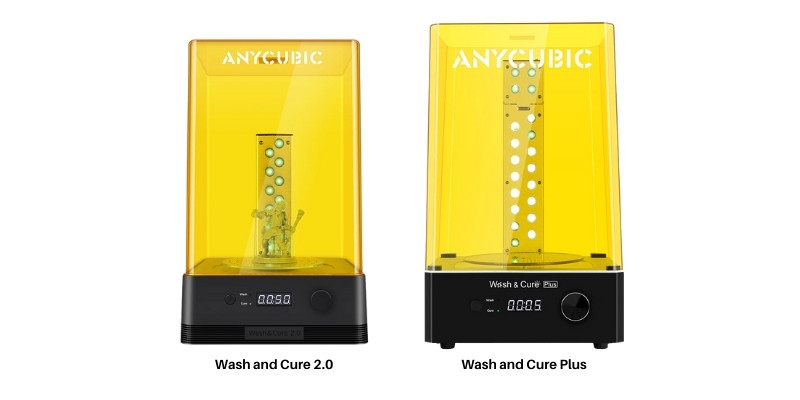
Another option is to buy a wash and cure station like the Anycubic Wash & Cure Plus, Creality UW-02, and Elegoo Mercury X, which largely automate the cleaning process but comes with the price tag to match. You can also consider building a DIY cure station or buying a low-cost UV curing setup.
How to Clean and Cure Prints

1. Preparation
- Make sure your work area is set up with a clear workflow clear of any obstructions.
- Top up your plastic containers/tubs/jugs with IPA.
- Lay down paper towels around the base of your printer and inside/underneath your work tray to catch any accidental spills.
- Slip on a pair of nitrile gloves and a pair of safety goggles/glasses.
- Don’t hesitate to take out a fresh pair of gloves between steps – this helps avoid getting resin on the outside of containers, tool handles, bottles, and so on.
2. Remove the Print From the Build Plate
Unscrew the build plate from the printer arm and gently angle it 45° and let any excess uncured resin drip into the vat.
Carefully transfer the build plate to your paper towel-lined work tray and use a scraper/knife to gently ease off and remove the model.
Dunk the build plate into one of your containers.
3. Rinse the Resin Model
Manual Rinsing
Place the model in the other container of IPA. Gently move the part around to remove as much uncured liquid resin as you can. There’s no set time frame for this – longer rinses tend to remove more resin than shorter ones.
We recommend sealing the container to avoid any accidental droplets flying out. As long as you have nitrile gloves on, don’t hesitate to get your hand in there, but be gentle to avoid spills.
Wash and Cure Machine
Here is where having a dedicated wash and cure station makes life easier. With a wash and cure station, all you need to do is place the model in the provided container (they often come with a basket for easy removal as well) and dial in a wash cycle.
The machine will automatically create a vortex with an agitator to remove the uncured resin from the model. In general, the steps include adding IPA to the container, dunking in the print, replacing the protective lid, and then triggering the cleaning cycle – check manufacturer steps and recommendations for your particular model.
Ultrasonic Cleaner
As an alternative to a wash and cure station, ultrasonic cleaners are sometimes used to remove uncured resin. These use ultrasonic energy waves to agitate water and remove uncured resin from parts.
These are generally used for professional applications like jewelry, watches, and glasses, and are highly effective, with your models completely free of any residual liquid resin after passing through the cleaner. If using one, pay careful attention to what chemicals are supported, especially if there are restrictions on flammable liquids like IPA.
If you’re using water-washable resin (a type of resin that reacts to water in the same way as traditional resin does to IPA), the process is much the same, except you swap out IPA for water. You’ll be exposed to less hazardous chemicals, making the cleaning process less daunting for beginners, but the tradeoff is that finished prints don’t offer the same durability or strength as those made from traditional SLA printer resin.
4. Remove Supports
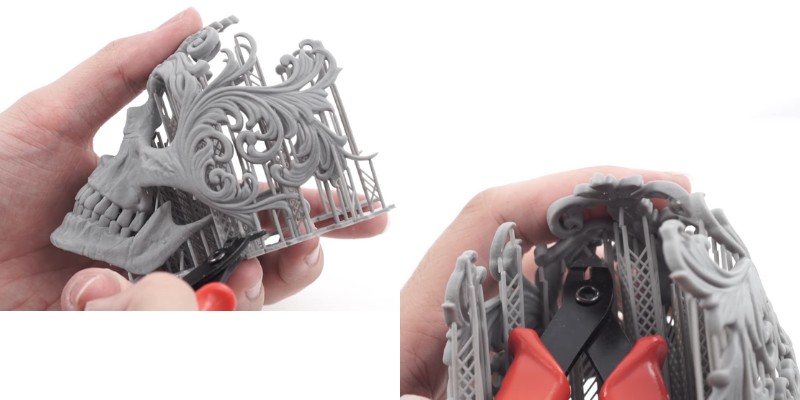
After cleaning the print, transfer it back to your tray. Use flush cutters to gently remove any support structures. In a lot of cases, you can also use your hands to generally snap off supports quite easily.
If you’re looking for the best possible finish and want to avoid snags and other blemishes on important details caused when removing supports, cutters are a better option as they allow you to be much more precise. The trick is to cut in a way that the supports leave a clean cut that’s ideally flush with the model’s surface.
Small bumps are common, so don’t worry too much about these as they can be removed later on with some targeted sanding and smoothing, or concealed by cleverly using paint.
You can also remove supports after curing a model, but in a semi-cured state, they are generally easier to remove and leave much less noticeable marks on features and details.
When removing supports, we highly recommend wearing goggles or other protective eyewear, as it’s very common for nobs of plastic to snap and fly off, possibly hitting you in the eye.
5. Second Clean
Though this step is mandatory, we find that a second clean helps remove residual uncured resin and helps remove build-ups in areas where the supports once were.

The process is the same – dunk the print into a tub of IPA and gently swish it around. At this point, we also like to use a toothbrush or bristled brush to ease off any remaining resin, especially around features and details. You may even want to use a third tub of IPA, reserved for second washes.
6. Dry the Print
With the print now free of uncured liquid resin, set it aside in your tray or on a fresh piece of paper towel and let it air dry to remove the IPA from its surface.
IPA evaporates quickly, so the print should be dry within a few minutes. You can also dab off IPA with a paper towel to speed up the process.
7. Cure the Print
To complete the washing and curing process, you’ll need to expose the model to UV light to cure it completely and bring out the sharp details and features.
Here are some of your options:
Sunlight Curing
The cheapest way to cure a print is to use UV rays from the sun. Simply expose your print to direct sunlight for anywhere from 4 to 8 hours (depending on if it’s a sunny day at the height of summer, or an overcast day deep into winter).
Remember to rotate it at regular intervals so that the sun reaches all parts of the model. For smaller prints, especially miniatures, you can also place them in a glass of water. The water will refract the UV light across the full surface of the print, speeding up the curing process.

You’ll know the curing process is complete when the print is no longer sticky and looks dry, with a discernible sharpness to feature-heavy areas and angles.
It goes without saying that using solar power means you’re at the mercy of the weather and sun curing takes a lot longer than store bought or DIY UV curing options.
Using a Wash and Cure Station
While solar curing is a great stop gap and a thrifty option, nothing beats a dedicated store-bought wash and cure station from a reputable SLA printer manufacturer. These are cleaner and tend to keep mess contained, while also removing the risk of chemicals flying out and potentially harming you.
Though you can buy dedicated curing stations, these generally come in 2-in-1 machines with a washing function built in. The instructions for curing depend on the specific wash and cure model, but in general the process involves fixing in the provided turntable, placing the model on the turntable inside the machine, replacing the UV-protective lid, dialing in the cure cycle length, then firing it off to cure the print.
Cure times depend on what resin you are using, so stick to manufacturer recommendations to avoid under or over curing your prints. In general, you’re looking at anywhere from 10 to 15 minutes for most models. These cure times are carefully dialed for specific SLA resins, so stick to them for the best results.
We recommend either the Anycubic Wash & Cure Plus, or the Elegoo Mercury X Bundle Washing and Curing Machine.
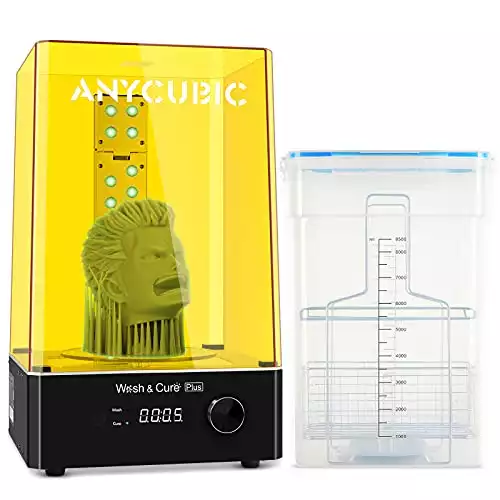
Largest 2-in-1 Wash & Cure Machine for the Mono X Large LCD SLA 3D printer models, With strip of curing light, Rotating curing platform, and A washing size of 192 x 120 x 290mm

Bundle with separate Washing Station and Curing Station for large resin 3D prints,
Compatible with the Elegoo Saturn and Mars MSLA 3D Printers
Low-Cost Cure Stations

Wash and cure stations with all the trimmings can be quite expensive, though prices are steadily plummeting thanks to more and more competition. As an alternative for makers on a tighter budget, we’re seeing more and more low-cost cure station alternatives on the market.
For example, eSun eCure Lite provides a collapsible silicone tent and a USB-powered UV light source – everything you need to cure your prints. You can dial in cure times as you would with a proper wash and cure station and have the added benefit of being able to fold down the tent for easy storage. Many of these also come with a small, battery-powered/sunlight powered turntable and reflective base, which ensure all parts of the print are cured uniformly.
The process is the same. Place the model on the turntable, put the tent over the model, place the UV light emitter into the provided slot at the top of the tent, dial in your cure cycle length, and start the curing process. For cure times, stick to manufacturer recommendations with 10-15 minutes per part a solid starting point for most SLA resins.
We have also written an article on the best UV light sources for curing resin prints.
DIY Cure Station
Last, but not least you have the option of piecing together your own DIY cure station for much less than the commercial alternatives. There are numerous options out there with no end of clever projects making use of common household items and strips of UV lights, but we recommend working with items you may already have.

A cardboard box lined with aluminum foil and UV lights is a popular option, as is using an empty paint can with a reflective surface. The shell or container doesn’t matter so much as long as you buy good quality UV light strips.
As for cure times, there’s no cut and dry cycle length as so many variables can affect UV exposure with a DIY station. In general, stick to 15 minutes, then adjust based on whether the print is still sticky and uncured after the first cycle.
Alternatives to Isopropyl Alcohol for Washing and Curing Prints
Though IPA is by far the most efficient option for cleaning prints prior to curing, there are alternatives out there. There are a few reasons you may want to consider an Isopropyl alcohol alternative, namely IPA can command quite a high price per liter, is often subject to availability issues, and can be quite abrasive and harmful if not handled correctly.
Popular alternatives include acetone, denatured alcohol, tripropylene glycol monomethyl ether, and Mean Green Super Strength Cleaner and Degreaser.
Mean Green is arguably the best alternative, due to its low cost, minimal odor, and the fact it has resin cleaning capabilities almost on par with IPA. The quality of the models is more or less identical for a fraction of the price of IPA. It’s also less harmful and safer to use.

Concentrated Formula, 96 FL Oz (2.84 L). Works on tough grease & grime.
Ultrasonic Cleaners vs Standard Resin Cleaners
If you’re looking for the most thorough clean that will leave you prints spotless and free of any residual liquid resin, ultrasonic cleaners are largely uncontested.

They remove the need for multiple washes or manual brushing off small traces using IPA and a brush, and require very little effort. Standard resin cleaners work well (considerably better than hand washing), but aren’t quite as effective as ultrasonic cleaners.
The downside to ultrasonic baths is their price, but also they only wash, not sure. This adds to the cost unless you happen to live in a region with strong sunlight year round.
Furthermore, ultrasonic baths are serious equipment and need to be handled correctly. Using IPA in a bath is a major fire hazard and aerosolized alcohol can be extremely harmful to the lungs if inhaled.
How to Dispose of Leftover Resin Safely
To dispose of leftover resin safely, cure and harden it before throwing it in the trash. This includes all and any tools/cleaning items that have come into contact with IPA – paper towels soaked in resin, gloves, and IPA laced with resin.
You can do this by curing them under UV light using a wash and cure station or exposing them to sunlight, though be careful of doing this in a manner that local animals and, even humans, can’t touch the resin while it’s curing. Transparent plastic bags left out in direct sunlight for an afternoon are a good course of action, simply make sure to regularly turn over the bag so that the rays reach all the contents.

When all the resin is cured you can dispose of it as you would any other form of household trash or filament like PLA. As for contaminated IPA, set the containers outside with the lid off to allow the alcohol to evaporate, then expose the remaining resin to sun or UV light either outside or in a curing station.
Remember to be responsible when using liquid resin – you have a responsibility to dispose of it properly. Never dispose of liquid resin into the environment or pour it down the drain as it can be harmful to plants, animals, and cause issues if it gets into your local sewage system.
How Long Should I Wash and Cure My Resin Prints?
How long to cure resin prints depends on the resin brand, but generally most hobbyist resins require 10-15 minutes of curing to fully harden and take on its final material properties within wash and cure stations.
Though, you should check the manufacturer recommendations and stick to these for the best results.
For sunlight curing, expect to leave a model out for between 4 and 8 hours depending on the time of year and intensity of the sunlight to fully cure a model.
Can You Over Cure Prints?
Yes, prints can be over-cured if left exposed to a UV light source for prolonged periods of time. This issue is especially prevalent when using a dedicated wash and cure station with a powerful UV light source. Over cured parts tend to be more brittle, fragile, and susceptible to breakage than perfectly cured parts.

But, don’t worry too much if your print stays exposed for a few minutes more than necessary, it takes much more to over-cure a print. You’d need to leave it exposed to UV light for hours to cause damage, and if the parts are used for decorative applications, you are unlikely to notice the effects of over-curing at all.
Can You Cure Resin Prints Without Washing Them?
Technically, yes, you can cure resin prints without washing them. However, doing so will cure the residual liquid resin left on the surface of the print, and leave blobs, blemishes, and unsightly marks that will sour the detail and features of a print.
To avoid this, always clean your prints before curing them by either cleaning them in a tub of Isopropyl alcohol manually or using a dedicated store-bought wash and cure station or ultrasonic cleaner. These devices are designed to thoroughly and effectively remove any residual liquid resin, leaving your print clean and smooth, ready for the curing process.
Related articles:
- The Best Glues To Use For Resin Models & 3D Prints
- Top UV Lights Products for Curing Resin (DIY, Curing Stations & Flashlights)
- The Best Water-Washable Resins Best Brands & 3D Printing Guide
- How to Finish Your 3D Prints – Ultimate Guide
- Top Best Resin 3D Slicers This Year For (SLA/DLP/LCD)
- Cool and Quirky Resin 3D Prints To Improve Your Resin Printing
- How to Fix Resin Prints Sticking To FEP Instead of Build Plate