
Over the past week, I’ve got to know the Qidi Tech X-Plus 3 quite well, rigorously testing the machine’s features, from its built-in enclosure to the auto bed leveling sensor. And, all in all, I’m very impressed!
The Qidi Tech X-Plus 3 is an excellent choice for makers interested in rapid prototyping or for advanced filaments like ABS or PC.
The X-Plus 3 has a very professional design, and its features have been optimized to handle higher-grade filament materials with incredible speed.
Overall, I loved the Qidi Tech X-Plus 3, and for under $800, I’d say this printer is a bargain given how much print space and professional-grade features it offers. Keep reading to learn more about the Qidi Tech X-Plus 3!
The Qidi Tech X-Plus 3 is an excellent choice for makers interested in rapid prototyping or who want to try out advanced filament materials like ABS or PC.
Moreover, the X-Plus 3 has a very professional design, and its features have been optimized to handle higher-grade filament materials with incredible speed.
Of course, no printer is without its flaws, and the X-Plus 3 has its fair share of issues. A few problems I ran into during my intensive 50-hour testing process included firmware bugs, temperature inconsistencies, and an oddly placed door hinge. But we’ll get to that later.
Qidi Tech X-Plus 3 Review: Summary
Here’s a quick rundown of the Qidi Tech X-Plus, divided into pros and cons.
Pros
- Can handle extreme print speeds (thanks to Klipper)
- Clean look with impressive cable management
- Built-in enclosure that doesn’t obstruct visibility (multiple access points with an LED light)
- Large 280 x 280 x 270 mm build volume
- Reliable automatic bed leveling
- Very easy to load filament into the extruder
- Compact direct drive printhead
Cons
- Swapping hot ends isn’t very simple
- Touchscreen LCD is difficult to use
- Chunky user interface
- Extremely limited internet capabilities
- Noticeably loud when printing at high speeds
Assembly & Setup
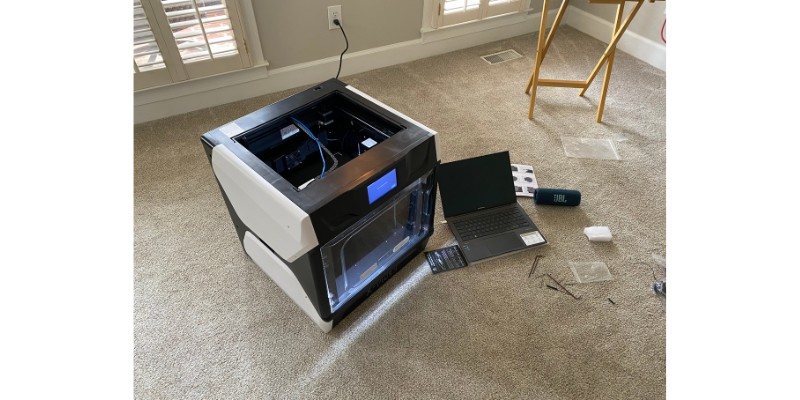
The Qidi Tech X-Plus 3 ships in a massive box, and, from personal experience, it’s quite a carry from your front door to your basement printing room.
But, after you move it, setting up the machine is fairly simple.


Similar to many budget machines (like the Creality Ender 3), the Qidi Tech X-Plus 3 comes almost entirely in one piece, making assembly a breeze.
The only parts not already attached to the printer are the spool holder, filament dryer, and the top enclosure piece. Once you put those pieces into place, all that’s left is cutting a few zip-ties and removing a few pieces of packing foam.
But, before you turn the printer on, check that the voltages of the printer’s power supply units (PSUs) match your country’s standard.
For the United States, this is 115V (or 110V). Unfortunately, the placement of the PSUs on the bottom of the printer is pretty poor, so checking and changing the voltage switch is tricky and might require your phone flashlight.

After that, plug in that power connector and flip the switch to turn on the printer! After a few seconds, the LCD interface will guide you through the remaining steps of the setup process, including removing four small screws and removing one hidden piece of foam.
Overall, the assembly is pretty easy and shouldn’t take more than an hour. And, if you’ve ever set up a 3D printer before, the total setup time will easily be under 30 minutes.
Testing & Results
No printer review is complete without at least a few test prints. And, boy, did I print more than a few on the Qidi Tech X-Plus 3! I started with a 3DBenchy but got carried away printing Snorlax after Snorlax before I moved on to a few more complicated prints.
In the sections below, I’ll go over each of the test prints and provide some pictures. I’ll also make sure to link to the exact model if you’re interested in printing one as well.
Test #1: 3DBenchy
The first print I made on the Qidi Tech X-Plus 3 was the standard 3DBenchy. I didn’t even have to slice the model because a pre-sliced G-code file was included in the printer’s USB drive, and tuned around the included filament spool.
And, to no surprise, the model came out near-perfect, with impressive detail and precision.
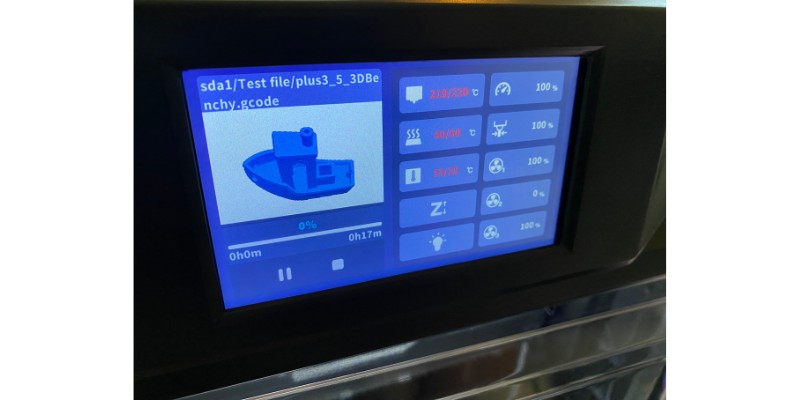


But the most surprising part of the print wasn’t its quality, but its print time.
While my other printers take a little over an hour to produce a decent-quality 3DBenchy, the X-Plus 3 took just 17 minutes! And, if that’s not impressive, then I don’t know what is!

This level of speed is unlike any other printer I’ve found and is undoubtedly a result of the machine’s use of Klipper along with its CoreXY motion system.
Test #2: Low-Poly Snorlax
My next model to test was this low-poly Snorlax, which I love to use for testing large layer heights. Unlike the previous model, I manually sliced this model in Qidi Slicer, and I made sure to keep all of the default settings, except for the layer height which I increased to 0.25 mm.

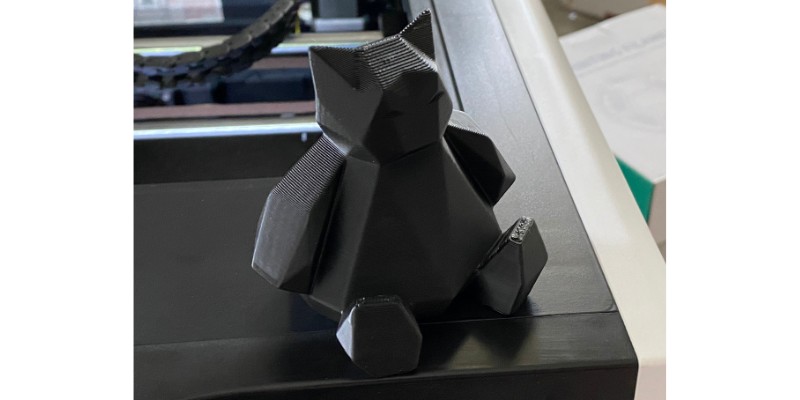
The results were better than I could’ve imagined. The large layer height looks immaculate on the model, and each layer is perfectly extruded.
Plus, the model took only 48 minutes to print, while being significantly larger than the 3DBenchy.
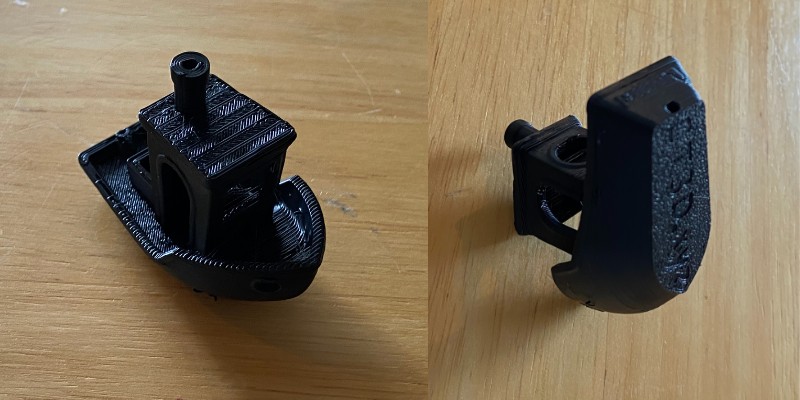
Test #3: Knurled Screw Bottle
My third test print was this two-piece knurled screw bottle. While I tested a large layer height with the previous model, I used a smaller 0.16-mm layer height to print this model. And it worked perfectly!

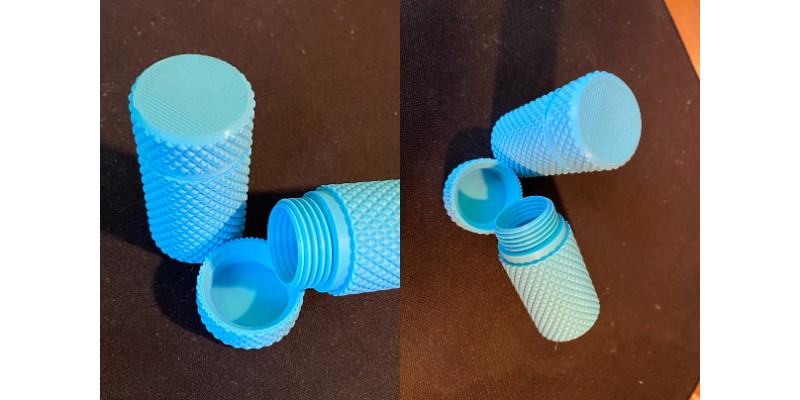
The model looked spectacular right off the print bed, and the screw threads worked without any complications. I loved it so much that I actually printed it again!
And, similar to the previous models, the print was also very fast, taking less than 2 hours for both pieces.
Test #4: Foldable Book Stand
My fourth and final test print was this large foldable book stand. While the X-Plus 3 took on the three previous models with ease, it definitely stumbled with this one. Moreover, the bookstand showed a lot of under-extrusion and layer separations, along with a plethora of other print quality issues like ringing and stringing.


But the silver lining was that all of the print-in-place mechanical features on the model functioned properly.

And, to be fair, I can’t blame the printer entirely. Not only was the model large and complex, but I was using a new filament spool that I had never tested before.
Design & Features
I had the chance to give the Qidi Tech X-Plus 3 a proper test drive and tried out all of its features. Here are my findings:
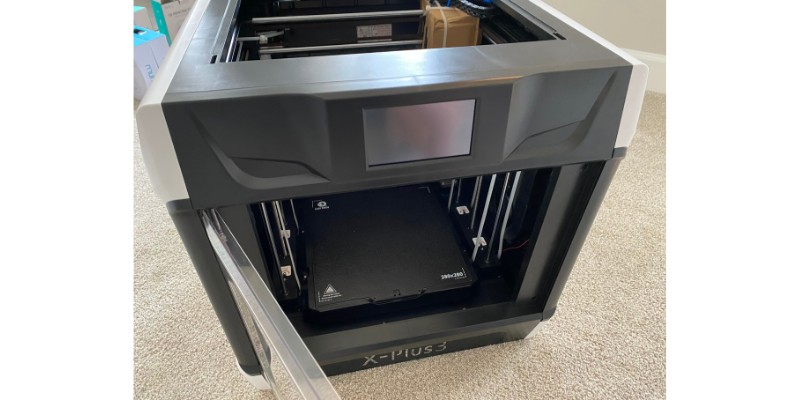
Frame
The Qidi Tech X-Plus 3 follows an inverse Cartesian frame style and utilizes a CoreXY motion system. In simpler terms, the printhead assembly (containing the nozzle) moves fluidly across the X/Y plane using a series of interconnected belts, while the print bed moves up and down across the Z-axis.
This more complex motion system helps the printer achieve more accurate printhead positioning and faster print speeds, leading to higher-quality prints.
It’s also worth noting that the Qidi Tech X-Plus 3 has 280 x 280 x 270 mm of usable print space. This is noticeably more volume than most consumer-grade printers, so you’ll be able to print some larger items like cosplay props and large household accessories.
Enclosure
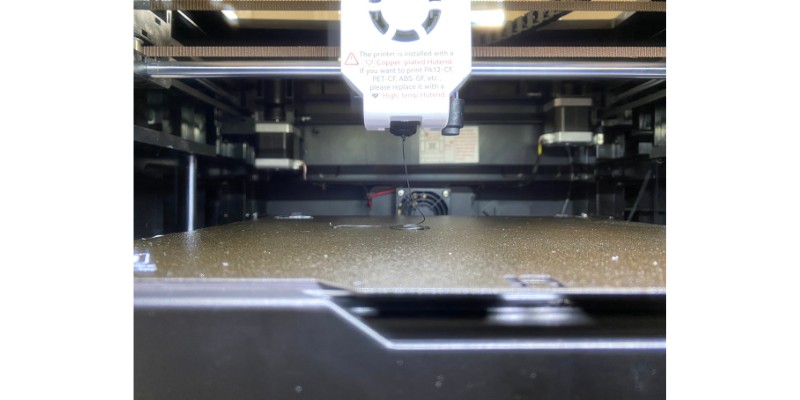
One of the most notable features of the Qidi Tech X-Plus 3 is its built-in enclosure. The enclosure is made up of transparent acrylic panels that go around the sides and top of the printer. The panels are transparent so you can look into the print space without letting out the heat.

On this note, the main purpose of the enclosure is to trap heat around the print space to allow you to print higher-temperature filament materials like ABS, ASA, and PC. Because of this, the Qidi Tech X-Plus 3 is a terrific enclosed 3D printer for anyone looking to print functional and mechanical-grade models.
Additionally, you can access the inside of the printer to remove models by either opening the hinged door or removing the top section of the enclosure.
Klipper Firmware
One of the most modern elements of the Qidi Tech X-Plus 3 is its use of Klipper firmware. For reference, Klipper is a special type of firmware that uses both a motherboard and a computer (rather than solely a motherboard) to process G-code more efficiently. And when the G-code is processed faster, the 3D printer can print the model faster.
How fast? Well, without any changes to the settings, the Qidi Tech X-Plus 3 completed a 3DBenchy in just 17 minutes. For comparison, many of my other printers (such as my Ender 3) take between 1 and 2 hours to print a 3DBenchy.
So, if speed is your concern, then you won’t have to worry about the X-Plus 3.
Auto Bed Leveling
Auto bed leveling, or ABL for short, is one of the most increasingly popular features for budget 3D printers. And Qidi did an excellent job implementing ABL technology into the X-Plus 3.
The printer has a very precise and accurate ABL sensor, mounted right next to the nozzle to take measurements. You can run a bed leveling sequence from the printer’s LCD, and you even have the option to automatically run one before every print job.
Personally, I don’t do this because each ABL sequence takes a few minutes, but you might be interested in the feature if you hate first-layer issues.

Additionally, you can also control the Z-offset in the printer’s LCD and all changes are made in real-time, so you can adjust the offset both before and during a print job to achieve the best first-layer results.
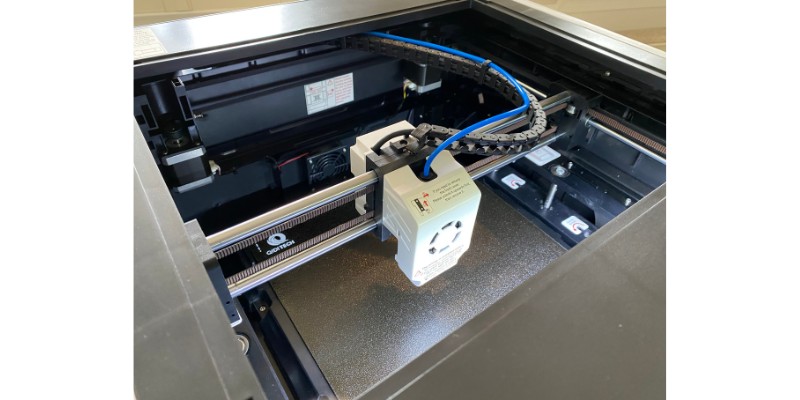
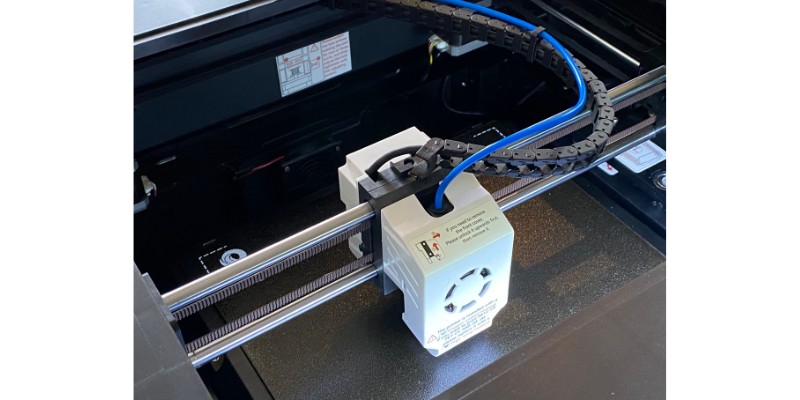
Electronics
The Qidi Tech X-Plus 3 has a plethora of note-worthy electronic features, so I thought it best to include them all under one section.
First off, the X-Plus 3 features a touchscreen, full-color LCD with a custom graphical user interface (GUI). Touchscreen LCDs are nothing new, and many budget printers have them nowadays, so I was a bit saddened when the LCD wouldn’t always respond to my fingers.
Additionally, the GUI had some lags and wasn’t nearly as well-developed as other options on the market, like Creality’s GUI for their Ender 3 S1 Pro machines.

Secondly, the printer has a filament runout sensor, which automatically tells the machine to stop printing when filament isn’t in the extruder. This is especially helpful for users printing large items, like cosplay armor sets or furniture pieces, because you don’t have to finish a print off of just one spool.
But what I loved even more than the runout sensor was the powerful 32-bit motherboard. Today, 32-bit boards are practically an industry standard, but the one inside the X-Plus 3 goes above and beyond, with 8 GB of onboard storage, 1 GB of RAM, and a speedy Cortex-A53 processor.
If you’re not caught up with the computer lingo this means the printer can process G-code very fast and handle large firmware packages.
Sadly, though, all of this motherboard power didn’t come with much internet capabilities. Furthermore, when I connected the printer to my home Wi-Fi (Ethernet port also available) and went to the proper URL on my laptop, I saw only a loading screen. Of course, this could be an issue with my internet provider, so don’t lose all your hope.

High-Temperature Hot End
On top of an enclosure, you’ll need a high-temperature hot end to print many high-grade filament materials, like ABS, PC, and Nylon.
Luckily, the X-Plus 3 comes with an extra hot end, specifically designed to handle higher temperatures for extended periods of time. This high-temperature hot end can reach as high as 350°C, which is more than enough for basically any filament material.
Changing the hot ends is also pretty easy. Though I couldn’t find the instructions for swapping the hot end, the process took me no more than 5-10 minutes. You just have to remove a few screws around the fan duct, slide out the original hot end assembly, and put in the new one!
Spring Steel Build Plate
Next, the Qidi Tech X-Plus 3 has a spring steel build plate, which is becoming more common these days with consumer-grade printers.
For reference, spring steel is a flexible and magnetic material, so popping off prints is super easy because all you have to do is bend the build plate until the attached part releases.
The surface of the spring steel build plate is textured and rough. This was likely done to ensure adequate bed adhesion for higher-grade filament materials, like ABS and PC, which tend to have more bed adhesion issues.
And, before I stop talking about the bed, it’s worth pointing out that the X-Plus 3 has a small ledge near the back of the bed area. This is meant to guide the magnetic build plate into place so that it’s properly lined up with the frame of the printer. While this feature is very minuscule, it adds to the printer’s usability.
Software: Qidi Slicer
While buying a printer should be about the machine itself, it’s also important to review the software that you’ll have to use with the printer. For the Qidi Tech X-Plus 3, you have to use a special 3D slicer software called Qidi Slicer.
Qidi Slicer is a fork (altered version) of Slic3r, one of the original open-source 3D slicer programs. As a fork, most of Qidi Slicer’s functionality is the same as Slic3r, and you can find almost all of the same slicer settings and parameters.
However, there are a few minor changes, such as native compatibility for the Qidi Tech X-Plus 3 and an adjusted user interface.

I had no issue using Qidi Slicer and was able to adjust the available settings to fine-tune the quality of the prints. The only problem I have with Qidi Slicer is that it’s not mainstream nor fully open-source. Because of this, the latest innovations in 3D slicing don’t usually reach Qidi Slicer for at least a few months.
And, if you want to use an alternative 3D slicer software, like Slic3r or Cura, you’ll have to manually configure the slicer for the printer. That’s because no other slicer besides Qidi Slicer natively supports the X-Plus 3, so there won’t be any default slicer profile for the machine in other programs.
Final Thoughts on the Qidi Tech X-Plus 3
Overall, the Qidi Tech X-Plus 3 was a pleasure to review. The machine is equipped with many professional-level features, like a built-in enclosure and a swappable high-temperature hot end, that make it capable of printing a wide range of filament materials.
Because of this, the X-Plus 3 is a great option for advanced hobbyists looking to print with high-temperature materials.
The Qidi Tech X-Plus 3 is an excellent choice for makers interested in rapid prototyping or who want to try out advanced filament materials like ABS or PC.
Moreover, the X-Plus 3 has a very professional design, and its features have been optimized to handle higher-grade filament materials with incredible speed.
Additionally, the printer is insanely speedy. The X-Plus 3’s Klipper-enabled firmware and CoreXY motion system make it capable of pumping out small 3D prints in under 20 minutes, which is extremely impressive.
While the X-Plus 3 is only natively compatible with the rather lacking Qidi Slicer software, this shouldn’t be too large of an inconvenience. Plus, the printer boasts many other benefits that will make it worth your while, like auto bed leveling, a spring steel build plate, and an easy-to-use LCD.
So, if you want a printer that can help you rapidly prototype for whatever project you’re working on, look no further than the Qidi Tech X-Plus 3!


