
3D scanners can get really expensive. We’d know – we’ve tested and researched them in creating our ranking of the best 3D scanners . However, if you’re willing to be a little more thrifty you can save a lot of money building your own DIY 3D scanner — and have a cheap 3D scanner you can feel proud of building yourself!
DIY projects are underrated as accurate and precise 3D scanners. In fact, there are some very accurate DIY 3D scanners on our list, you just need to assemble them yourself.
The best part: they’re almost free if you 3D print the parts — your only costs are the camera/parts.
However, don’t be fooled – you won’t get $20,000-quality scans from these kits.
And, it takes focus and skill to build such a technical piece of kit – hence we’ve included a couple of easy-assemble kits which cost more, but let you get right down to scanning.
|
Best DIY 3D Scanner Kit Under $200

|
Best 3D Scanner Under $1000
|
|
Yes, you'll get better quality if you spend more on a scanner like the Revopoint POP range, but with this you get to build your own 3D scanner from the parts for several hundred dollars less. |
You'll see just how accurate this scanner is when you try it (I've tested it to confirm a 0.07mm accuracy in my hands-on review) - there's nothing better for under $1000. |
|
|
|
|
4.1
|
5.0
|
|
$139.00
|
$719.00
|
|
|
Yes, you'll get better quality if you spend more on a scanner like the Revopoint POP range, but with this you get to build your own 3D scanner from the parts for several hundred dollars less.
You'll see just how accurate this scanner is when you try it (I've tested it to confirm a 0.07mm accuracy in my hands-on review) - there's nothing better for under $1000.
Quick Overview
- BQ Ciclop: Best 3D scanner kit overall
- Murobo Atlas: Good Ciclop DIY scanner alternative
- Cowtech Ciclop: Upgraded premium Ciclop scanner
- Openscan: Great open source 3D scanner
- AAScan: Great option for Android
- Revopoint POP 2: Best semi-assembled 3D scanner to save you time
For the DIY kits, we’ve included download links and links to documentation to get you started.
The Best 3D Printable 3D Scanner Kits
1. Ciclop DIY 3D scanners
Many of the best DIY scanner kits are based on the original Ciclop open-source files. Massive companies like BQ have created their version, as well as tweaked versions such as CowTech Engineering’s take.
We’ve included them all here, as each option are some of the most DIY accurate 3D scanner options for this price range. For a pre-assembled scanner with the same quality, you’d likely need to spend double this.
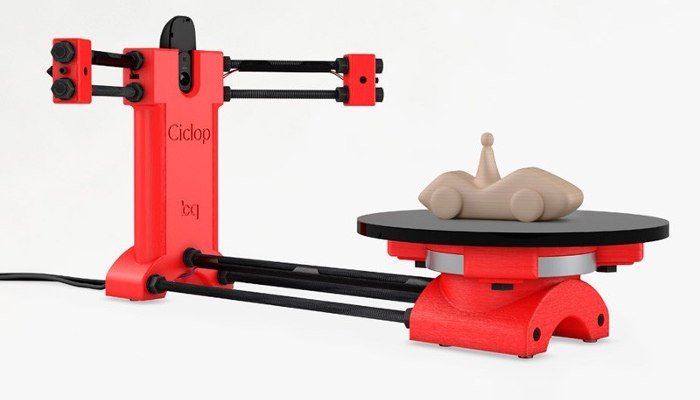
BQ Ciclop
- Price: depends if 3D printing yourself — The Kit is Available on Amazon here
- Resolution: 0.3-0.5mm
- DIY 3D scanner technology: laser triangulation
Pros
Easily modifiable to individual preferences.
Very easy to build.
Laser triangulation technology gives precise and accurate scans.
Cons
Will take some time in setting up the scanner.
BQ are a Spanish technology giant who are well-known across Europe for their smartphones, tablets, and 3D printers. They’ve also developed their Ciclop DIY 3D scanner, which scans a volume up to 250 x 205 mm, based on laser triangulation technology.
An important feature of the BQ Ciclop is that it’s a completely open source 3D scanner. You’re free to modify it as you wish, following the RepRap philosophy. It’s easily accessible via USB or Bluetooth, and can 3D scan with a resolution of between 0.3-0.5mm.
- We also have a ranking of the best open source 3D printers.
Another great addition to this DIY 3D scanner is that it works with Horus open source 3D scanning suite which BQ also developed. This makes scanning much easier with the compatible program. You can buy just the electronics (includes an Arduino, webcam etc) and print the parts yourself for $115, or buy the whole kit for $240. Not bad.
However, it is worthy of note that the BQ Ciclop is difficult to assemble. Other DIY 3D scanners are quicker and simpler to build, though the Ciclop is still a fantastic DIY 3D digitizer.
Yes, you'll get better quality if you spend more on a scanner like the Revopoint POP range, but with this you get to build your own 3D scanner from the parts for several hundred dollars less.
Murobo Atlas — Great Raspberry Pi 3D Scanner
- Price: depends on if 3D printing — Available on Amazon worldwide here
- Resolution: 0.25mm
- DIY 3D scanner technology: laser triangulation technology
Pros
High-quality specs for the price.
Compatible with Raspberry Pi camera.
Can access the scanner via WiFi or with an SD card.
Cons
Has trouble with dark and shiny surfaces.
Another homemade 3D scanner, the Atlas has the highest quality specs of any DIY 3D scanner we researched. It includes a 3D printed body made from PLA and ABS filaments, which can be purchased online. If you’re a serious DIY fanatic, you can print the parts yourself via the download link here.
Depending on if you already own a Raspberry Pi or not, you can save money on the build. This is because the Atlas DIY 3D scanner uses a Raspberry Pi camera to take detailed 3D scans with an accuracy of 0.25mm. Depending on your choice, the Atlas is likely to cost between $200 and $250, which is far less than most professional 3D scanners.
Moreover, Murobo has made considerable efforts to make sure that the Atlas DIY 3D scanner is convenient and simple to use. To achieve this, the Atlas comes with FreeLSS free 3D software which enables you to easily take 3D scans. In addition, you can access your Atlas via your computer’s browser through WiFi, as well as via SD card.
Overall, this DIY 3D scanner Raspberry Pi collaboration is a really interesting and creative way of combining several different innovative technologies to create a scanning device. If you’re an Arduino fan instead, you may be able to make it work for you too.
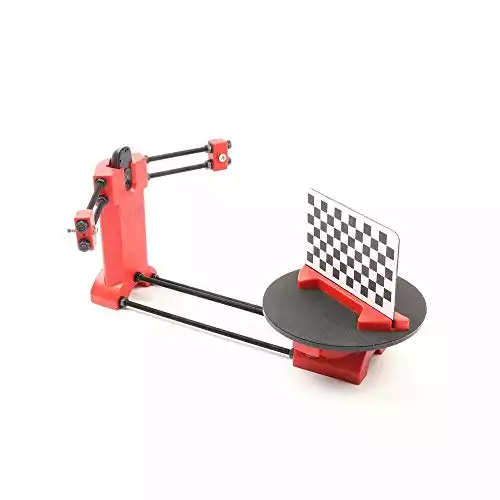
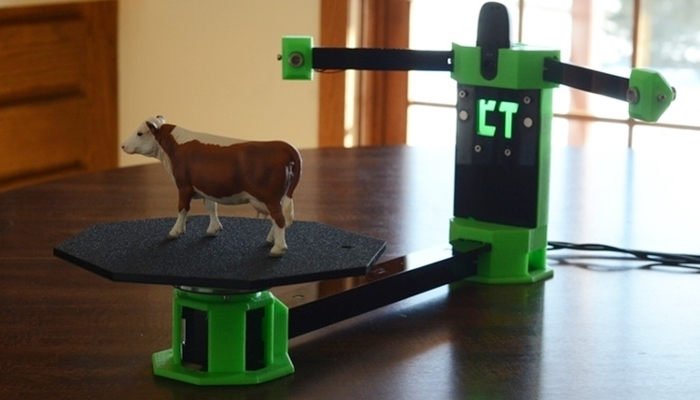
CowTech Ciclop
- Price: depends on whether you’re 3D printing the parts or not — Available on Amazon here
- Resolution: 0.5 mm
- Maximum scan volume: 200 x 200 x 205 mm
Pros
Adjustable laser holders.
Effective for laser triangulation 3D scanning.
Affordable.
Cons
Lack of consistency is a complaint from users.
BQ formed the foundations of the DIY 3D scanner kit, and remains one of the best DIY 3D scanner on tight budget options. Then back in 2015, CowTech Engineering used the foundations led by BQ, putting their unique spin on an updated model.
True to the open source movement, Cowtech started a Kickstarter campaign to raise money to put their version of the original, the CowTech Ciclop, into production. The team set the lofty goal to raise $10,000, and were met with surprise when the community rallies to raise $183,000. The CowTech Ciclop DIY 3D scanner kit was born.
So what are the differences between CowTech’s version and BQ’s DIY 3D scanner?
The CowTech Ciclop still uses the Horus 3D software program as it does a fantastic shop for 3D scanning objects. Differences however include a slightly different design, which the team spent days designing so that the parts could be 3D printed on any FDM 3D printer. Some desktop 3D printers only have a small build volume, so CowTech designed parts that can be printed on any printer with a build volume of 115 x 110 x 65 mm, which almost all 3D printers have.
Additionally, CowTech’s Ciclop has adjustable laser holders, and whereas the BQ Ciclop uses threaded rods, CowTech’s DIY 3D scanner uses laser-cut acrylic. This isn’t anything drastic and the scanners still look fairly similar, but CowTech only intended to improve the existing design, not reform it. CowTech sell the Ciclop, ready-to-scan, for $159 on their website. Overall, this is a great cheap DIY 3D scanner, and very effective for laser triangulation 3D scanning.
2. OpenScan Classic and OpenScan Mini
- Max Scan Volume: 180 x 180 x 180 mm / 80 x 80 x 80 mm
- Accuracy: Up to 50 microns
- DIY 3D scanner technology: Photogrammetry
- Price: Starting at $100.00 up to $200.00 for a complete kit with 3D printed parts and electronic
Pros
The OpenScan classic is compatible with DSLR cameras and smartphones.
High quality for a low price.
Cons
OpenScan Mini is tied to a Raspberry Pi and only works with either a Pi Camera or Arducam IMX 519
The Mini and Classic are two low-cost but high-quality 3D printed DIY scanner projects designed by German company OpenScan. In action, the OpenScan uses a stepper motor mounted to a 3D printed frame to rotate an object to capture images from various angles. These are then compiled into a high-quality 3D model using open-source software or OpenScanCloud, ready for 3D printing.
Where the OpenScan Classic and Mini differ from one another is max scan volume and camera/SBC options. The Mini features an 80 x 80 x 80 mm scan volume, while the Classic more than doubles the scan volume to a roomy 180 x 180 x 180 mm, perfect for scanning larger objects.
The OpenScan Mini is tied to a Raspberry Pi and only works with either a Pi Camera or Arducam IMX 519 and includes one-click easy scanning. This allows the completed scanner to rotate not just the object but also the camera for a more detailed point cloud.
On the other hand, the OpenScan Classic is also compatible with Smartphones and DSLR cameras, which generally means better quality photos and, as a result, higher-quality models. It’s the tinkerer’s option and better suited for those that want to customize the scanner to their needs.
OpenScan offers a solution for all DIY skill levels and budgets, whichever model you decide on. You can customize kits based on your needs or order a complete kit that includes all the electronics and 3D printed parts.
The full assembly guide is here.
3. AAScan Open Source 3D Scanner Based on Arduino and Android
AAScan is a very recent (February 2020) DIY open source 3D scanner that’s fully automated in taking photos and moving the object around on the scan plate. All the files are on Thingiverse, which we’ve linked below. Interestingly, the creator stresses that the AAScan is intended to be a purposefully minimalist machine, able to scan but not filled with extra features beyond this primary capacity.
All the instructions for how to build, print and assemble the AAScan are on the Thingiverse page, requiring an Arduino, some electronics, and either a 3D printer to print the plastic parts or someone else to print them for you — such as from a 3D printing service.
You can view the DIY scanner on Thingiverse here.
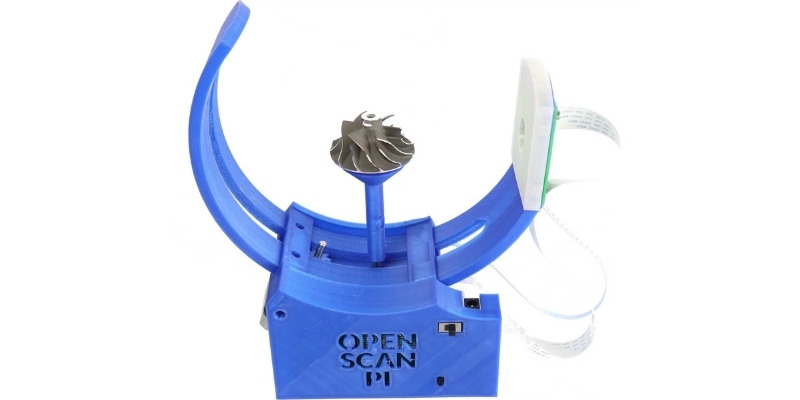
4. FabScan Pi
- DIY 3D scanner technology: laser triangulation
- Price: $100-200 depending on which version
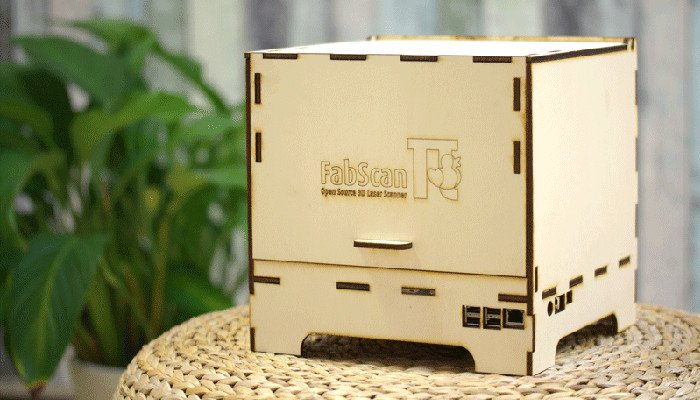
The original FabScan was a DIY 3D scanner built by Francis Engelmann as part of his Bachelor’s thesis back in 2010. Since then, there have been numerous improvements made in new iterations up to the newest model, the FabScan Pi. This new model uses a Raspberry Pi camera along with the new design to offer higher quality 3D scans.
Based on laser triangulation technology, the FabScan Pi is one of the best DIY 3D scanner options for those who are into doing it themselves. Depending on if you go for one of the older models or the latest, the price can vary between $100 and around $200 to completely create the 3D scanner. Overall, it’s a really cool kit and thesis which you can make at home.
If you want to create your own FabScan, you can follow the assembly guide here.
5. DIY Standalone 3D Scanner by Jun Takeda
- DIY 3D scanner technology: Photogrammetry
- Price: $200.00
The DIY Standalone 3D Scanner is an excellent option for those that want a hands-on project that results in a reasonably accurate and easy-to-use stationary 3D scanner.
By combining a Mbed board with a camera and OpenCV libraries, the scanning process is largely automated with just a single button push. The scanner captures multiple images of an object to create a 3D model that’s then output as an STL file written to an SD Card.
To complete the project, you’ll need a GR-LYCHEE as a centerpiece sided by smaller electronic parts, plastic sheets to create the housing, and various nuts and wiring to piece it all together.
As the name implies, it’s very much a DIY project and, as such, would best suit those happy to troubleshoot any potential hurdles with little hand-holding. Though there are instructions, you’re responsible for designing the housing, wiring the board, and calibrating the camera.
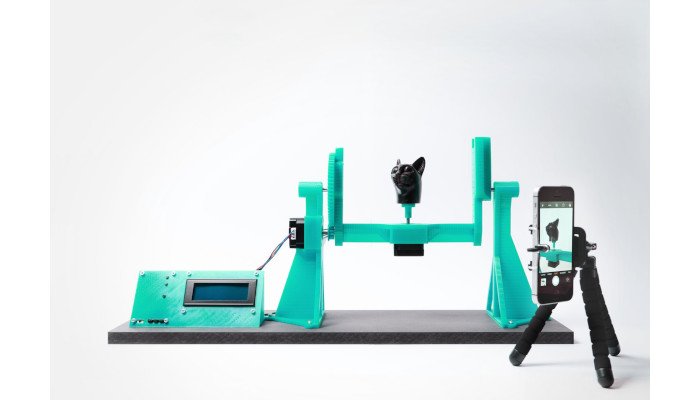
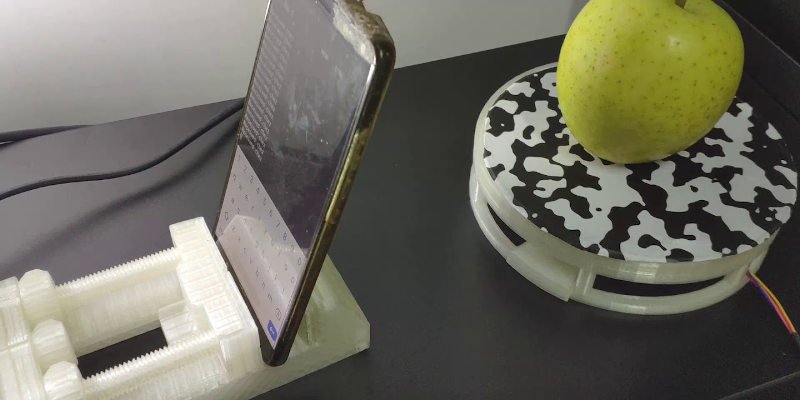
6. Arduino-Controlled Photogrammetry 3D Scanner by Brian Brocken
- DIY 3D scanner technology: Photogrammetry
- Price: ~$100
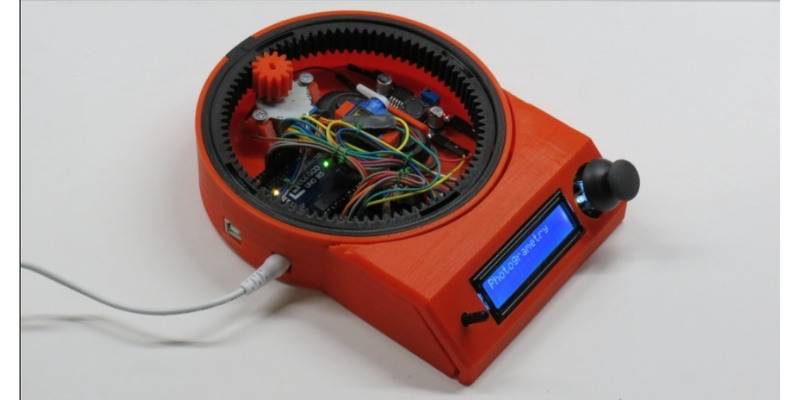
The Arduino-Controlled Photogrammetry 3D Scanner is a 3D printable 3D scanner DIY project that leverages the camera on any run-of-the-mill Smartphone and a cheap Arduino UNO SBC to keep costs low.
The core idea is to assemble a turntable consisting of 3D printed mechanical parts, including a print-in-place bearing. A Bluetooth-connected Smartphone does the actual scanning via the normal photogrammetry process. As for electronic components, you’ll need a servo motor, LCD screen, Arduino Uno, PCB, stepper motor, Bluetooth remote, regulator, and a small joystick module.
Once assembled, the Arduino-Controlled Photogrammetry 3D Scanner can capture anywhere from 2 to 200 photos in a single 360° rotation for reasonably detailed scans. The images are then sent to photogrammetry software such as AutoDesk Recap Photo to assemble a 3D model.
Aside from the cost of filament, expect to pay no more than $100 for all the parts and the STL files to 3D print the turntable.
Semi-assembled DIY scanners
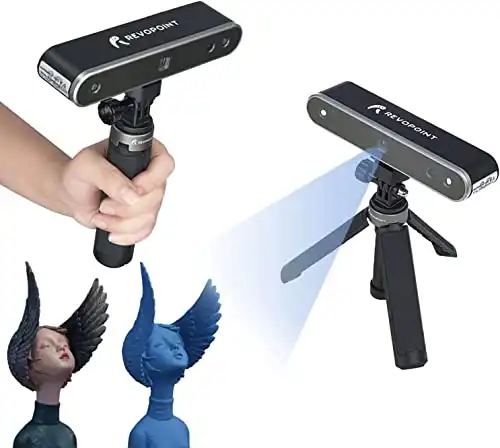
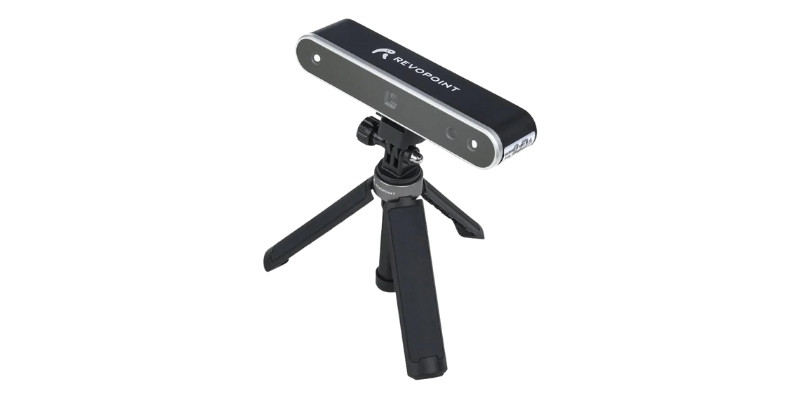
7. Revopoint POP 2
- Price: $500-700 — Available at Revopoint store here
- Accuracy: 0.3 mm
- Max Scan Volume: 200 x 300 x 300 mm
- Scan Speed: Up to 8 FPS
- DIY 3D scanner technology: Structured light
Pros
Both have versatile scanning options.
Good price for performance.
Lightweight and easily portable.
Cons
The scanner can often lose track of the object.
Though not technically a DIY scanner, I’m still mentinioning the Revopoint POP 2 as a cheat option if you want to save time but cutting down assembly time.
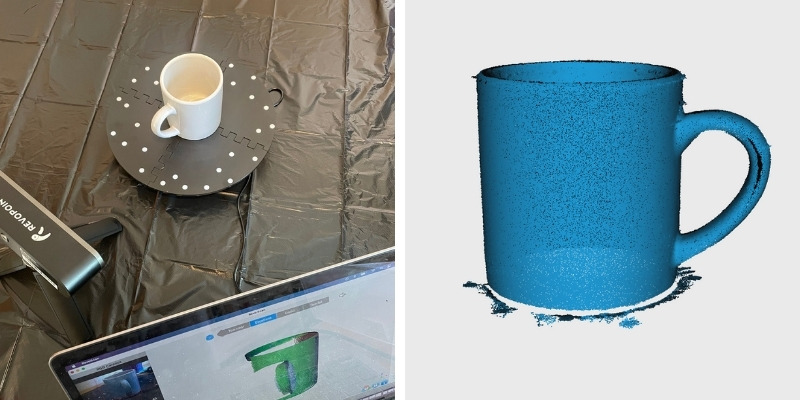
The POP 2 comes semi-assembled. You’ll just need to attach the tripod, connect the USB and the turntable, add the sticker markers for better scan tracking, and optionally build and attach the larger turntable. It took me just 5 minutes to get started!
The catch? At over $500, the Revopoint POP 2 is more expensive than most 3D scanner kits.
Still, I would personally rather pay this premium for a scanner that takes just 5 minutes to assemble, and is capable of faster and higher-quality scans. it may be worth paying the premium for the convenience and reliability.
The Revopoint POP 2 offers within 0.1 mm accuracy, and has automatic alignment technology, making for more detailed and smooth full-color 3D models than DIY scanners. It can capture 360° scans of objects up to 200 x 300 x 300 mm, besting most DIY options.
The main benefit of all this is high accuracy scans that are just about ready for 3D printing with very little post-processing needed to iron out imperfections and poor surface details.
Ease of use also extends to the intuitive software, which works with Smartphones for on-the-go scanning and features exports to STL and OBJ formats.
Alongside, it bundles in best-of both-worlds handheld and stationary modes. Five different scanning profiles allow you to tune the POP 2 to each scan with face, body, feature, mark, and dark mode. For more detail, you can also read my full Revopoint POP 2 review.

You'll see just how accurate this scanner is when you try it (I've tested it to confirm a 0.07mm accuracy in my hands-on review) - there's nothing better for under $1000.

What Makes a Good DIY Kit?
- Price-performance ratio: for the price, how good are scans?
- Resolution: how crisp is scan quality
- Accessibility: you may be able to print most of the 3D scanner, but are the rest of the parts easy to buy?
- Ease of assembly and use: quick and easy builds are always better. The best 3D scanner projects can be built by anyone, newbie or expert.
Can You Make a 3D Scanner?
- Choose a DIY 3D scanner design.
- Source the non-3D printable parts such as the camera, stepper motor, single board computer (such as an Arduino), wiring, and other electronic parts.
- 3D print the housing, brackets, turntable, mounts, and other parts required for the 3D scanner project.
- Wire and assemble all the parts.
- Configure and set up the single board computer.
- Test and scan.
Other articles you may be interested in:
- The best 3D scanners
- The best low-cost 3D scanners
- Top 3D scanner apps for iOS and Android
- The best photogrammetry software
- 3D body scanners: a guide
- Industrial 3D scanners


