

Key Takeaways
- Auto bed leveling: A feature that automatically measures and adjusts the tilt and distance of the bed surface and the nozzle for better print quality.
- BLTouch: The most popular and accurate ABL sensor that works with all Ender 3 models and build plate types. Requires an adapter board for some models.
- CR Touch: A cheaper alternative to BLTouch that is designed for Creality printers. Only works with newer 32-bit mainboards.
- SuperPINDA: An inductive sensor that is very affordable but only works with metal build plates. Requires DIY installation and firmware tuning.
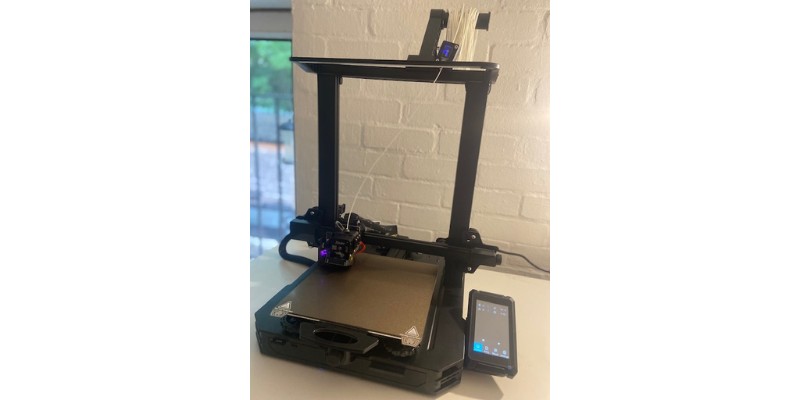
There’s a lot to like about Creality’s flagship budget printer, but one of the rare drawbacks is that most models can’t auto-level.
An Ender 3 auto bed leveling upgrade can save you countless hours of tedious manual bed honing to achieve the best possible prints. For our money, it’s one of the best ways to level up the Ender 3 experience.
For most users, I’d recommend the BLTouch Ender 3 Auto Bed Leveling Sensor.
Even though it’s a little more expensive than its competitors, the superior accuracy and performance still make it the best value-for-money pick overall.
If budget is your primary concern, you may want to consider a DIY option – but not that this will require more experience to install and use reliably!
This guide will provide a breakdown of the best options I’ve tested, as well as a few common beginner questions to help you decide which Ender 3 bed leveling upgrade is right for you.
Top Ender 3 Bed Leveling Upgrades
BLTouch Ender 3 Auto Bed Leveling Sensor
3DSourced is reader-supported. When you buy through links on our site, we may earn an affiliate commission. Learn more
Ender 3 Auto Bed Leveling Breakdown
Here, we’ll break down what bed leveling provisions each version of the Ender 3 offers:
| Ender 3 Model | Auto Leveling or Manual |
|---|---|
| Ender 3 | Manual leveling |
| Ender 3 V2 | Manual leveling |
| Ender 3 Pro | Manual leveling |
| Ender 3 Max | Manual leveling |
| Ender 3 S1 | Automatic bed leveling, CRTouch |
| Ender 3 S1 Pro | Automatic bed leveling, CRTouch |
With this in mind, an automatic bed leveling upgrade only really applies to the Ender 3, Ender 3 V2, Ender 3 Pro, and Ender 3 Max.
That said, you can swap out the CR Touch on the Ender S1 models for a BLTouch if you aren’t completely happy with it.
Read more: the best 3D printers with auto leveling
Best Ender 3 Auto Bed Leveling Options
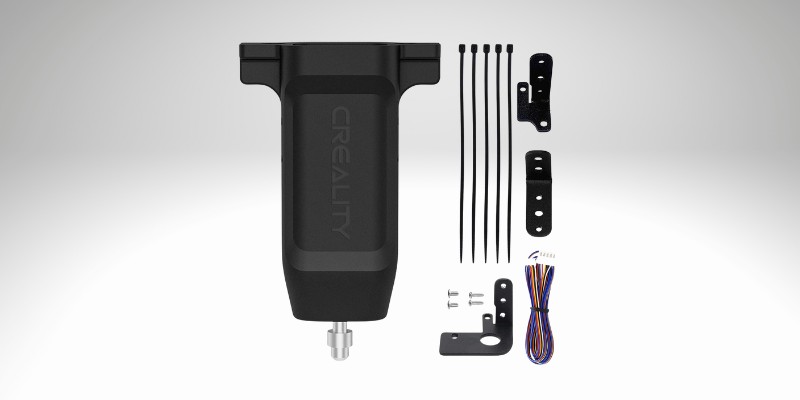
BLTouch Ender 3 Auto Bed Leveling Sensor
- Price: $50 for an Ender 3 auto bed leveling kit with wiring, brackets, extender board, and accessories — Check on Amazon here
- Ender 3 compatibility: Ender 3, Ender 3 V2, Ender 3 Pro, Ender 3 Max, Ender 3 S1, Ender S1 Pro

Antclabs’ BLTouch Auto Bed Leveling Sensor is by far the most popular Ender 3 bed leveling upgrade.
The BLTouch uses a contact-triggered push-pin sensor and hall sensor to measure the tilt of the bed surface and distance to the nozzle.
The printer saves the collected data, which it uses to make minor adjustments during printing to counteract any level discrepancies between parts of the bed.
Part of its appeal is broad compatibility with a vast cross-section of FDM printers, including the Ender 3 in all its incarnations, and build plate types, including metal, PEI, and glass.
And, more importantly, the accuracy of the bed leveling the BLTouch provides is excellent.
Note that if you’re installing the BLTouch on the Ender 3 or Ender 3 Pro, you’ll need to source an adapter board to cater to the extra ports required by the sensor.
Creality sells a complete kit – board, brackets, and all included – for around $50, though we’ve seen it drop to as low as $29.
- BLTouch kit available at: Amazon here
Creality CR Touch Ender 3 Auto Bed Leveling
- Price: $40 — Check on Amazon here
- Ender 3 compatibility: Ender 3, Ender 3 V2, Ender 3 Pro, Ender 3 Max – newer 32-bit mainboard only, won’t work with 8-bit versions
It’s said that imitation is the sincerest form of flattery, and the Creality CR Touch embodies the saying by borrowing the same push-pin probing technology and design as the market-leading BLTouch.
This being Creality, the CR Touch is priced lower than the BLTouch, making it a solid option for those looking for a slightly thriftier path to Ender 3 auto bed leveling.
As the CR Touch is designed specifically to pair with Creality printers, including the full Ender line-up, installing it on the Ender 3, whether that’s the V2, Pro, or any other model, is a walk in the park.
Creality provides three mounting brackets suited to the different Ender 3 printers and accompanying firmware to help get the probe up and running quickly.
Like the BLTouch, the CR Touch’s contact-triggered and Hall sensor combo ensures compatibility with all build plate types. Creality says the CR Touch delivers a positional accuracy of 0.04 mm.
While a great option for most Ender 3 owners, it is only compatible with newer 32-bit mainboards, specifically printers with 4.2.2 and 4.2.7 boards, and won’t work with the older 8-bit machines, such as older original Ender 3s.
- CRTouch available at: Amazon here / Creality store here
SuperPINDA
- Price: $26 — Available at Prusa store here
- Ender 3 compatibility: Ender 3 Pro, or Ender 3, Max, V2 with upgrade to metal build plate/sheets
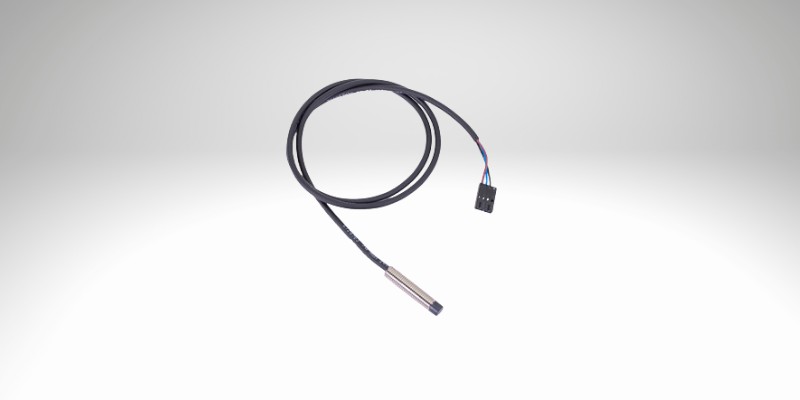
If you’re looking for something different from the push-pin style sensors, Prusa Research’s inductive leveling SuperPINDA probe costs considerably less than the BLTouch and other copycat Ender 3 auto bed leveling products.
Aside from being more cost-effective, inductive sensors provide excellent accuracy and reliable Ender 3 auto bed leveling results.
However, due to the underpinning technology, which employs an electrical conductor inside the probe to detect magnetic fields on the build plate to determine the distance between the bed and nozzle, the SuperPINDA only works with a metal build surface.
As such, it’s only compatible with the Ender 3 Pro, though you can upgrade the build plate on the Ender 3, Pro, and Max to make the SuperPINDA a viable automatic bed leveling upgrade.
Installation and firmware are also sticking points that may deter Ender 3 owners.
As the SuperPINDA is chiefly designed for Prusa printers, installing one on an Ender 3 generally requires 3D printing an adapted mount, creative wiring, and a deep dive into Marlin firmware to tune sensitivity and other parameters.
Check out this excellent YouTube tutorial for more details.
EZBL Pro
- Price: $63
- Ender 3 compatibility: Ender 3, Ender 3 V2, Ender 3 Pro, Ender 3 Max, Ender 3 S1, Ender S1 Pro
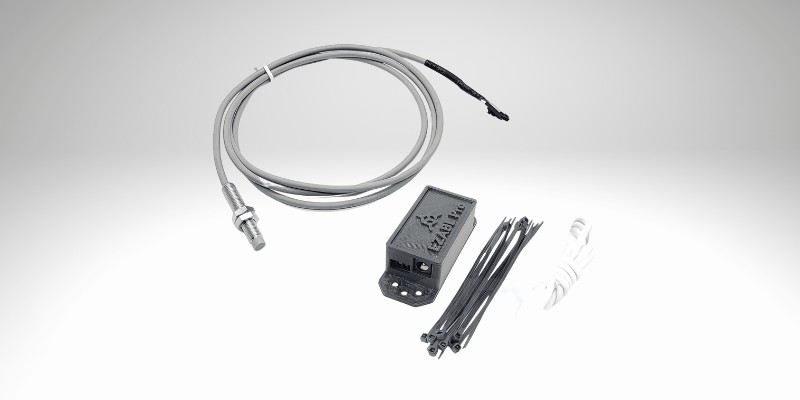
The EZABL Pro is a capacitive auto bed leveling sensor developed by TH3D, a company known for offering all manner of premium add-ons and upgrades.
It doesn’t boast the same popularity as the BLTouch but is among the best Ender 3 ABL add-ons currently on the market.
It’s priced higher than competing ABL sensors but offers market-leading 0.01 mm accuracy and compatibility with all Ender 3s along with all build plate surfaces. Both the hardware and firmware are tuned and tested by TH3D to guarantee compatibility with all Ender 3 printers.
The EAZABL Pro also ships with its own control box, which, when paired with an optional power adapter, removes the need to dive into the Ender 3’s guts and tinker with the mainboard to install the sensor.
This makes it one of the easiest Ender 3 auto bed leveling installs out there, catering to makers put off by the soldering and wiring required to install alternatives like the BLTouch and CR Touch.
For a few extra dollars, TH3D will even 3D print the mounts for you with options for all the Ender 3 models available.
Alongside, you can also buy an accompanying bootloader flashing kit that comes pre-loaded with the TH3D Unified Firmware package, an excellent Marlin-based firmware that’s rated among the best for those looking to move beyond the stock Ender 3 firmware.
DIY Auto Bed Leveling for the Ender 3
- Price: $15-$20

Though the relative affordability of even the most premium Ender 3 auto bed leveling kits makes the savings you’d get from a DIY upgrade not all that attractive, it is an option.
Like many DIY Ender 3 projects, a DIY ABL upgrade regroups 3D printed parts with a few choice low-cost manufactured parts.
Thingiverse has several viable options, but we’re partial to contributor brunoofporto’s BFPTouch design, also known as the Poor Man’s BLTouch.
You’ll need a mini servo, pen spring, optical end stop, hardware, and 3D printed bracket mount. It functions like a Z end stop, using a springed contact trigger to determine the distance between the bed and nozzle.
We like the BFPTouch because it’s compatible with all bed surface types, highly moddable to suit your needs and specific Ender 3 model, and you can easily swap out parts as required if anything breaks or malfunctions.
Depending on what parts you may have lying around, you can piece a DIY Ender 3 auto bed leveling sensor together for as cheap as $15, a world away from the $60+ asking price of the premium EZBL Pro and even the more affordable $26 SuperPINDA.
Need to Know: Best Bed Leveling Sensors for Ender 3
What is the easiest way to level up an Ender 3 bed?
There are two major steps to Ender 3 bed leveling.
First, consider upgrading to either a tempered glass build plate, magnetic spring steel sheet, or flexible PEI build plate to help adhesion.
Which one you choose comes down to personal preference, but also which Ender 3 you have.
For example, the Ender 3 V2 already has an excellent glass bed that won’t benefit much at all from an upgrade. On the other hand, the stock Ender 3 bed is crying out for an upgrade, so either option is well worth the investment.
Second, we recommend upgrading to automatic bed leveling by installing an ABL sensor such as the BLTouch or CR Touch. Doing so removes the need for time-consuming manual bed leveling to let you focus on what matters – the printing.
Check out our guide to best Ender 3 upgrades for options and details about leveling up your Ender 3 bed.
How often should I level my Ender 3 bed?
There’s no perfect bed leveling formula or routine. How often your printer needs leveling depends on many variables.
Have you accidentally knocked the printer? Have you moved your printer since the last print? Are you using the printer for the first time in a few weeks? Are you having trouble nailing that first layer? Have you worked with different temperatures and filaments recently?
If so, bed level is recommended.
To err on the side of caution, we’d recommend heavy users level their Ender 3 bed every few days or every 5-10 prints. Otherwise, every one to two weeks for casual use should be sufficient.
We suggest fine-tuning your own bed leveling routine to see what works best for you. Don’t hesitate to level before every print job if you’re worried about not getting the best print quality, especially if you have an Ender 3 auto bed leveling probe as it won’t take much time at all.
Does Creality Ender 3 have auto bed leveling?
No, the stock Ender 3 does not have auto bed leveling, relying instead on the user to manually level the bed. The same applies to the Ender 3 V2 bed leveling and the Ender 3 Pro bed leveling.
With the Ender 3 S1 and S1 Pro, the two most recent Ender 3 versions, Creality implemented Ender 3 auto bed leveling via its proprietary CR Touch ABL probe.
How do you manually level a bed in Ender 3 Pro?
Here’s a brief breakdown of the steps involved to manually level the Ender 3 Pro’s bed:
– Clean the bed surface to remove any dirt or filament that could disrupt the leveling process.
– Do the same for the nozzle, removing any filament residue.
– Allow the bed to dry if you’ve used soapy water or a chemical/alcohol solution.
– Fire up the printer, then Auto Home via the display menu.
– Lower the bed a little using the leveling knobs under the bed to avoid scraping the nozzle and causing damage to the bed.
– Source a thin piece of paper, ideally around 0.1 mm thickness.
– Slide the print head assembly slowly to each of the four corners of the bed one at a time, positioning the piece of paper below the nozzle and shifting it back and forth, then adjusting the leveling knobs until you notice a slight pull or resistance.
– Repeat the process to make finer adjustments until you get the same resistance on all four corners.
Though simplified for convenience, the above steps encompass the basic process behind Ender 3 Pro bed leveling. Refer to the Ender 3 Pro manual for more in-depth instructions.
Alternatively, you may want to consider an Ender 3 Pro auto bed leveling upgrade.
Either the BLTouch or Creality’s own CR Touch ABL probes come highly recommended and require a relatively hassle-free installation. Check out the dedicated sections above for each of these for more details.
Articles we recommend:
- Ender 3 vs Ender 5
- The best Ender 3 (Pro/V2) Hot End upgrades
- The best Ender 3 firmware
- The best slicer For Ender 3
- Creality Ender 3 Dual Extruder
- The best Ender 3 software
- Ender 3 Alternatives
- Ender 3 filament guide
- Ender 3 direct drive mods
- Ender 3 fan upgrades – with every type explained
- Ender extenders – make your Ender 3 bigger


