|
|
|
|
|
4.7
|
4.2
|
4.5
|
|
$7.98 ($11.24 / Ounce)
|
N/A
|
$12.48 ($1.56 / Ounce)
|
Quick Overview
The Best PETG Glues
1. Super Glue / Cyanoacrylate
Pros
Reliable adhesive.
Convenient.
Works well on PETG pieces.
Cons
Can be difficult to bond fiddly pieces together.
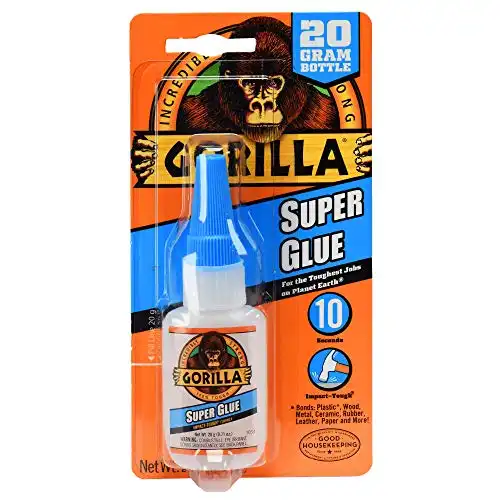
Super glue is a go-to, reliable adhesive. Most people already have a tube in their toolbox, which makes it a convenient choice. Superglue can be quickly applied to broken parts in a pinch. If you don’t already have a small bottle stashed away, it’s cheap and easy to get your hands on.
Super glue also works well on PETG pieces. It is a strong adhesive and matches PETG’s durability. It’s sturdy, and the bond will last a long time, even through normal wear and tear.

Price
$7.98 for a 20 g bottle of Gorilla Super Glue
Safety
- Always use super glue in a well ventilated area.
- Super glue dries very quickly. Always wear gloves to make sure you don’t super glue your fingers together and protect your skin.
How to use
- Prepare all bonding surfaces by sanding and cleaning.
- Line up the surfaces before you begin.
- Apply a thin layer of super glue to each surface.
- Press tightly together, and clamp or weigh down if possible.
- Be careful to press the parts together correctly the first time. They will fuse together almost immediately, so a precise hand is important.
2. 3D Gloop
Pros
Specifically formulated for gluing 3D printed parts.
Stronger than super glue, epoxy, and even stronger than PETG itself.
Cons
Fumes can be concerning.
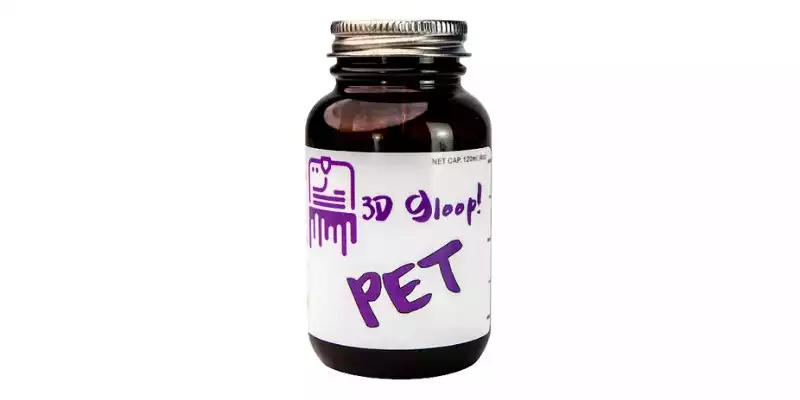
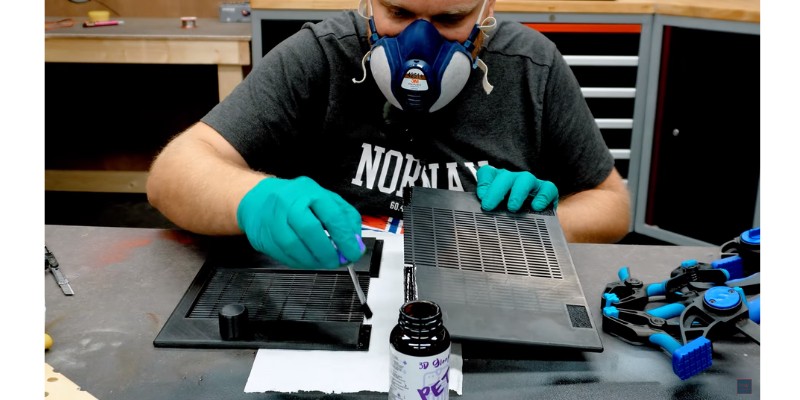
3D Gloop! manufactures a line of adhesives specifically formulated for gluing 3D printed parts. They have created a specific product for PET, PETG, and co-polyester filament parts – called PET Gloop.
They even claim PET Gloop is stronger than super glue, epoxy, and even stronger than PETG itself.
Price
$24.99 for a 75 ml bottle & $34.99 for a 120 ml bottle of PET Gloop
Safety
Fumes can be a concern, so be sure to wear a respirator or make sure you have plenty of ventilation. It is recommended that you wear latex gloves to protect your skin. Use care to not get any PET Gloop on any plastic work surfaces, especially your 3D printer’s build plate. PET Gloop is very sticky and it will stick and stay forever.
How to use
- Prepare all bonding surfaces by sanding and cleaning.
- Shake the bottle well, especially if it has been sitting for a while. Then let it rest for about a minute to help keep the seal clean.
- Apply lots of Gloop to both surfaces.
- If possible, clamp pieces together or weigh them down. This will create a strong bond.
- Give your parts an hour or more for the Gloop to fully cure.
- If any Gloop oozed out from the seam, it can be removed with a razor blade once the Gloop is fully cured.
3. Polyurethane
Pros
Just as versatile as super glue.
Extra toughness over super glue.
Waterproof.
Cons
Hard to come across.
Polyurethane glue is less recognized than common super glue – but it’s just as versatile.
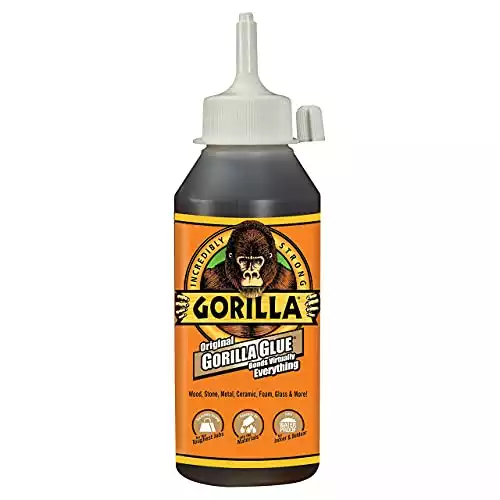
Standard Original Gorilla Glue is a polyurethane adhesive. The main benefit of polyurethane over regular cyanoacrylate super glue is the extra toughness. If you chose PETG filament for the extra strength, you’ll want a glue that can match that strength. Polyurethane is up for the task.
Polyurethane is also waterproof, which is especially useful if you’re planning on 3D printing PETG parts for use outdoors.
One of the qualities that gives it that extra strength is that the polyurethane expands when it dries. This is fine on large parts, but isn’t ideal for more delicate pieces. If you plan on gluing something that will see a lot of wear and tear, the extra strength could be worth a slight bulge on the seam.
Price
$12.48 for an 8 oz bottle of Original Gorilla Glue
Safety
Always use polyurethane in a well ventilated area or wear a respirator. Keep away from skin, clothes, and surfaces. Wear gloves to protect the skin.
How-to glue
- Prepare all bonding surfaces by sanding and cleaning.
- Damped the surface with a spray bottle of water.
- Apply a thin layer of polyurethane glue to one side of your project. Press the other side in for a secure bond.
- Wipe away any excess glue with a damp cloth within the first 15 minutes after application.
- Clamp for two hours at minimum, and allow a full 24 hours for a full cure.
4. Silicone
Pros
Can be used as an adhesive.
Can be used to hold water, or keep it out.
Can withstand some impact and harsh temperatures.
Cons
Harmful to the skin, so keep yourself well protected.
Clear silicone can be used as an adhesive, as well as a sealant. This, in addition to its strength and slight flexibility, make it the perfect adhesive for PETG projects that need to be water tight – whether they are designed to hold water, or keep it out. Silicone creates a resilient bond that doesn’t crack, peel, or shrink, and is able to withstand some impact and harsh temperatures.
Price
$5.78 for a 2.7 oz tube of Henkel Loctite Clear Silicone Waterproof Sealant
Safety
Always use silicone in a well ventilated area or wear a respirator. Keep away from skin, clothes, and surfaces. Wear gloves to protect the skin.
How-to
- Prepare all bonding surfaces by sanding and cleaning. The surface should be rough for the best results.
- Apply to one of the surfaces to be bonded.
- Press surfaces together.
- Clamp tightly for 24 hours for a full cure.
5. Epoxy
Sets in 5 Minutes, .85 Ounce Syringe, Clear, (Pack of 2)
Pros
Effective and versatile.
Strong and hard when dry.
Can be used as a filler.
Cons
Can be messy at times.
Epoxy is an effective and versatile choice for PETG bonding. It’s very strong and hard when dry, so there’s no risk of your parts breaking off from each other once the epoxy is set and cured.
Epoxy isn’t just glue, it can also be used as a plastic filler. Epoxy can fill in small holes, seams, and imperfections on 3D printed parts. It is also great for smoothing surfaces.

Price
$15.18 for Gorilla 2 Part Epoxy .85 Ounce Syringe Pack of 2
Safety
Epoxy is toxic and should not be breathed in. Proper ventilation is essential while working, but a good respirator is also a great idea. Gloves should be worn to protect the skin.
How-to
Epoxy can be tricky to use at first. There are two types of chemicals that must be mixed at a specific ratio. First is the epoxy resin itself, then also a hardener that will trigger the chemical reaction that allows the epoxy to set. You need to get the proportions right, and once mixed, it needs to be used within a few minutes.
- Carefully read the directions that come with your epoxy resin to make sure that your bond is successful.
- To use epoxy as an adhesive, simply brush a thin layer onto one bonding surface. Press together.
- If possible, clamp for at least 30 minutes. Up to 24 hours for the full cure time.
6. Using a 3D Pen
Great for pros seeking precision with speed/temp controls, ergonomic design & large LCD.
Smooth, seamless 3D pen experience.
Pros
Perfect if consistency is important for your finished product.
Almost impossible to tell where one part ends and the other begins, if using the same filament for the initial print.
Cons
No major cons.
3D Pens are a great way to connect pieces together. This method is perfect if consistency is important for your finished product. If you use the same filament for the initial print, and for the 3D pen “glue”, it’ll be practically impossible to tell where one part ends and another begins. They’re literally be made from the same material.

Price
$39.99 for SCRIB3D Advanced 3D Printing Pen with 20 Feet of Filament
Safety
Be careful not to touch hot filament to avoid burns. Keep away from skin and clothing.
How-to
- Prepare all bonding surfaces by sanding and cleaning.
- Apply a thick layer of hot filament to one surface.
- Quickly press the other surface to it. Hold the pieces together until set.
7. Hot Glue Gun
Pros
Easy to find, as they’re everywhere.
Great if something breaks and you need a quick hold.
Cons
Not the strongest bond on our list.
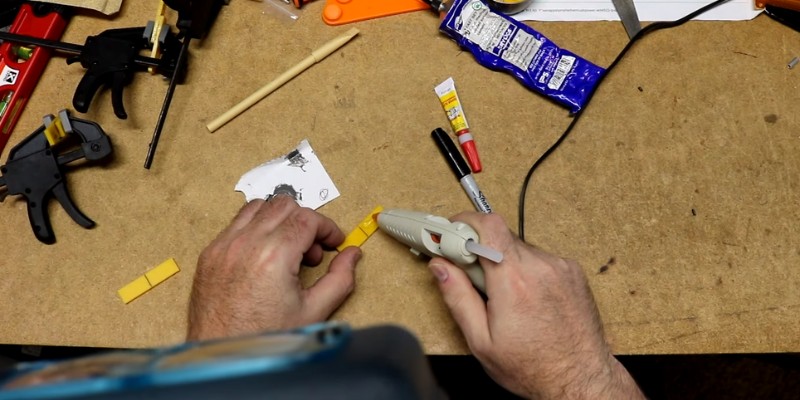
Hot glue guns are everywhere. While not the strongest bond on this list, hot glue can be a great choice in a pinch. If something breaks or you need a quick hold hot glue is a great choice. As long as the bond doesn’t need to withstand too much pressure, hot glue will be fine.
Price
$17.99 for Gorilla Dual Temp Mini Hot Glue Gun Kit with 30 Hot Glue Sticks
Safety
The nozzle of a hot glue gun gets very hot, just like the nozzle of a 3D printer. Be careful not to touch the nozzle to avoid burns. Keep hot glue away from skin and clothing.
How-to
- Prepare all bonding surfaces by sanding and cleaning.
- Heat up the hot glue gun.
- Apply a thick layer of glue to one bonding surface.
- Press the other surface to it.
- If possible, clamp pieces together until set.
We also have a review of the best glue sticks for 3D printing
Why Glue PETG?
Printing multiple pieces
Some things are just too large or complex to be printed as a single piece. 3D printed cosplays often require glue to assemble multiple printed parts into one great costume. If you have a small printer you might find files that are too big to print in your machine. So, a solution is to glue several smaller 3D printed pieces together.
Fixing broken parts
One of the biggest reasons you’d use glue on a PETG 3D print is when something breaks. PETG is ideal because it is more durable than other filaments like PLA. Still, even with PETG’s strong composition, sometimes pieces break. You never want to be forced to throw out an entire project when it could be fixed with just a spot of glue. That’s why it’s important to make sure you are selecting the perfect glue for your PETG project.
What Glue Works on PETG?
A variety of glues work on PETG, including super glue, Gorilla glue, polyurethane, silicone glue, epoxy resin, and you can even use a hot glue gun.

When you pick a glue, you’ll want to consider a few things. First, consider how strong and durable the bond needs to be. Decide whether the seam needs to be clean, or if some bulging is okay.
Also think about flexibility. Some bonds should be strong and hard, whereas others can be a little bit flexible. These factors will all affect which glue best suits your project – though we’ll explain all the intricacies in this article.
How To Glue PETG
To glue PETG, simply prepare all bonding surfaces by sanding and cleaning. Then apply a layer of adhesive to either one or both sides, and press them tightly together. For adhesives that have longer setting times, clamping is helpful. Wait for the adhesive to fully cure before applying any pressure to the bond.
FAQs
How to glue PETG printed parts together
3D printed pieces made with PETG filament can easily be glued together. Prepare all bonding surfaces by sanding and cleaning. Apply a layer of adhesive to either one or both sides. Press tightly together. For adhesives that have longer setting times, clamping is helpful. Wait for the adhesive to fully cure before applying any pressure to the bond.
What can I use to glue PETG?
Lots of different glues work on PETG. When you pick a glue, you will want to consider a few things. Consider how strong and durable the bond needs to be. Decide whether the seam needs to be clean, or if some bulging is okay. Think about flexibility. Some bonds should be strong and hard, some should be a little bit flexible. With all of this in mind, choose your glue.
Does PETG need adhesive?
PETG needs adhesive to glue multiple pieces together. A 3D maker might need to glue PETG pieces together if they need a large model. Some things are too large or complex to be printed as a single piece. You might also need adhesive to fix broken parts. PETG is a durable filament, so if it breaks, you need durable glue.
Can you glue PLA and PETG together?
You can glue PLA and PETG together. Print out both pieces with the filaments you want to use. Then apply a thin layer of glue to each of the bonding surfaces. Use either cyanoacrylate super glue or polyurethane glue to glue PLA and PETG. Press the pieces together, and for best results clamp them for at least an hour.
Related articles:
- Best Glue for PLA, ABS, PETG, TPU, & Nylon 3D Prints
- Best Glue For Resin
- Our Complete PETG Filament 3D Printing Guide
- Everything You Need To Know About PLA, ABS, and PETG Shrinkage
- Explained: How Strong Are 3D Printed Parts in PLA, ABS, PETG & More
- PETG Not Sticking to Bed? We Discuss The Causes and Recommend Fixes

