Key Takeaways
- Direct drive extruder: Improves filament feeding, reduces clogging, and enables flexible filaments.
- Glass bed: Prevents warping, improves adhesion, and gives a smooth bottom layer.
- Firmware upgrade: Adds features, improves safety, and enables compatibility with other upgrades.
- Laser engraver: Allows you to engrave and cut various materials with your Ender 3.
Creality’s Ender 3 series of 3D printers has been a popular choice for people who want to start 3D printing at home.
Their beginner-friendly printer is ready to make great prints right out of the box – but did you know it’s also easy to upgrade to a laser engraver?
For most people, Creality’s official laser upgrade is the best choice. It’s the easiest to install and most reliable – perfect for beginners.
If you’ve got a bit more modding experience (and are looking to save some money), you can consider 3rd party options by Endurance Laser and other companies – which often deliver more power than Creality’s laser.
Over the past 2 – 3 years I’ve tried a handful of the best Ender 3 laser upgrades, and in this post, I’ll share the best choice for each type of maker. This includes not just the standard Ender 3, but also when I tested out my Ender 3 V2 Neo, and Ender 3 S1 Pro.

Can the Ender 3 Laser Engrave?
Yes, the Ender 3, and all of its upgraded variations, can laser engrave, if you upgrade it to have a laser engraving module. It has no built-in laser engraving or cutting capability, but Creality sells several laser modules you can install to turn your Ender 3 into a laser engraver or cutter.
Depending on how powerful you want, expect to pay at least $70 for the lowest-power lasers, with 10W or 20W options costing several hundred dollars.
Ender 3 Laser Engraver Reviews
You have two main options for turning your Ender 3 into a laser engraver:
- Creality’s Laser Engraver Upgrade Kits
- Third-party Add-ons, such as those by Endurance Lasers
No matter which company you purchase from, you’ll have multiple options for different wattage and models.
For example, Creality has 3 main laser modules, while Endurance has tens of modules ranging from professional-grade to simple 3.5W lasers. Choosing the right one will depend on your needs, your equipment, and your price range.
Laser Engraver Upgrades for Ender 3
The Creality Choices
- Creality Basic Laser Engraver Upgrade
- Creality Laser Module For Ender 3 S1
- Creality Updated Laser Module
… and Endurance Picks
If you want to get more experience under your belt or just kit out your Ender 3 as much as possible, you can check our article on Ender 3 upgrade ideas.
However, before installing any laser engraver module, be sure to turn your printer off and unplug it from the wall. If recently used, you’ll want to make sure that your printer has completely cooled and is free of any leftover materials or debris before installing new parts.
3DSourced is reader-supported. When you buy through links on our site, we may earn an affiliate commission. Learn more
1. Creality Basic Laser Engraver Upgrade
- Price: Amazon here
- Compatibility: Ender 3, Ender 3 Pro, Ender 3 V2, Ender 3 Max, Ender 5, etc.
- Power: 0.5W / 4W options
- Materials: Wood, cardboard, bamboo, leather goods, paper, etc (depending on wattage, more details below)

While there are some DIY laser engraver add-ons for your Ender 3, Creality’s official version is perhaps the safest and most reliable if you aren’t as technical.
Creality’s official Ender 3 laser engraver is compatible with all Ender 3 modules, including the V2 and Ender 3 Pro. This engraver, called the Laser Kit, is a simple-install device that connects directly to your Ender 3.
The kit comes with two wooden material blocks you can test and practice engraving on, though the laser kit can also cut plastic, acrylic, and paper, all depending on the settings. These are connected to the fan speed, which can be altered to suit whichever material you’re engraving.
If you want to use an Ender 3 V2 for laser engraving, you’ll need a separate mount. Fortunately, you can print one using the free files here. However, this laser kit is not compatible with models like the Ender 5.

However, this really is a weak laser. You can’t really laser cut anything with 0.5W.
To put it in perspective, most of the 5W lasers I’ve owned (like the Ortur Laser Master 2, Longer Ray 5, and a few others) are mostly recommended for engraving, and even these are far more powerful than this laser’s 0.5W. My Snapmaker 2.0’s 1.6W laser struggled to cut thin sheets of basswood, and really I recommend at least 5W if you want to do any wood laser cutting – ideally 10W. I bought the 10W upgrade for the Snapmaker so I could cut acrylic sheets.
I think the 4W version should be able to cut, so long as you’re willing to make multiple passes over the material. You’ll have to deal with longer timeframes and potential scorching, but the job will be done all the same.
You’ll only need a screwdriver and protective eyewear when installing your laser cutter. Simply unscrew the mainboard cover and connect the laser engraver to the fan port.
Once connected, the magnetized laser module can be attached to your printer or set into an externally printed mount, depending on your preference.
Using a dial on the side, ensure the laser is set to 0 before turning anything on. Once you’re confident everything has been set up correctly, you can start laser engraving!
After downloading and installing Creality Workshop software, you can import files much like you would CAD for 3D printing. Simply change the settings to ‘laser’ and ensure the wattage is set correctly for the material you’re using.

Some users have complained over needing to switch out the wires when alternating between 3D printing and laser engraving with the Ender 3. While awkward, this acts as a safety benefit, ensuring the two can never be accidentally used in tandem, which could be dangerous.
2. Creality Laser Module – Laser Engraver For Ender 3 S1 & S1 Pro
- Price: $79 — Available at Creality Store here
- Compatibility: Ender 3 S1, Ender 3 S1 Pro
- Laser Wattage: 1.6W
- Materials: Cardboard, wood, bamboo, rubber, leather, fabric, acrylic, plastic, etc.
The Ender 3 S1 or Ender 3 S1 Pro don’t work well with Creality’s basic laser module, but they have a separate option designed for the S1 range. This module doesn’t have any higher wattage options and is stuck at 1.6W for a cheap $79.

This makes it an easy option if you just want the bare minimum of laser cutting capacity, and to avoid breaking the bank. Unfortunately, it also means you’ll be a bit limited for cutting – just very thin softwoods, and even then it’ll take multiple passes.
When using a laser module of this wattage, metals are going to be mostly out of the question. Harder woods or plastics will also be very difficult to cut.

It’s always possible to go over multiple times, though – like I said before, some of the 3DSourced team have had some luck with using modules anywhere between 1.6W and 10W to complete laser cutting jobs, it just takes a little longer.
We recently tested the 20W xTool D1 Pro on our CNCSourced site, and the differences versus 1.6W lasers like this is honestly astounding.
The downside to taking multiple passes is you do run the risk of scorching the side of the material. Regardless, it can work well, so long as you are using softer materials like leather.
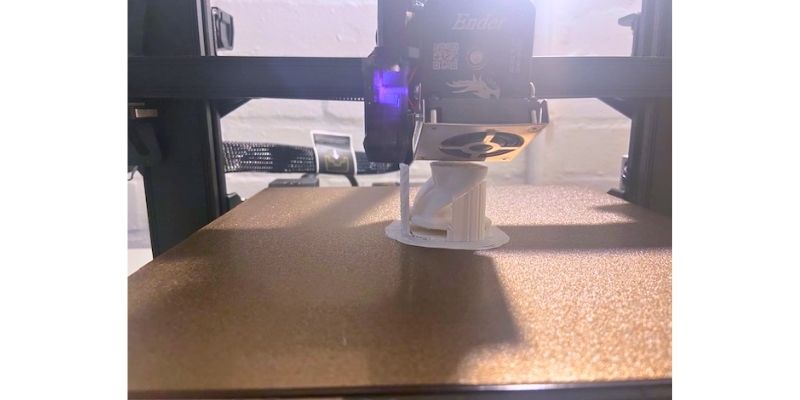
Although this module is only for the Ender 3 S1 series, it’s better built than the basic option, will last longer before wearing out (up to 10,000 hours), and is generally just better quality.
3. Creality Updated Laser Module
- Price: $99 / $129 / $199 — Available on Creality Store here
- Compatibility: CR-10, CR-10 Mini, Ender 2 Pro, Ender 3, Ender 3 Neo, Ender 3 V2 Neo, Ender 3 Max Neo, Ender 3 V2, Ender 3 S1, Ender 3 S1 Plus, Ender 3 S1 Pro, Ender 3 Pro, etc.
- Laser Wattage: 1.6W / 5W / 10W
- Materials: Cardboard, wood, bamboo, rubber, leather, fabric, acrylic, lacquered metal, plastic, etc (depending on wattage, more details below)
The priciest member of Creality’s lineup of laser modules is this updated, wide-compatibility variation.

For a slightly higher price than the other modules, it can be used with almost every Creality machine, including the Ender 3 Neos, Ender 3 S1s, and the Ender 3 V2. It’s even compatible with the CR-10 and CR-10 Mini.
There’s higher power options, too. It scales up to a maximum of 10W for $199, which is honestly a bargain for that wattage power.
To put it in perspective, the two best 10W laser engravers at the moment, in my opinion, are the xTool D1 Pro and the Ortur Laser Master 3, and they’re both in the $600 range – so a $199 10W laser is excellent value.
So, you shouldn’t struggle cutting standard thickness acrylic sheets, softwoods, and engraving on anodized aluminum. Obviously, being a diode laser, you can’t cut clear acrylic (you’ll need a CO2 laser for this), but there are tricks you can use, like painting it first.
Creality ambitiously lists lacquered metal as an option for this module – a reasonable expectation for engraving. The updates that Creality made to this laser module also improve durability, which is definitely important when you’re potentially shelling out $199!

Just like the rest of the Creality laser modules, installation on an Ender device is super easy and streamlined. They even outline the full process in a video on their Youtube channel.
Overall, if you want to turn your Ender 3 into a laser engraver, rather than buying a whole other machine, the 10W option here is your best option.
But for even more options, there are also some third-party lasers you can use, which I’ll talk about next.
4. Endurance 15W Laser
- Compatibility: Most major 3D printers on the market. Comprehensive list here.
- Laser Wattage: 15W
- Materials: Paper, leather, plastic, wood, certain metals
- Price: $1,600 (Available at Endurance Lasers)
Endurance Laser sells modules that can be attached to a variety of different 3D printers, including most of the Ender series (including the Ender 2s, 3s, 4s, and 5s), certain Ultimaker machines, and an exciting batch of RepRap printers, amongst many, many others.

This flexibility is one of the main comparison points between an Endurance laser one of Creality’s options. Yes, you can get Creality modules specifically tailored for Ender machines – but if you ever want to switch to a non-Creality machine, you have no guarantee that it will work.
Upgrading the simple Ender 3 frame into a laser engraver is even easier than using the Endurance on other devices, though. Setup requires little more than ensuring the wires don’t cross, and the laser module itself is held in an appropriately sized mount.
The specifics of the Endurance 15W laser are certainly intimidating, both in good and bad ways. It’s a powerhouse to be reckoned with as far as add-on laser modules go, and can cut through wood materials without much trouble.
You might have luck with engraving certain types of metal, but wood cutting and engraving are the name of the game for a 15W laser like this one.

Unfortunately, the price matches the quality at $1,600.
That’s probably overkill for your basic Ender 3, but if you plan on getting a pricier printer to deck out at some point, it could be a worthy upgrade.
I generally think it’s not worthwhile if you’re just trying to experiment a little with an Ender, but there are lower-priced options also, which I’ll discuss below.
5. Endurance 10W+ Laser
- Compatibility: Most major 3D printers on the market. Comprehensive list here.
- Laser Wattage: 10W
- Materials: Acrylic, glass, stone, leather, wood, plywood, cardboard, felt, leather, plastic, copper, brass, painted/polished aluminum
- Price: $1,000 (Available at Endurance Lasers)
The Endurance 10W+ laser module is a decent middle ground, allowing you to engrave most typical materials, and cut certain materials in a single pass. Wood, plywood, and acrylic have all been tested and can be cut with relative ease.
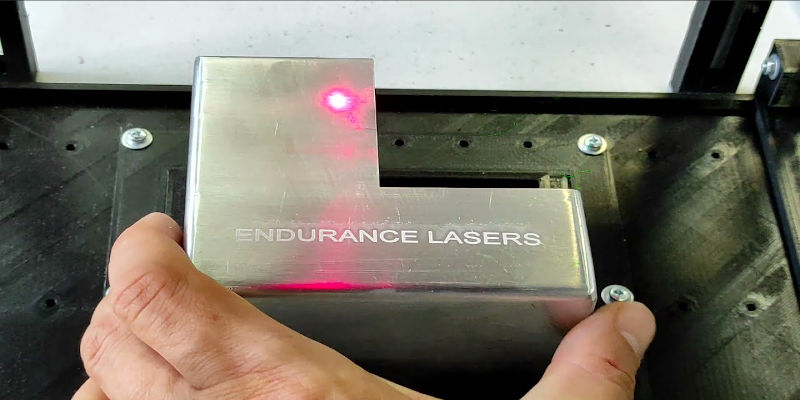
It prides itself as a 10-watt machine, making it seem fairly powerful. However, this number refers to its maximum potential output, and doesn’t necessarily mean you’ll get a continuous beam of that power.
Despite this, the Endurance laser module is an impressive add-on, capable of engraving metals and ceramics with speeds of up to 100mm/s when engraving standard metals like copper and steel. For softer metals like aluminum, it can engrave up to 400mm/s.
This is all very good news for turning your Ender 3 into a laser engraver for metal engraving, but those who are looking only to use their laser engraver sparingly, or focus on wood, may be turned away by the rather steep price of $1,000.
Endurance does run sales often enough, so we advise you to hold on for a sale instead of buying at full price. Even the 10W plus version can become a reasonable option when it’s on sale – I’ve seen it on sale for $400 recently.
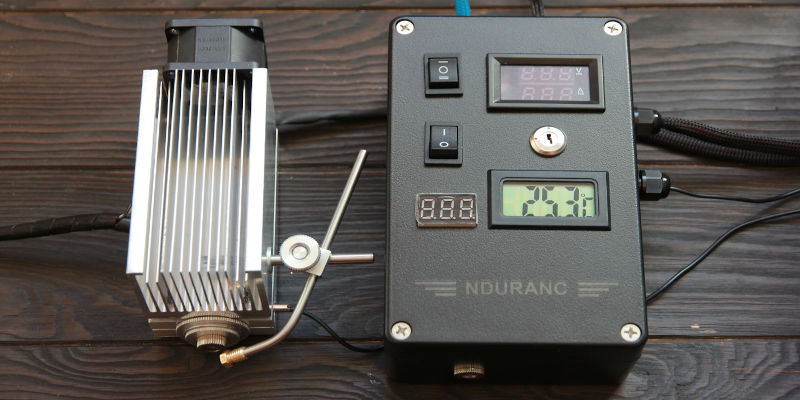
The higher price is definitely intimidating compared to the Creality laser modules, that cost a fraction of the price for similar wattage.
We do think it’s a worthy purchase if you want a long-lasting, higher-power laser that will be compatible with more printers in your collection, and generally it’s a higher-quality product. Features like air assist help prevent burning the edges when working with wood, and add to your precision when cutting.
6. Endurance 3.5W Laser
- Compatibility: Most major 3D printers on the market. Comprehensive list here.
- Laser Wattage: 3.5W
- Materials: Acrylic, glass, stone, leather, wood, plywood, cardboard, felt, leather, plastic, copper, brass, painted/polished aluminum
- Price: $295 (Available at Endurance Lasers)
If you were intimidated by our previous Endurance picks, the Endurance 3.5W laser might be closer to what you’re looking for. It has the high quality, well-tested lifespan, and versatility of all the other Endurance laser modules – but for significantly less cost.

It sells for $295 – still $100 more than Creality’s most expensive option. Simply put, the extra compatibility and easier setup are worth a couple hundred extra dollars if your budget has a little stretch. Cheaper Creality options are more for experimenting and very casual use.
It’s not suitable for heavy-duty workshopping – you’ll require multiple passes for cutting, which will slow your productivity significantly.
That being said, a 3.5W module should serve you well for all of your engraving needs. It has been tested with a variety of materials, and there’s a table containing more information on the product page, like how many passes it takes to cut through 8 mm of dark acrylic (the answer is 5-8 times!)

Although some companies overestimate performance, we find Endurance’s listed estimations to be quite reasonable. All in all, the Endurance 3.5W laser module is a good option for a higher-end laser module without any added installation complexity and without completely breaking the bank.
Pros and Cons of a Creality Laser Module
| Pros | Cons |
|---|---|
| Super easy installation on a variety of Ender 3 models | Not a great option for non-Creality machines |
| Low cost makes basic laser engraving very accessible | No lasers with above 10W available |
| Hundreds of resources available online to learn and get inspired by | |
| Creality Workshop easily interfaces with laser engraving and cutting |
Pros and Cons of Third-Party Laser Modules For the Ender 3, such as Endurance Laser
| Pros | Cons |
|---|---|
| Greater machine compatibility | Costly |
| More options for laser wattage | Not designed specifically for Creality machines |
| Always comes with PSU, sometimes includes other add-ons like air assist | |
| Good customer support options |
Before You Start
Laser engravers use high-intensity lasers to carve imagery into objects. Because of this, they can be extremely dangerous if improperly used. Safety precautions must be taken into consideration before installing or using any equipment like this, including the Ender 3 laser engraver.
Air Quality
Engraving of any kind can release airborne particles. While wearing a mask is a good counter to this, it’s still important to ensure proper ventilation and filtration systems are used when engraving, especially when working with plastics and metals.
Hazards to Vision
Cool as laser engraving may look, it’s important to remember never to look directly into the laser as it’s working. Keeping an eye on any actively working machine is always a good idea, but protective eyewear is a must as well as avoiding staring directly at the laser for long periods of time.

Never Leave Alone
A laser cutter or laser engraver should never be left unattended. Fire hazards and electrical faults are a constant danger with any high-voltage machinery, so, despite the engraving process being automated, at least one person should be present throughout.
This is to ensure any problems can be detected and dealt with immediately, reducing the risk of fires and other dangers like electrical burning or poor ventilation.
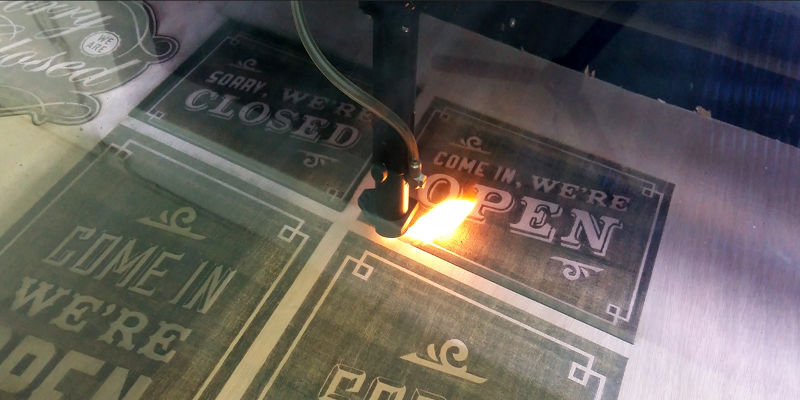
These risks can be further reduced by keeping the workstation as free from dust and debris as possible.
Extra Advice
Installing and setting up a laser engraver is all well and good, but you’ll need to know what settings to use and precautions to take to make sure you get the best possible results every time while minimizing potential risks.
Always Double-Check Wattage
Double-checking the power output settings is important to getting good results from your Ender 3 laser engraver. Materials of various thicknesses and strengths will require different wattage levels, so make sure you know which options you should use and double-check them before beginning.
Don’t Overestimate Your Hardware
Laser engravers cannot necessarily act as laser cutters. Attempting to use a higher wattage to repurpose your engraver as a cutter can ruin projects and even cause fires if the settings aren’t applicable to the materials and purpose.

It’s also important to check the limitations of your engraver. The official Creality laser engraver, for example, is not the most powerful machine available, and so shouldn’t be used on stronger metals like titanium or steel.
Run Tests
Before engraving a piece of furniture or signing your name onto your favorite bookmark, run a few tests using your new equipment to ensure the image sizes and orientations are engraved exactly the way you want.
Make sure you have a good feel for your laser engraver and are confident in what it can do and how before turning your attention to important or fragile projects.
FAQ
Can you put a laser engraver on an Ender 3?
Yes, you can put a laser engraver on an Ender 3. The official Ender upgrade is easy to install and produces excellent results for the price.
What can you cut with the Ender 3 laser engraver?
The materials you can cut with an Ender 3 laser engraver depends on the power level of the laser module you buy. With a 0.5W or 4W Creality laser, you’re mostly restricted to engraving, and even if you are able to cut very thin softwoods, cardboard, or leather, it will require multiple passes and take a long time. With Creality’s 10W Ender 3 laser, you’ll be able to cut most thin woods and acrylic sheets.
What software should you use with the Ender 3 laser engraver?
Creality Workshop is an easy software to use with the Ender 3 laser engraver, but you can also use most other third-party softwares like Cura, Repetier, and Slic3r. You should choose software like Inkscape and Adobe Illustrator for the most laser engraving functionality, although they won’t feel as intuitive if you’re used to 3D printing-focused software.
Can you add a laser engraver to the Ender 3 S1 Pro?
Yes, you can add a laser engraver to the Ender 3 S1 Pro if you purchase a compatible laser module. Creality’s basic laser engraver kit is not compatible with any S1 models, but they offer a separate option designed specifically for Ender 3 S1 3D printers. You can also purchase from a third-party company like Endurance, whose laser modules are compatible with most mainstream 3D printers.
Can you add a laser engraver to the Ender 3 V2 Neo?
Yes, you can add a laser engraver to the Ender 3 V2 Neo. Most Creality laser modules will work with the V2 Neo’s design, as will certain laser modules from third-party companies. For example, Endurance makes modules that are widely compatible with hundreds of printers.
Other articles you may be interested in:
- Creality Ender 3 vs Ender 5 Compared
- Ender 3 vs Pro vs V2 Compared
- Ender 3 Upgrades & Mods
- Ender 3 dual extruder upgrades
- Best 3D Printer Controller Boards
- The Best Direct Drive Extruders for Ender 3

