

Key Takeaways
- Ender 3 Extenders: Kits that increase the Ender 3’s build volume by expanding the frame and other parts.
- Ender Extender: The only reputable company that sells Ender 3 extender kits, with various sizes and prices to choose from.
- Installation Process: A challenging and involved DIY project that requires disassembling and reassembling the printer, as well as updating the firmware.
- Benefits and Applications: Extending the Ender 3 allows you to print larger and more complex models, such as cosplay props, vases, or storage solutions.
While an impressive machine overall, the Ender 3’s build volume is decidedly average.
But you don’t have to let the restrictive printable area rule out your larger, bolder projects.
There are plenty of Ender 3 extender upgrades available to spruce up Creality’s budget king.
For most users, I’d recommend the Ender Extender 400 kit. It offers a significant increase in build volume and can handle many larger projects, for a reasonable price compared to other kits on the market.
However, it’s essential to consider your specific requirements before making a final decision. This guide covers everything you need to know about the most popular extenders you can buy to supersize your Ender 3’s build volume.
I’ll dive into what exactly an extender is and does, and explain the benefits and applications I’ve discovered over the past few years – and help you find the right extender for you.
The Best Ender 3 Extender Upgrades
Ender Extender 400 Z Height Kit
Best Ender 3 Extension Kits
Given an extender is a relatively niche upgrade and we’re focusing on the Ender 3, there’s only one reputable company that manufactures kits – the Texas-based and suitably-named Ender Extender.
As such, all our recommendations are Ender Extender products. We’ll provide a quick Ender extender review for each kit below.
Ender Extender 400 Z Height Kit
- Price: $69
- Ender 3 Compatibility: Ender 3, Ender 3 V2, Ender 3 Pro
- Build Volume: 220 x 220 x 400 mm

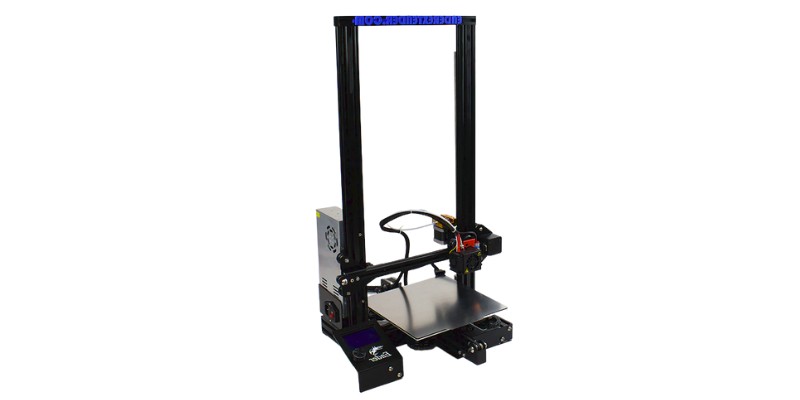
The Ender Extender 400 Z Height Kit is the company’s lowest-priced option. Its core feature is elevating the Ender 3’s Z-axis to a towering 400 mm – almost twice the stock Ender 3’s vertical build volume.
As the Ender Extender 400 Z Height Kit only increases the Z height, installation is easier than other kits as you don’t need to dismantle too much of the printer.
This kit should suit makers looking to print tall parts but are happy with the X and Y volume of the Ender 3. Potential projects suited to this Ender 3 extender include vases, narrow but tall storage solutions, and cosplay weapons.
Ender Extender 500 Z Height Kit
- Price: $79
- Ender 3 Compatibility: Ender 3, Ender 3 V2, Ender 3 Pro, Ender 3 Max
- Build Volume: 220 x 220 x 500 mm
Like the 400 Z, the Ender Extender 500 Z Height Kit pushes the Ender 3’s vertical build volume to a massive 500 mm and comes with the same more straightforward installation process.
It’s also one of a select few Ender Extender kits that’s compatible with the Ender 3 Max as well as all the other Ender 3 models. This Ender 3 extender kit includes dual aluminum frame extrusions, wiring, and a lead screw.
Ender Extender 300
- Price: $159
- Ender 3 Compatibility: Ender 3, Ender 3 V2, Ender 3 Pro
- Build Volume: 300 x 300 x 250 mm

Arguably the most modest kit in terms of build volume extension, the Ender Extender 300 expands the Ender 3’s X and Y-axes to 300 mm from the stock 220 x 220.
Installation proves more involved than the straight Z height kits, but Ender Extender provides an in-depth guide with ample color pictures to guide you.
Note that the kit isn’t compatible with the Ender 3 Max.
The company also highly suggests using a glass plate and/or an ABL probe as the aluminum plate isn’t guaranteed to be true and flat.
Ender Extender 300XL
- Price: $179
- Ender 3 Compatibility: Ender 3, Ender 3 V2, Ender 3 Pro
- Build Volume: 300 x 300 x 400 mm

The Ender Extender 300XL combines the verticality of the 400 Z Height Kit with the wider X/Y axis of the standard 300 kit to balloon the Ender 3’s build volume to 300 x 300 x 400 mm.
It’s one of the more involved and tricky Ender 3 extender kits the company sells, so expect a serious DIY project. Otherwise, the kit includes frame extrusions, belts, wiring, hardware, and a build platform, leaving you only to buy up a suitably sized build surface to complete the build.
Ender Extender 400
- Price: $179-$189
- Ender 3 Compatibility: Ender 3, Ender 3 V2, Ender 3 Pro, Ender 3 Max
- Build Volume: 400 x 400 x 250 mm

Almost identical to the Ender Extender 300, the Ender Extender 400 supersizes the flat build volume to a roomy 400 x 400. The Z-axis remains the same height as the stock Ender 3 build volume in this kit.
Unlike the Ender Extender 300, the 400 kit works with Creality’s Ender 3 Max.
Ender Extender 400XL
- Price: $259
- Ender 3 Compatibility: Ender 3, Ender 3 V2, Ender 3 Pro, Ender 3 Max, Ender 3 S1
- Build Volume: 400 x 400 x 500 mm

Lastly, we have the Ender Extender 400XL, the company’s most ambitious and priciest Ender 3 extender kit.
Once installed, the kit pushes the build volume to a hulking 400 x 400 x 500 mm – more than enough room for amateur hobby projects of all shapes and sizes.
Installation is appropriately involved and complex, but the kit provides everything you need other than a build surface.
It’s compatible with the Ender 3 Max as well as the original Ender 3 trio of printers.
What About an Ender 3 S1 Extender?
Due to the Ender 3 S1 being the newest entry in Creality’s budget series, we’ve yet to see any manufactured entender kits hit the market quite yet.
Ender Extender has already announced an Ender Extender 400XL for the S1 with pre-sales well underway for $329 instead of the eventual full retail price of $379.
The company says it plans to start shipping pre-orders from Summer 2022 onward, though a two-week lead time for its existing lineup of Ender extender kits suggests it may be some time before the S1 version is widely available.
As for Ender Extender’s other kits, nothing has been mentioned as of writing, but we imagine they’ll be available in due course.
What You Should Know About Ender 3 Extension Kits
Unlike the more obscure name of some 3D printer parts and upgrades, the definition of an extender is very literal – it extends the Ender 3’s build volume by expanding the frame along the X and Y-axes and, in some cases, the Z-axis.
In other words, an Ender 3 size upgrade.
To illustrate this, we can look at the raw numbers. One extender we recommend expands the Ender 3’s stock 220 x 220 x 250 mm build volume to a massive 400 mm x 400 mm x 500mm.
There are also more modestly-sized options – such as 300 mm x 300mm x 400 mm – paving the way to the biggest kit to suit various needs.
Turning briefly towards specifics, any Ender 3 extension kit consists of frame extrusions, wiring, hardware, lead screw, belts, 3D printed mounts, extended Bowden tubing, and a build platform – everything you need to mod the printer.
Ender 3 extender kits reuse many of the stock Ender 3 parts to complete the project but require the purchase of a new manufactured 3D printer build surface or a cut-to-size piece of glass.
Head here for a selection of surfaces confirmed to fit with various kits.
Nothing short of a major DIY modification, installing an Ender 3 extender is a serious undertaking that involves hardware changes and reconfiguring firmware to accommodate the much larger build volume.
Advantages of an Ender 3 Extender
Size
It dramatically expands your build volume.
An Ender 3 extender allows you to create far larger prints, removing the need to print multiple separate parts and join them using epoxy or adhesive.
One for those partial to 100-hour + prints, such as a challenging cosplay costume part/accessory, or a life-sized Master Chief helmet.
Cost
Compared to buying a new large-format printer with a similar build volume, an Ender 3 expansion kit costs considerably less.
A Creality CR-10 Max costs just shy of $1000, and a Modix BIG-60 V3 is priced at over $4,500. Prices run from $69 for the smallest kit all the way to $259 for the largest.
There’s a decent argument for simply buying a printer like a CR-10S V2 or Ender 5 Plus if you aren’t pushing for the largest build volume, especially if you aren’t up for the heavy DIY aspects of the upgrade.
But, the cost of a $189 Ender 3 plus $159 for a medium-sized Ender 3 extender kit still works out cheaper than either of those Creality alternatives.
Fun DIY Project
It’s a subjective point, but for those who enjoy modding their Ender 3s, the extender upgrade is among the most challenging and impactful.
It’s an enjoyable and involved project for tinkerers who like a challenge.
Strong Community
Though niche, the Ender 3 extender upgrade has fostered a small but vibrant community happy to share their insight and personal twists on the mod.
It’s also a great source of help troubleshooting any potential issues, which given the DIY nature of the project are part and parcel of the experience for many.
Projects You Can Print By By Upgrading Ender 3 Bed Size
- Cosplay costumes and props
- Masks – Check out these Star Wars Trooper helmets and this Mandolorian helmet
- Armor – Here’s a great example of what’s possible
- Large vases and other large-format household items
- Large figurines and models
- And, virtually any other large-format FDM printer projects you can think of
How To Install an Ender 3 Extender?
Though this page is by no means a step-by-step guide but rather an overview of your options, we’ll quickly run through the installation steps required for those curious about how a kit merges with the stock Ender 3.
- Dissemble the Ender 3 – the extent of this depends on the kit, but involves removing the LCD displays, print bed, filament holder, motors, lead screw, etc., then dismantling the frame.
- Assemble the new frame, build platform carriages and install new parts such as mounts, belts, brackets, and wiring.
- Reassemble the Ender 3 around the new frame and parts.
- Configure firmware to accommodate to larger build volume.
- Test, tweak, and fine tune.
- Print.
As above, this is a very brief, cursory outline. Refer to the detailed Ender Extender guide here for a more in-depth step-by-step guide with supporting images.
FAQs
Can I make my Ender 3 bigger?
You can extend the Ender 3’s build volume thanks to an extender.
These generally come in kits that include all the necessary parts and instructions to complete the modifications except for a new appropriately-sized build surface.
Prices range from $69.00 to $259.00 depending on the size of the build volume upgrade.
How do I extend my 3D printer?
To extend your 3D printer, you’ll need an extender kit, or alternatively, if you’re experienced with metallurgy and electronics, DIY craft your own.
The basic idea is to create a larger frame around which the rest of the printer is modded to fit. Aside from the hardware, you’ll also need to key in new firmware settings to cater to the expanded build volume.
How do you make Ender 3 pro taller?
To make the Ender 3 Pro taller, your best bet is to purchase an Ender 3 Pro extension kit, in particular one that extends the Z-axis height.
Ender Extender, a US-based company, offers Ender 3 Pro-specific kits starting at $69.00 to convert the Z height to 400 mm. For those looking to push the envelope, the $79.00 Ender Extender 500 Z height kit extends the vertical build volume to 500 mm.
Articles we recommend:
- Ender 3 vs Ender 5
- Ender 3 vs Ender 3 Pro, V2 and Max
- The best Ender 3 Upgrades
- Ender 5 vs Ender 5 Pro vs Ender 5 Plus
- Ender 3 firmware guide
- Best Ender 3 filaments
- Ender 3 direct drive upgrades
- My Top Picks for Ender 5 Pro Upgrades
- The Best Ender 5 Plus Upgrades


