Celebrating the company’s seven years manufacturing some of the best low cost 3D printers around, Creality unveiled the latest iteration of their CR-10 range, the CR-10 Smart.
Said to be their most intelligent and technologically advanced 3D printer, and their “fashionable flagship high-end model” according to their site, we were ecstatic when Creality offered to send us one of their newly-released CR-10 3D printers to try out and review.
Creality CR-10 Smart Main Specs
- Creality CR-10 Smart price: $499 — Available on Creality Official Store here
- Creality CR-10 build volume: 300 x 300 x 400 mm
- How long does it take to build the CR-10 Smart: under 15 minutes
- Max nozzle temperature: 260C
We’ve had great fun testing out the Creality CR-10 Smart over the last few days, and here are our findings:
Building the Creality CR-10 Smart
Creality have clearly put a lot of effort into making their 3D printers as accessible as possible to even those with minimal DIY or making experience. The 3D printer came mostly assembled, with the major parts fitted into the polystyrene within the box it arrived in.
From there, the main step is simply putting four screws in — two on each side of the printer — to attach the frame (and extruder) to the build plate. This is easy to do on your own; all you have to do is place the 3D printer on its side and use the tools that come with the Creality CR-10 Smart (they’re in a pull-out draw on the front of the 3D printer to the left of the SD card slot) to tightly twist in each screw.
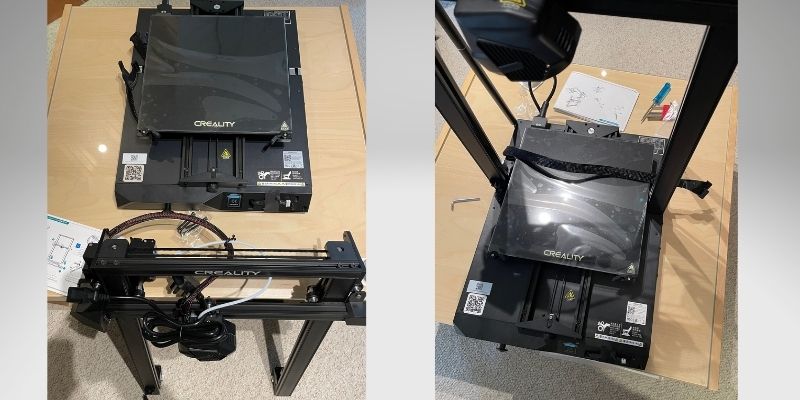
Every other part of the assembly is just as much of a breeze as this first major step. The two z-axis beams need to be screwed in so they lie diagonally behind the 3D printer’s frame, providing additional support and stability — a fairly new addition to the CR-10 range that wasn’t present on the original CR-10. This is easy to do, and helps provide accurate and precise printing that’s far less affected by vibrations and other factors.
From there, the only somewhat challenging part is the filament spool holder, which involves sliding in a couple of nuts and twisting them so they remain in place. A 3D printer we tested recently, the Anycubic Vyper, has an easier clip-on method for the spool holder which is quicker (literally a couple of seconds), but the CR-10 Smart’s filament holder is still simple to attach.
The entire assembly process took under 15 minutes, and then it was time to turn it on, start the auto leveling process (which took around 5 minutes), and start loading 3D printer files to the SD card (an 8GB card comes with the 3D printer, also featuring instructions and troubleshooting solutions if you have any issues).
Testing and reviewing the CR-10 Smart
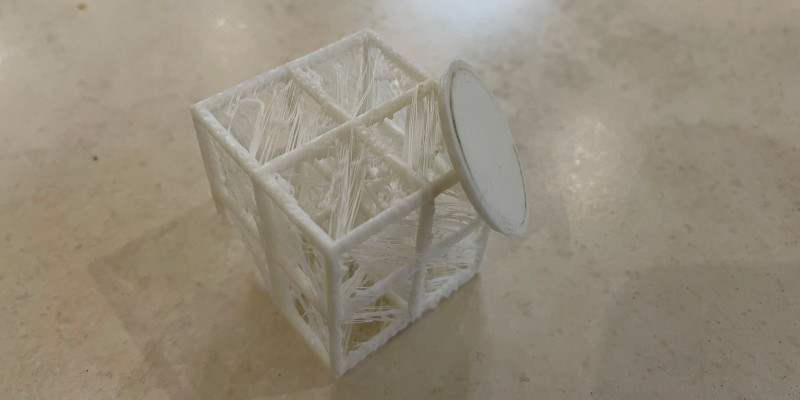
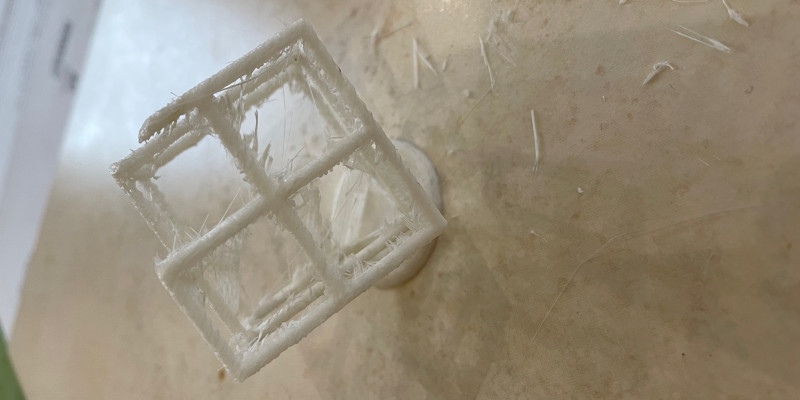
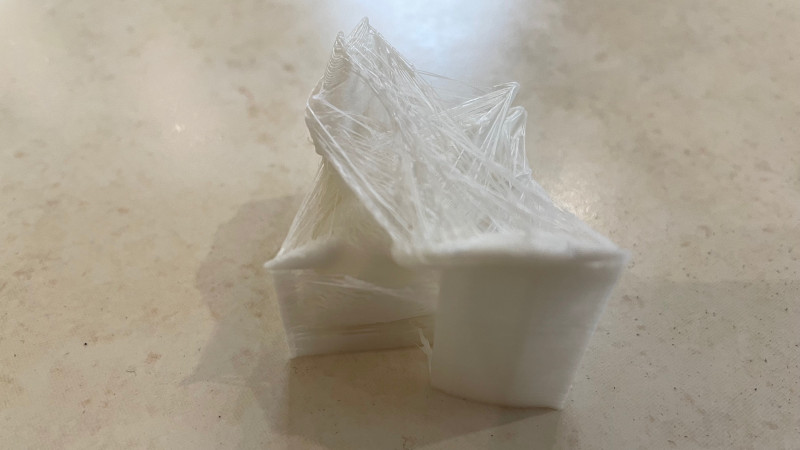
One of the first tests we always do when reviewing 3D printers is a torture test. These aptly named prints are designed to push a 3D printer’s capabilities to their limit, either by not using supports on a print with mild overhangs to test quality and precision, a print with a number of intricate and awkwardly placed geometries, and many others.
Instead of a 3DBenchy, we opted for a lattice cube torture test featuring 45 degree angled thin sides that are notoriously hard to print.
We used standard white PLA filament to print our models. The resulting print was fairly good — especially seeing as we hadn’t optimized the print settings enough, so the print came out with stringing. The CR-10 Smart managed to keep the intricate diagonal cube shape well, and if we had set the print temperature lower (we started at 220C, higher than the 200C we settled on) it would have looked better and had less stringing.
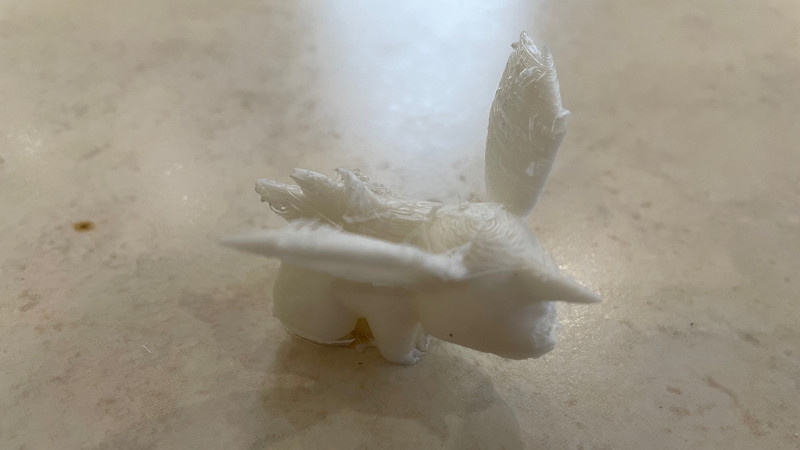
We then printed a popular video game character to see how it would print miniature figurine-type prints. We opted for the Nidoran-M from the 1st generation of Pokemon, and printed it fairly small to see how it handled the precise details of the ears, spikes, and tail.
We were again impressed with the precision, especially on the details on top of the Nidoran. The Creality CR-10 Smart could handle the intricacies expected in printing miniature character models, and again if we had better optimized the print settings the model would have been better quality without the stringing.
It is worth noting that though the Creality CR-10 Smart has WiFi printing functionality and remote printing via the Creality app, we used the traditional SD card export route.
We will continue to update this article as we further test the Creality CR-10 Smart.
Creality CR-10 Advantages / Pros
Large build volume
When the first and original Creality CR-10 released, one of the major factors behind its instant popularity was the fantastic build volume for such as cheap 3D printer (the original retailed for around $379 a few years back). Several iterations later, the CR-10 Smart still maintains this stellar print volume, but with a host of improvements — Creality call the CR-10 Smart their most technologically advanced 3D printer.
WiFi connectable
You can also print remotely using the Creality Cloud app. This is far easier than repeatedly plugging an SD card into your laptop or PC, loading the sliced STL file from Cura or Creality’s 3D slicer, and then plugging the SD card back into your 3D printer.
Some computers have forgone the SD card slot entirely, meaning you have to buy an SD card to USB adapter or a microSD to SD adapter, making the WiFi option particularly attractive.
Sturdy build and reliable
The z-axis diagonal beams effectively anchor the Creality CR-10 Smart and prevent extraneous vibrations or any other factors from affecting your print. The resulting lack of z-wobble improves your print’s surface finish on even the most intricate models.
Really quick to assemble
We comfortably built and had the CR-10 Smart ready to print in under 15 minutes, including the slow auto leveling process.
Great adhesion from the carborundum glass bed
The platform surface makes for great adhesion and easy printing, and also makes prints easy to remove. The printer also comes with a scraper for easy print removal once it has cooled down for a few minutes.
Creality CR-10 Smart Cons
Instructions could have been clearer in one area
One step in the building process involves you attaching the filament spool holder to the side of the CR-10 Smart. The instructions only give a fairly basic guide of how to do that, as there are screws in the filament holder that do not have an immediately obvious place to fit, nor are there any obvious places on the side of the 3D printer that you’d know to attach it to.
It’s actually more nuanced than the instructions tell: you need to turn the movable end of the filament spool holder so that the nuts slide into the side of the printer’s side frame, before then twisting it so that the nuts — which are too tall to fit in except when positioned sideways — slide into the side of the 3D printer.
Makers who have built a few machines before or have a decent level of DIY experience will intuitively understand this, but this frustrate and confuse breginners.
Somewhat slow calibration
The CR-10 Smart calibrates before every print, touching up and down on 16 points on the print bed.
While this is great for ensuring precision for every print, this can take more than 5 minutes, and if you’re using the printer for a lot of fairly quick prints, these few minutes can add up and put a small dent in your productivity.
Differences between other CR-10 models and the CR-10 Smart
Firstly, the new Creality CR-10 Smart now has diagonal z-axis beams for added stability. The most recent CR-10 V3 also had these diagonal beams, but the original CR-10 did not.
Older CR-10 models also did not have a touchscreen, instead using a twisting knob to choose between different control options such as printing, leveling and adjusting extruder and bed temperature. Now, featuring a 4.3-inch touchscreen, this process is much more streamlined and overall more pleasan — as is also used on the CR-6.
Creality CR-10 Smart Full Specs
Build volume: 300 x 300 x 400 mm
Price: $499 — Available on Creality Store here
Weight: 14kg
Slicer: Creality Slicer, or Cura
Precision: 0.1mm
Layer heights: from 0.1mm to 0.4mm
Nozzle diameter: 0.4mm (comes with one nozzle fitted and two spares)
Nozzle temperature: up to 260C
Heated bed: reaches up to 100C
Heated platform: made from carborundum glass
Compatible filaments: PLA, ABS, TPU, PETG
Connectivity: Prints via SD card or WiFi
Enclosure: Optional enclosure add-on for $85 (on sale, originally $109)
App connectivity: Can print via the Creality Cloud app where you scan your printer’s QR code, register and can then wirelessly print files others have made and uploaded to the app. Creality have built an interactive community on the app where you can share your proudest designs with fellow 3D printer owners.
Extruder type: bowden extruder
OS: Windows 7+, Mac OS X 10.7+, Linux Ubuntu 12.04+
Type: FDM 3D printer, 3D printer kit
Filament size: 1.75mm
Single or dual extruder: single
WiFi: Built in wifi function
32-bit mute board and mute fan for quieter printing (find dB?)
Intelligent auto leveling
Screen protection and auto shutdown
Frame: Strong metal aluminum frame fortified by the diagonal draw bars for better stability from the strong triangular support.
Automatic turn off feature: Automatic sleep after 30 mins, making the CR-10 Smart safer and saving energy
Touchscreen: 4-3inch full touch screen
Other articles you may be interested in:
- Creality Ender 3 V2 Neo review
- Creality Halot One Plus printer review
- Creality Sermoon V1 3D printer review
- Ender 3 vs Prusa Mini
- CR-10 upgrades