
Chocolate is a $50 billion market worldwide, and over half of Americans say that chocolate is their absolute favorite flavor. With the demand for more exciting designs and ways of presenting chocolate ever increasing, more and more people are searching for the best chocolate 3D printers to create their own luxury treats.
Quick Overview
| Model | Speed | Max Print Volume (mm) | Price | Where to buy for the best price |
|---|---|---|---|---|
| Cocoa Press 3D Printer | Each chocolate takes between 5 minutes and 2 hours, depending on the size and complexity | 140 x 150 x 150mm | starts at $1,499; Pro Version starts at $3,995 | — |
| mycuisini 2.0 Choco Printer | 5 – 50 mm/s | 105 x 80 x 50 mm | Basic-$535; Starter-647; Comfort-$699; Premium-$805 | — |
| ZMorph Fab – 5-in-1 3D Printer | 235 x 250 x 165mm | 40mm/s | $4,700 | — |
| FoodBot S2 | 15-70 mm/s | 150 x 150 x 73 | $2,100 | 3DPrintersOnlineStore here |
| WiiBoox Sweetin | 15-70 mm/s | 90 x 90 x 70 | $1,599 | Amazon here |
| Zmorph VX | 120 mm/s | 235 x 250 x 165 | $4,299 | Amazon here |
| Mmuse Touchscreen Chocolate 3D printer | 30-60 mm/s | 160 x 120 x 150 | $5,700 | 3DPrintersOnlineStore here |
The Best Chocolate 3D Printers – Reviews
1. Cocoa Press 3D Printer – A passion project that changed the way we look at 3D printing chocolate
- Price: starts at $1,499 / Pro Version starts at $3,995
- Build volume: 140 x 150 x 150mm
- Speed: Each chocolate takes between 5 minutes and 2 hours, depending on the size and complexity
- Chocolate materials it can print: Dark, milk, and white chocolate ‘Cocoa Cores’
- Best for: Professional confectioners, bakers, and hobbyists who want to create unique chocolates
The Cocoa Press 3D printer was a long-time passion project for engineer Ellie Weinstein, and would eventually become the talk of the chocolate 3D printing community. The technology uses preset “Cocoa Core”, which makes for a simple way to 3D print professional-grade confectionery. To see how it works, check the video below:
The Cocoa Press comes with two different purchasing options, Kit and Pro. The kit version is a basic starter pack that you will need 3D printing experience to assemble, requiring 3D printing and some soldering of your own parts to get it up and running. If you don’t have a 3D printer, you can instead purchase the necessary parts from Cocoa Press for an additional $200.
Cocoa Press are also planning an upcoming Pro package, which will come pre-assembled and ready to go along with an extended warranty and some included Cocoa Core cartridges, though this version will cost $3,499, more than double the Kit price. It is planned to roll out in early 2024
The company is also working on vegan cartridges for dairy-free dark chocolate, though these are still in early development.
Once assembled, the Cocoa Press prints smoothly and precisely, like with standard FDM printing. This precision and smooth printing allows for some intricate edible designs and truly awe-inspiring dessert treats. And everyone agrees that the company-made chocolate creations are as delicious as they are beautiful.
The Cocoa Press can also be easily and seamlessly paused mid-print so you can add extra sweets like gumdrops and marshmallows anywhere in your creation for some extra oomph in your 3D printed chocolate projects. For more information, you can watch this interview with the CEO.
2. mycuisini 2.0 Choco Printer – A cheap and easy way to 3D print chocolate art
- Price: Basic – $535 / Starter – $647 / Comfort – $699 / Premium – $805
- Build volume: 105 x 80 x 50 mm
- Print speed: 5 – 50 mm/s
- Chocolate materials it can print: mycuisini 3D Choco cartridges only
Back in 2014, a small group of food and engineering enthusiasts got together to collaborate on new ways to combine cuisine and technology. The end result was the mycuisini, and the latest model, the mycuisini 2.0, is an upgrade that’s easy to set up, use, and maintain.
The mycuisini 2.0 is as simple as it gets, and comes with a wide variety of pre-set templates so you can simply insert the cartridge and watch the chocolate print. If you’re more creatively minded or have experience in 3D modeling, you can make your own files and print entirely unique confectionary without any hassle and all of the fun.
The mycuisini Choco 3D printer comes with four different purchasing options; basic, starter, comfort, and premium, with the most expensive package costing only $805. The printer itself is the same with each package, the only difference being what they come with.
The basic package includes everything you’ll need to get started, though it only offers a 6 month membership to the mycuisini Club which offers exclusive access to files, prints, and tutorials to make whatever chocolate prints you like. The other three options come with full membership included.
It also only includes 10 chocolate cartridges which are needed for the printer as it does not support third party chocolate materials.
For a full look at what each version comes with, you can check out the handy table on the muycuisini store here.
The mycuisini 2.0 is designed to be as easy to clean as possible. The round design can be easily washed with a cloth and hot water, and it even has a cleaning mode to make the dishwasher-safe parts safe and simple to detach.
3. ZMorph Fab – 5-in-1 3D Printer Including Thick Paste Extruder For Chocolate [add new content]
- Price: $4,700
- Build volume: 235 x 250 x 165mm
- Print speed: 40mm/s
- Chocolate materials it can print: Dense chocolate pastes such as Nutella, frosting, and cookie dough
The ZMorph Fab is a multipurpose machine that, amongst other functions like CNC milling, can 3D print with single and dual extruder with an impressively wide variety of materials. These materials include moderately thick chocolate materials such as typical sugar frosting and chocolate spreads like Nutella.
The settings for printing chocolate are simple to set up with your thick paste extruder. With the ZMorph Fab’s included software, you simply need to select the Thick Paste option before setting up and printing your edible masterpieces.
Despite not being specifically designed for chocolate 3D printing like the Cocoa Press, the ZMorph Fab’s thick paste settings and hardware helps make chocolate artworks as precise and reliable as any standard PLA or ABS print.
ZMorph’s previous machine, the VX, was still capable of printing thick pastes like chocolate and marzipan, though it was a delicate process that required much trial and error. The company itself didn’t advertise the add-on due to its unreliability. The ZMorph Fab, however, comes improved to make chocolate 3D printing simpler even for newcomers.
It is worth noting, however, that the ZMorph Fab is designed for much more than just confectionary, and so the high price tag is only really worth it if you plan on making use of its many functions. So if you’re looking to exclusively print chocolate and other edible pastes, then you’ll save money by buying a cheaper, more single-focussed machine like the Cocoa Press.
4. FoodBot S2
- Price: Check price at Amazon here
- Max print volume: 150 x 150 x 73 mm
- Chocolate 3D printing speed: 15 – 70 mm/s
- Accuracy: 100 microns

As well as chocolate, the FoodBot S2 can also print biscuit, jam and toffee for a variety of 3D printable food projects. You will immediately notice the marvelous design; the futuristic, sci-fi build and colors will really bring your kitchen into the 22nd century.
It’s designed to be super simple to print with, featuring a 5.2-inch touchscreen and clear UI. It can print between 15mm/s and 70mm/s depending on the intricacy and model detail — print at the lower end if you want more precision for your chocolate prints.
The 100-micron accuracy is more than enough for most small chocolate prints, and you can switch the nozzles out depending on your printing priorities between 0.3 and 1.5 mm sizes. The FoodBot S2 comes with its own 3D slicer software so you don’t need to worry about installing any other software if you’re a beginner.
It’s hygienic — the food filament never actually touches the printer — and easy to clean as you only need to clean the nozzle.
5. WiiBoox Sweetin
- Cost: Check price at Amazon here
- Print volume: 90 x 90 x 70 mm
- Speed: 15 – 70 mm/s
- Accuracy: 100 microns
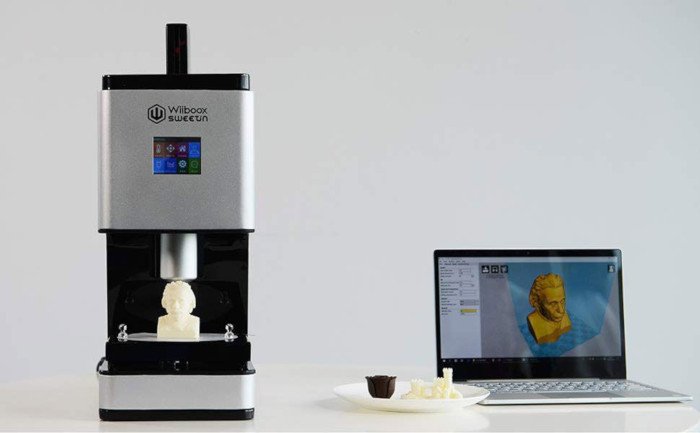
The WiiBoox Sweetinhas 100-micron accuracy, which is fine for all but the most minuscule details. It prints with a 0.6mm nozzle, and comes with its own slicer, though you can use other slicers with it if you prefer.
Some customers online have recommended leaving the chocolate prints to stand for around 10 mins after printing before trying to remove them, giving the chocolate extra time to cool and solidify.
6. Mmuse Touchscreen Chocolate 3D
- Price: $5,700 — Available on 3DPrintersOnlineStore here
- Print volume: 160 x 120 x 150 mm
- Speed: 30 – 60 mm/s
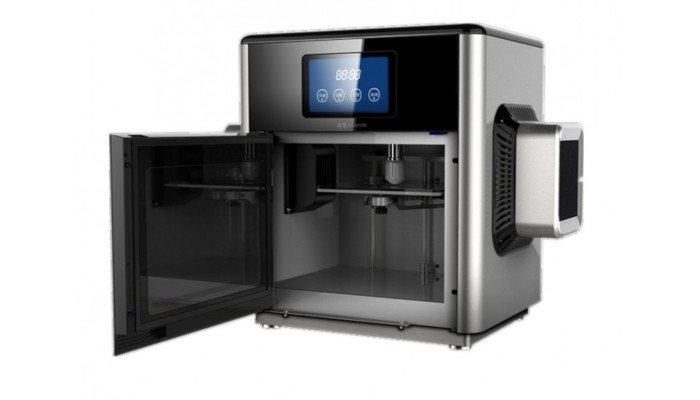
A specialist chocolate 3D printer with a larger maximum print size and slightly higher speeds, the Mmuse is perfect if you’ve got the budget. A premium machine, it is not sold as a 3D printer, but a chocolate-making experience.
It’s designed with simplicity in mind. You can 3D print chocolate models via USB, SD card, or by WiFi. Additionally, the Mmuse chocolate 3D printer’s “intelligent temperature control technology” keeps a very closely regulated temperature to ensure chocolate is extruded at the perfect consistency — neither too liquid that it loses shape, nor too solid that it struggles to extrude properly.
It comes fully assembled and ready to go, no DIY skills necessary. The sleek touchscreen makes getting started super simple, and the 3D printer’s nozzle is designed with hygiene in mind and is very easy to replace. If you’re a professional chocolatier and want to start making beautiful chocolate creations, this best suited for you.
How Chocolate 3D Printing Works
Chocolate 3D printers work very similarly to standard FDM 3D printers, depositing melted chocolate layer-by-layer to create a finished chocolate piece. Just instead of filament, chocolate printers use plastic cartridges filled with chocolate deposited by a syringe.
The chocolate 3D printing process is almost identical to FDM:
- Design or download the 3D STL file model you want to print in chocolate.
- Import the model into a 3D slicer and slice it with your chosen print settings.
- Start printing on your chocolate 3D printer as you would an FDM printer.
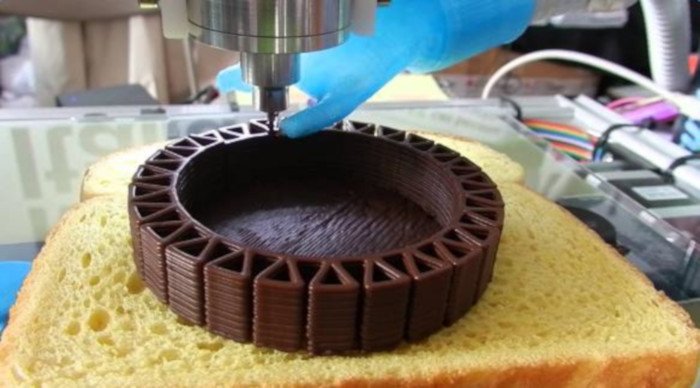
The chocolate is heated to a specific temperature before being deposited through the print head. This exact temperature must be maintained so the chocolate is not so liquid that it loses shape once it has been printed, and not so solid that it can’t form the required shape.
The chocolate cartridges and syringes are designed so there is no contact with the outside world prior to printing. This ensures the printers are hygienic, clean, and printing is efficient.
It is recommended to use models that are quite small, and models without overhangs. If you’re printing a complex, intricate chocolate model, reduce your speed to allow the chocolate more time to dry and harden before the next layer is deposited.

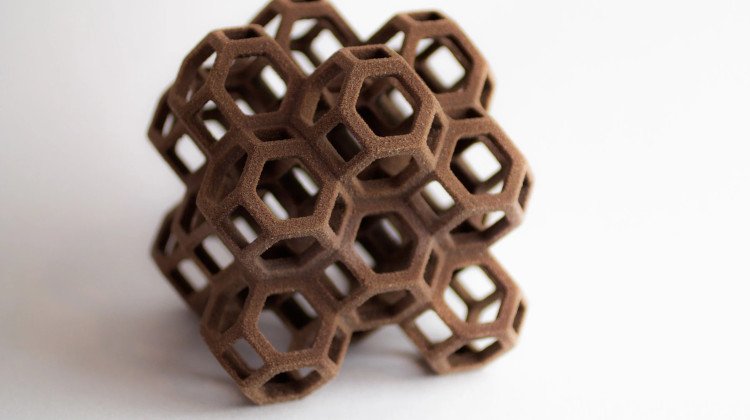
The main difference between 3D printing, and the standard form of producing chocolate using molds, is that with 3D printing you can create more intricate shapes that are not possible using molds. 3D printed chocolate models can have hollow sections, whereas you can’t do this when pouring melted chocolate into a mold.
Advantages and Disadvantages vs Standard Chocolate Production
Benefits
- Very accurate and intricate chocolate shapes and designs.
- Great for business events and other business applications, as well as having fun with your family. For example, you could print a limited run of 6 chocolates with your client’s brands on them, and send them as a thank-you gift. Or, hand out custom chocolates during a pitch.
Limitations
- Slow to print chocolates: they can sometimes take upwards of an hour each to print. It is not scalable, or competitive with factory production using molds.
- Temperature needs to be maintained very carefully or the chocolate loses some of its properties, either becoming too liquid and losing shape, or becoming too hard and creating extruding problems.
- Different types of chocolate have different properties, requiring specific adjustments in print settings to avoid errors.
How Much Does a Chocolate Printer Cost?
The cheapest chocolate printers start at around $500, with most costing around the $1,500 mark. There are also some more premium machines designed for restaurants and other professional uses that cost around $5,000.
The costs depend on the printer size, resolution and quality of print, cost of the chocolate filament materials, how quickly it prints chocolate, and many other factors.
We also have similar articles covering:
- A general ranking of the best food 3D printers.
- Our complete guide to 3D printed meat.


